Follow these eight steps to get your space sketched + measured to a designer’s standard. Take your time with this! Accurate dimensions are vital to your project.

- Tape measure [you may need a second person to help you with long dimensions]
- Paper
- Pencil
- Camera/phone
- Angle finder [if the room contains angled walls]
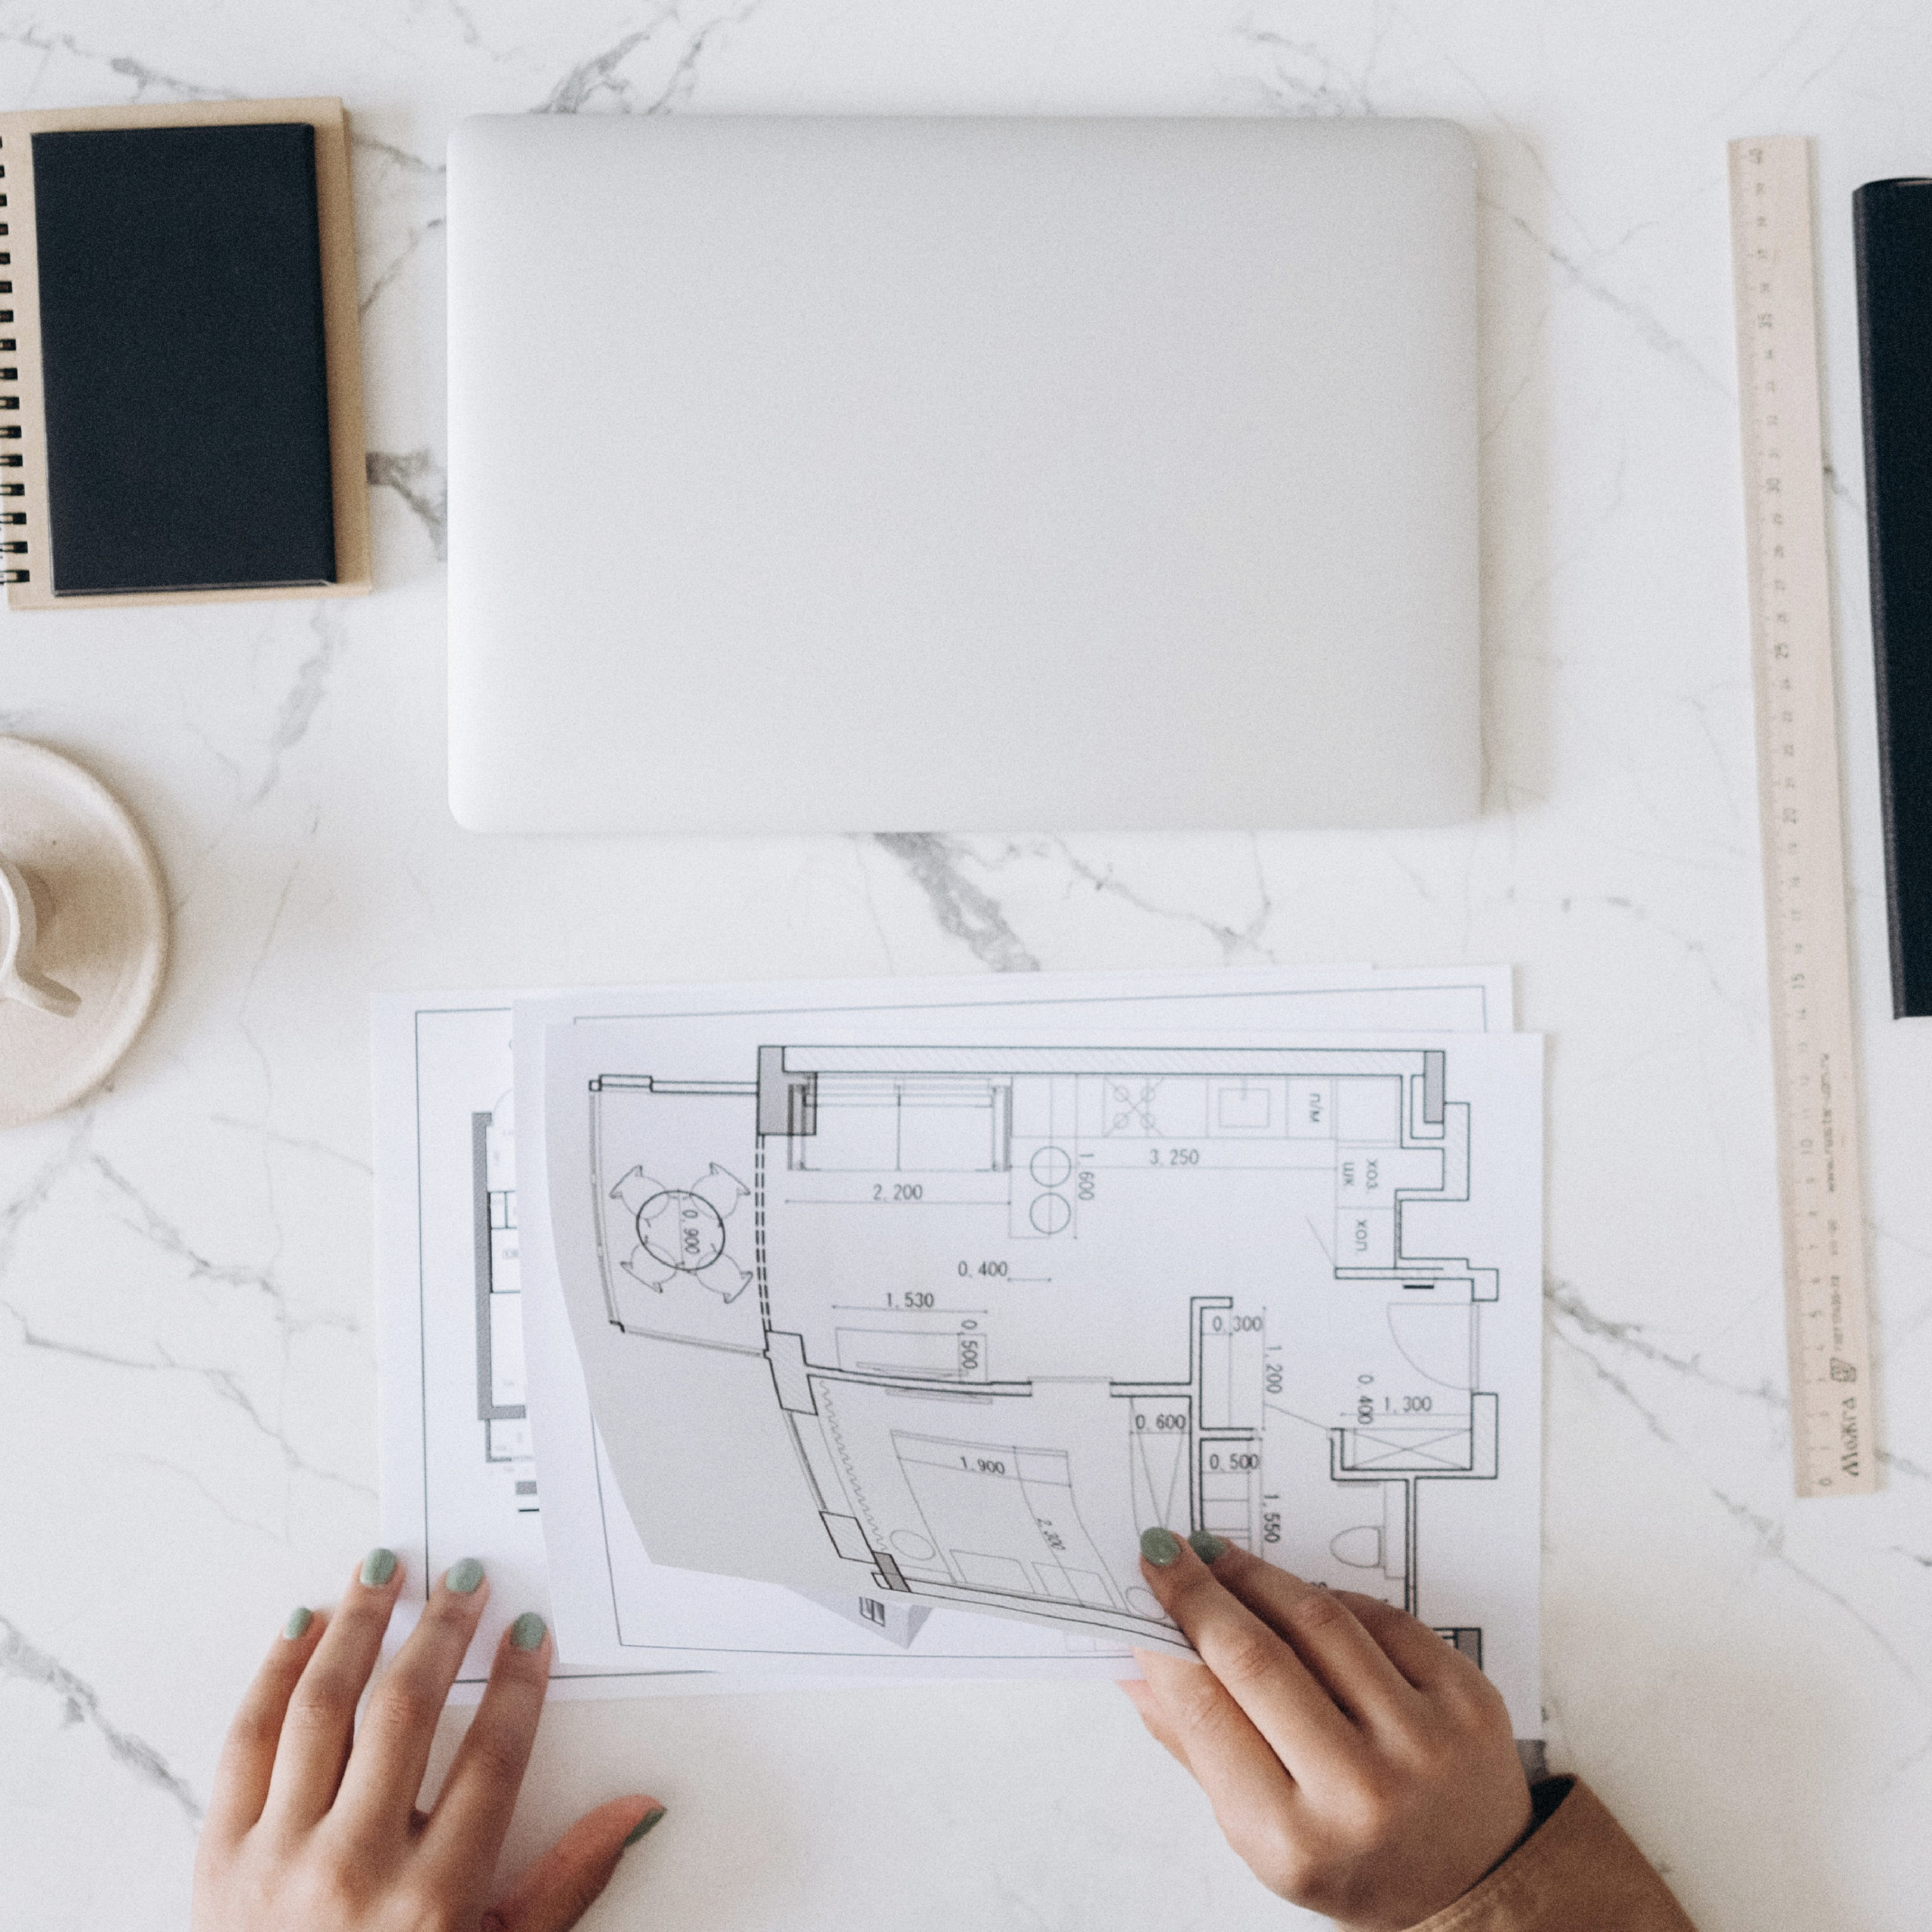

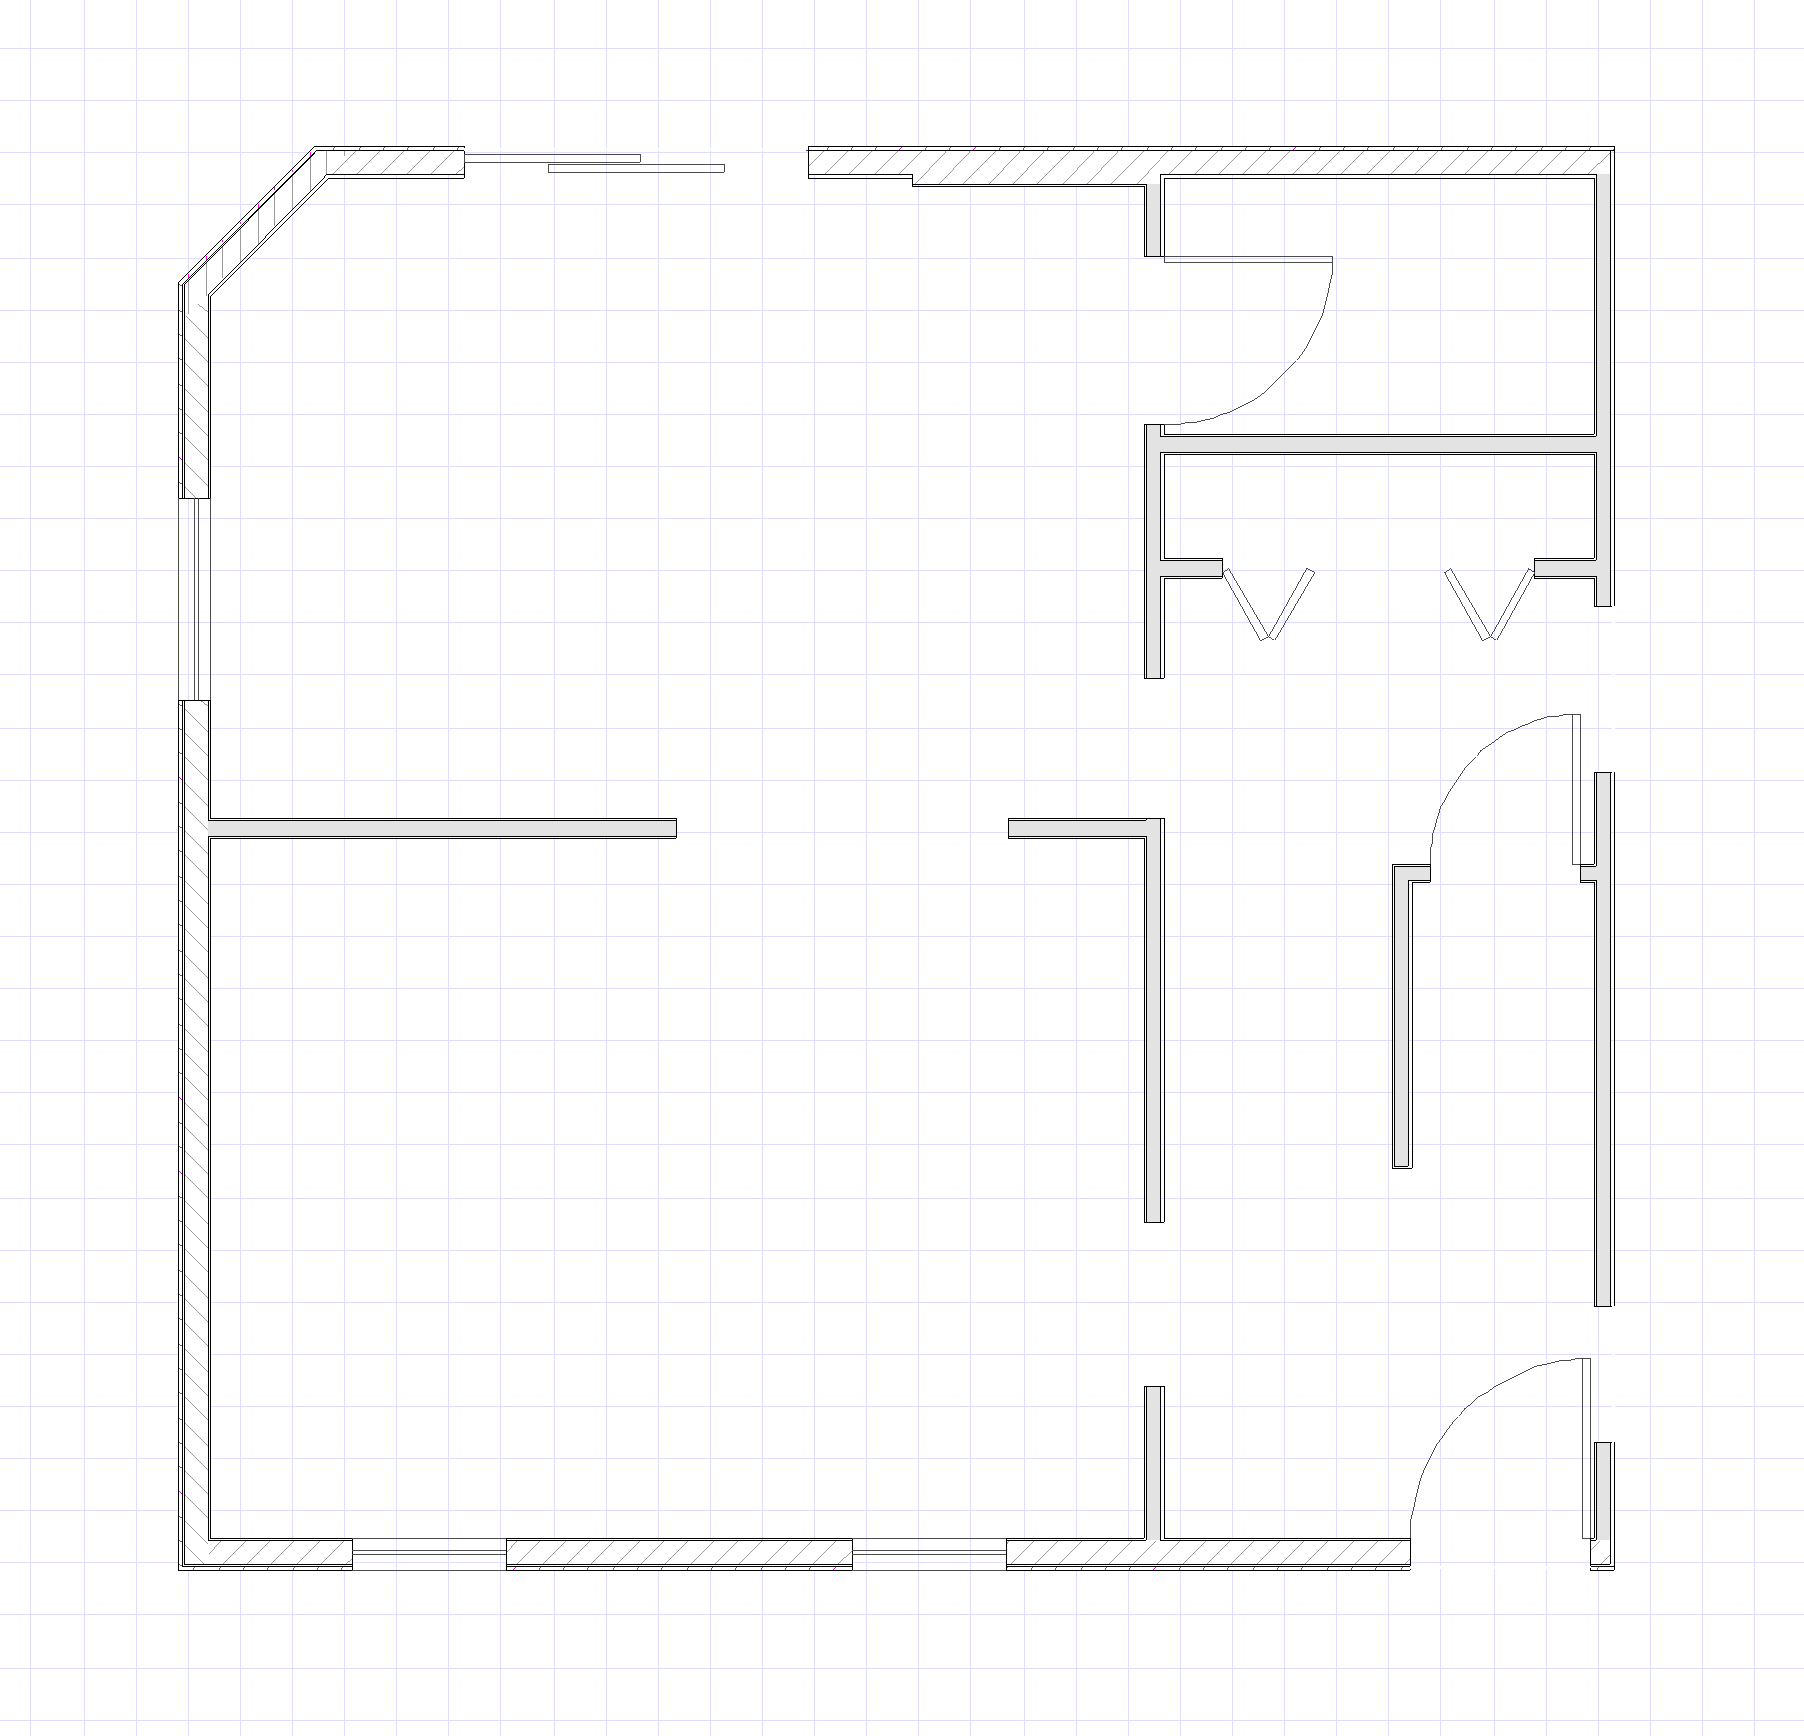
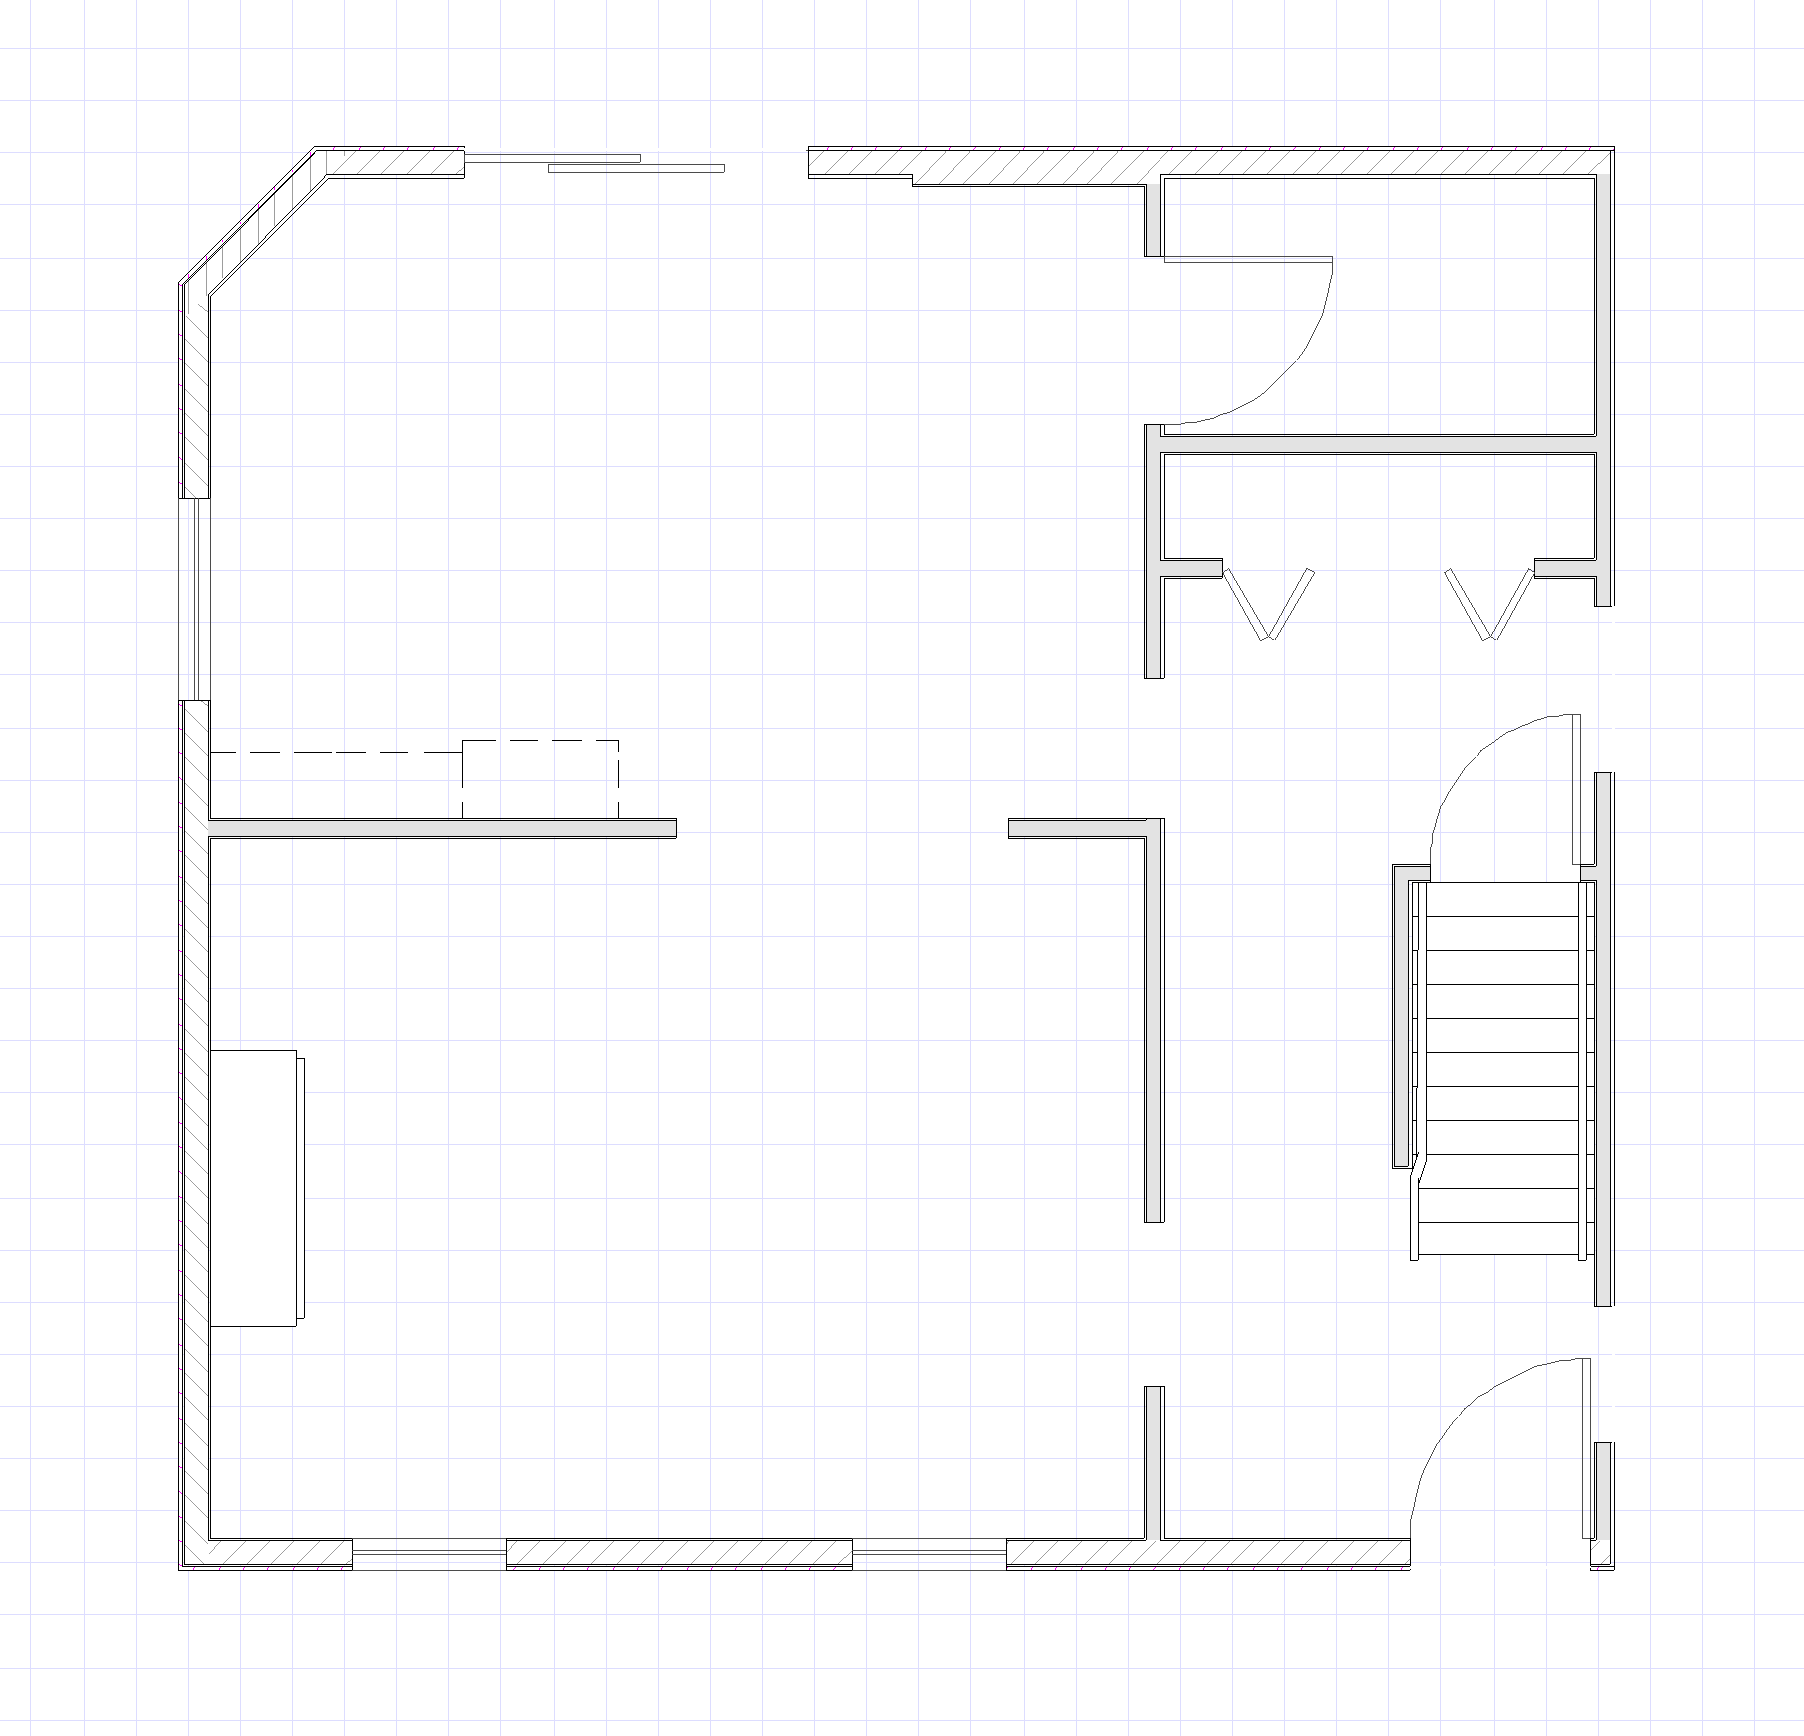
- Sketch the walls of the existing room. Include adjacent rooms for best results.
- Sketch the openings including doors, windows + other openings. Include door swings.
- Identify exterior walls using a diagonal hatch pattern as seen below.

- A permanent fixture is something you’re keeping as-is or updating, but you’re not willing to change the location or general size. A common permanent fixture is a fireplace or set of stairs.
- Most clients are itching to remove soffits + relocate HVAC to accommodate a new design. If this sounds like you, no need to include these in your sketch. If you’re 100% against moving something, sketch it!

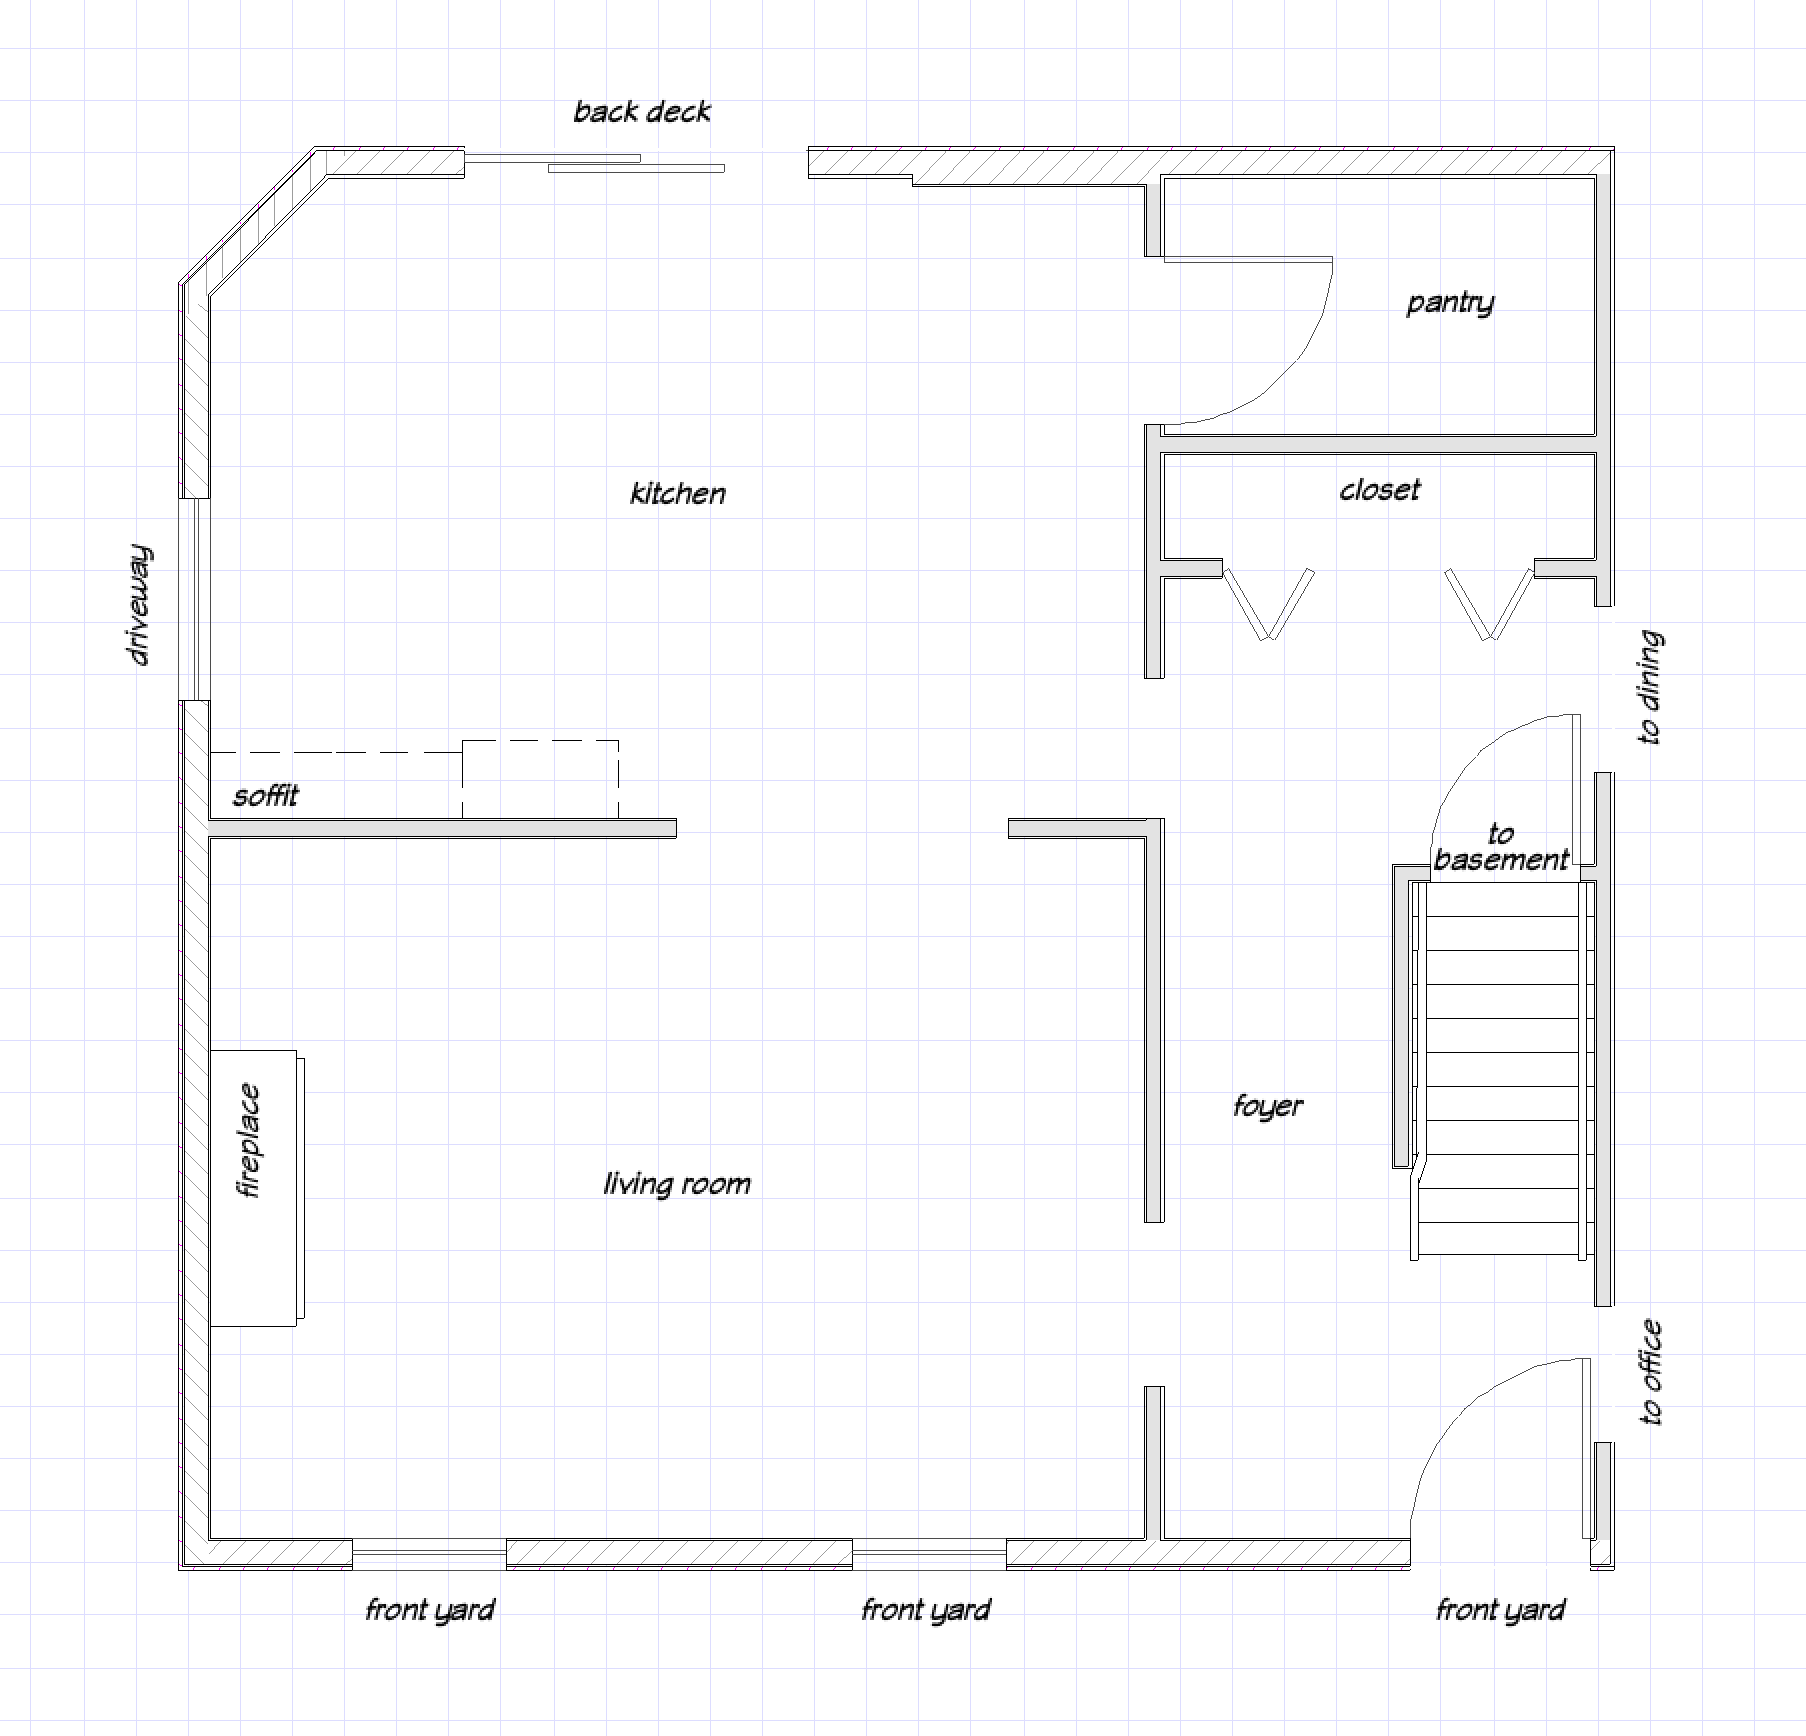
- Label each room + permanent fixture.
- If an opening leads to a room or exterior that is not sketched + labeled, label where this opening leads.

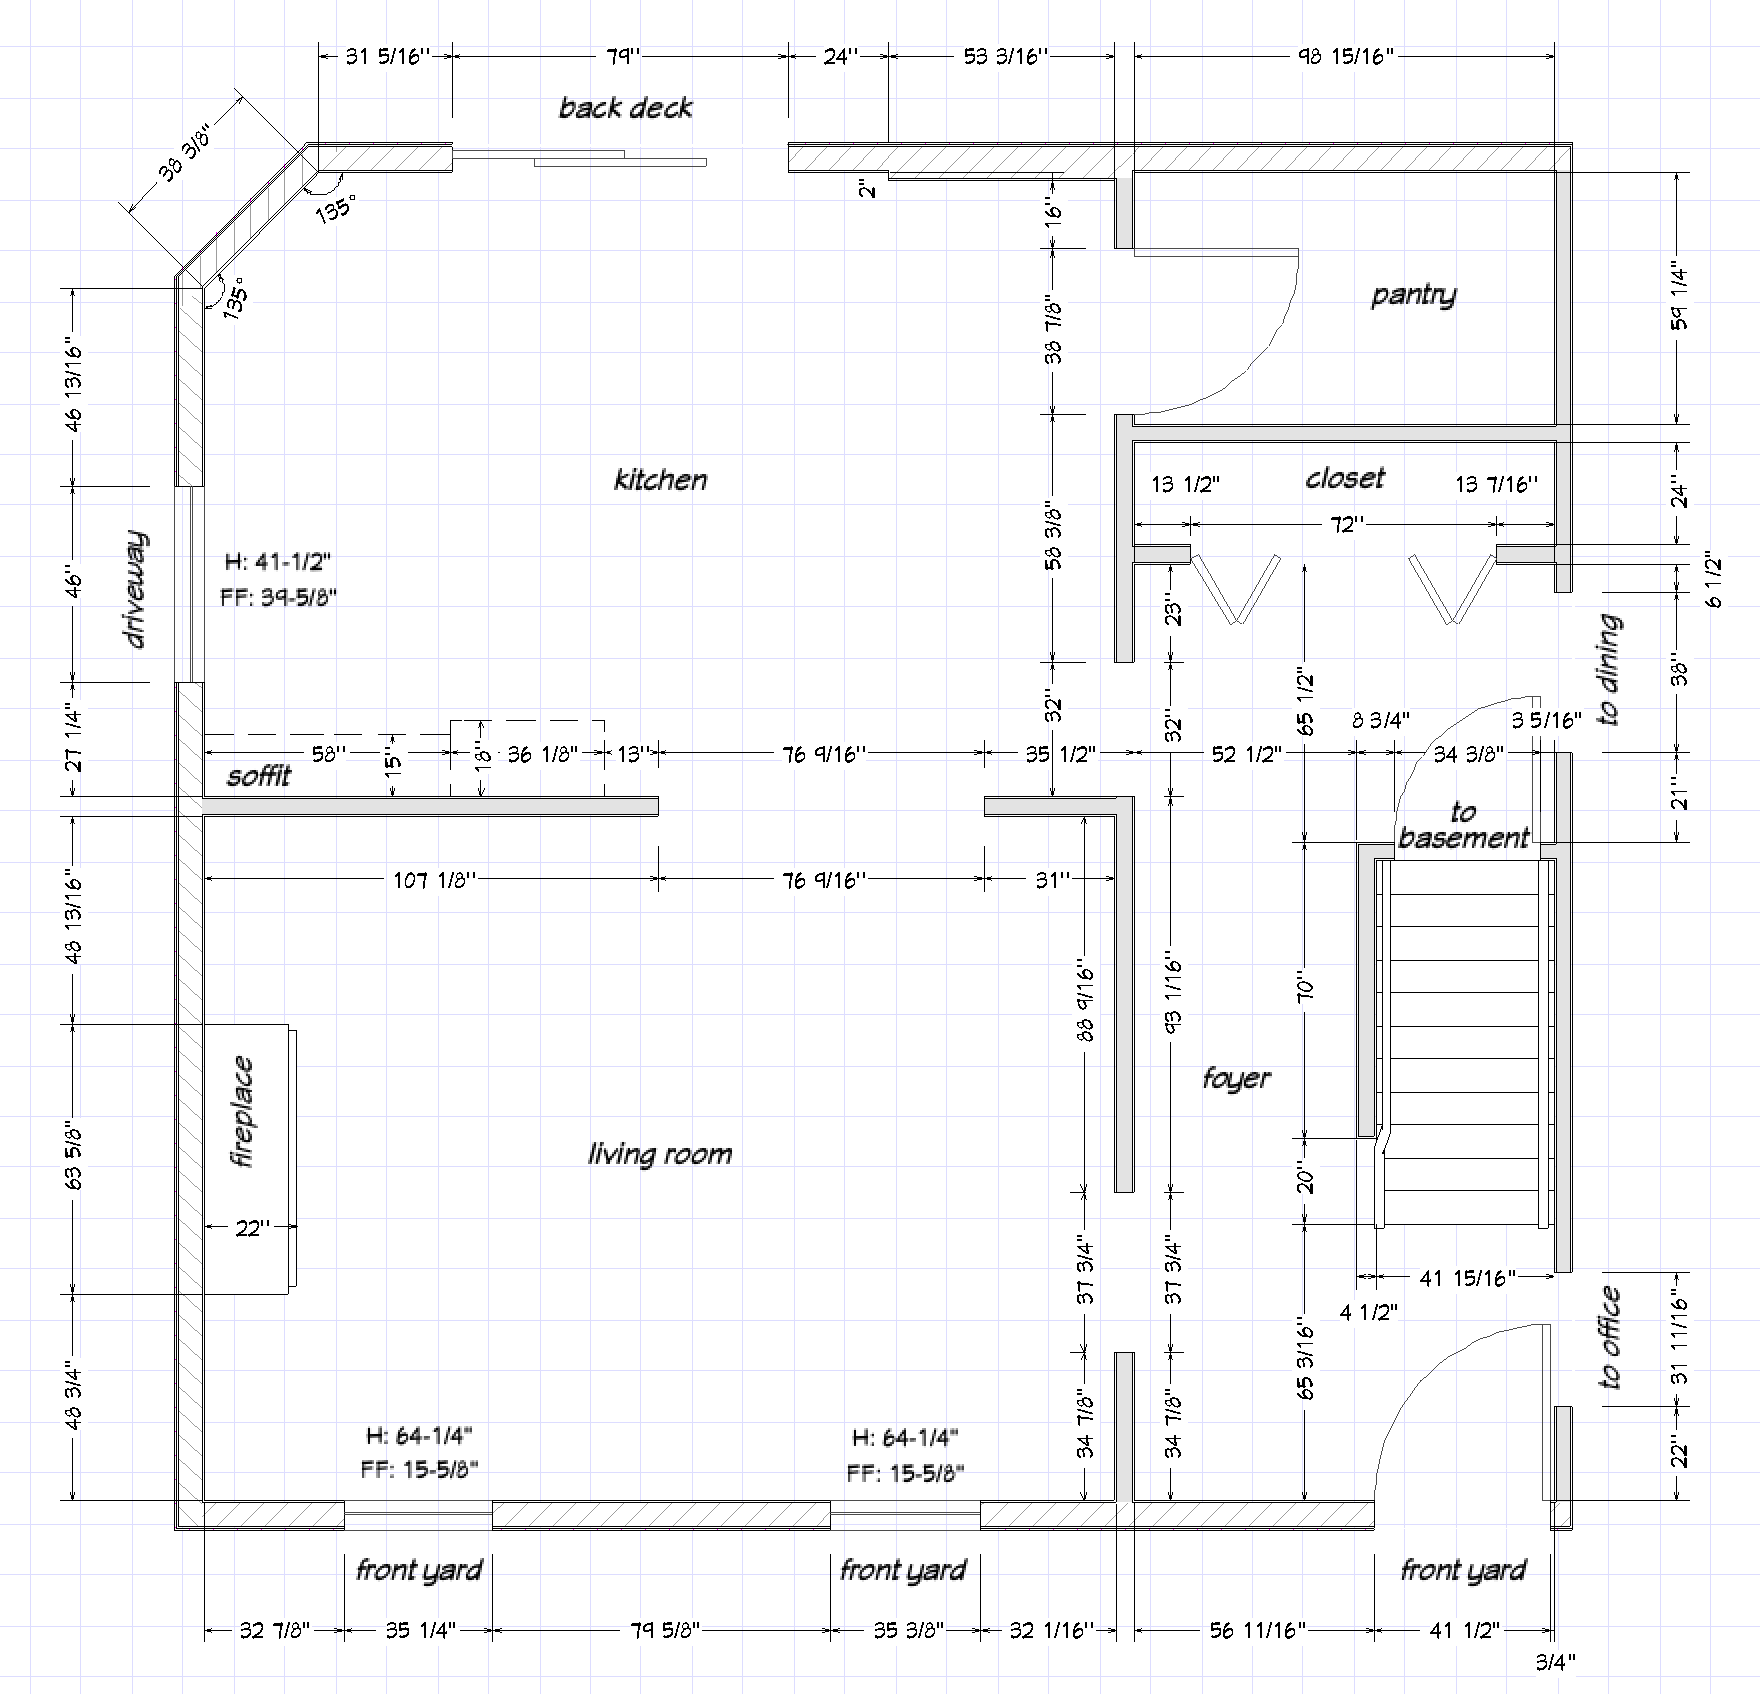
- Before you continue, read my dos + don’ts of measuring below. This is extremely important! Designers require specific measurements using specific techniques.
- Start at a corner. Extend your measuring tape to the next measuring point [another corner, opening, or permanent fixture]. Study the tape carefully + record the dimension clearly on the sketch.
- Repeat this until you’ve dimensioned everything you’ve sketched.

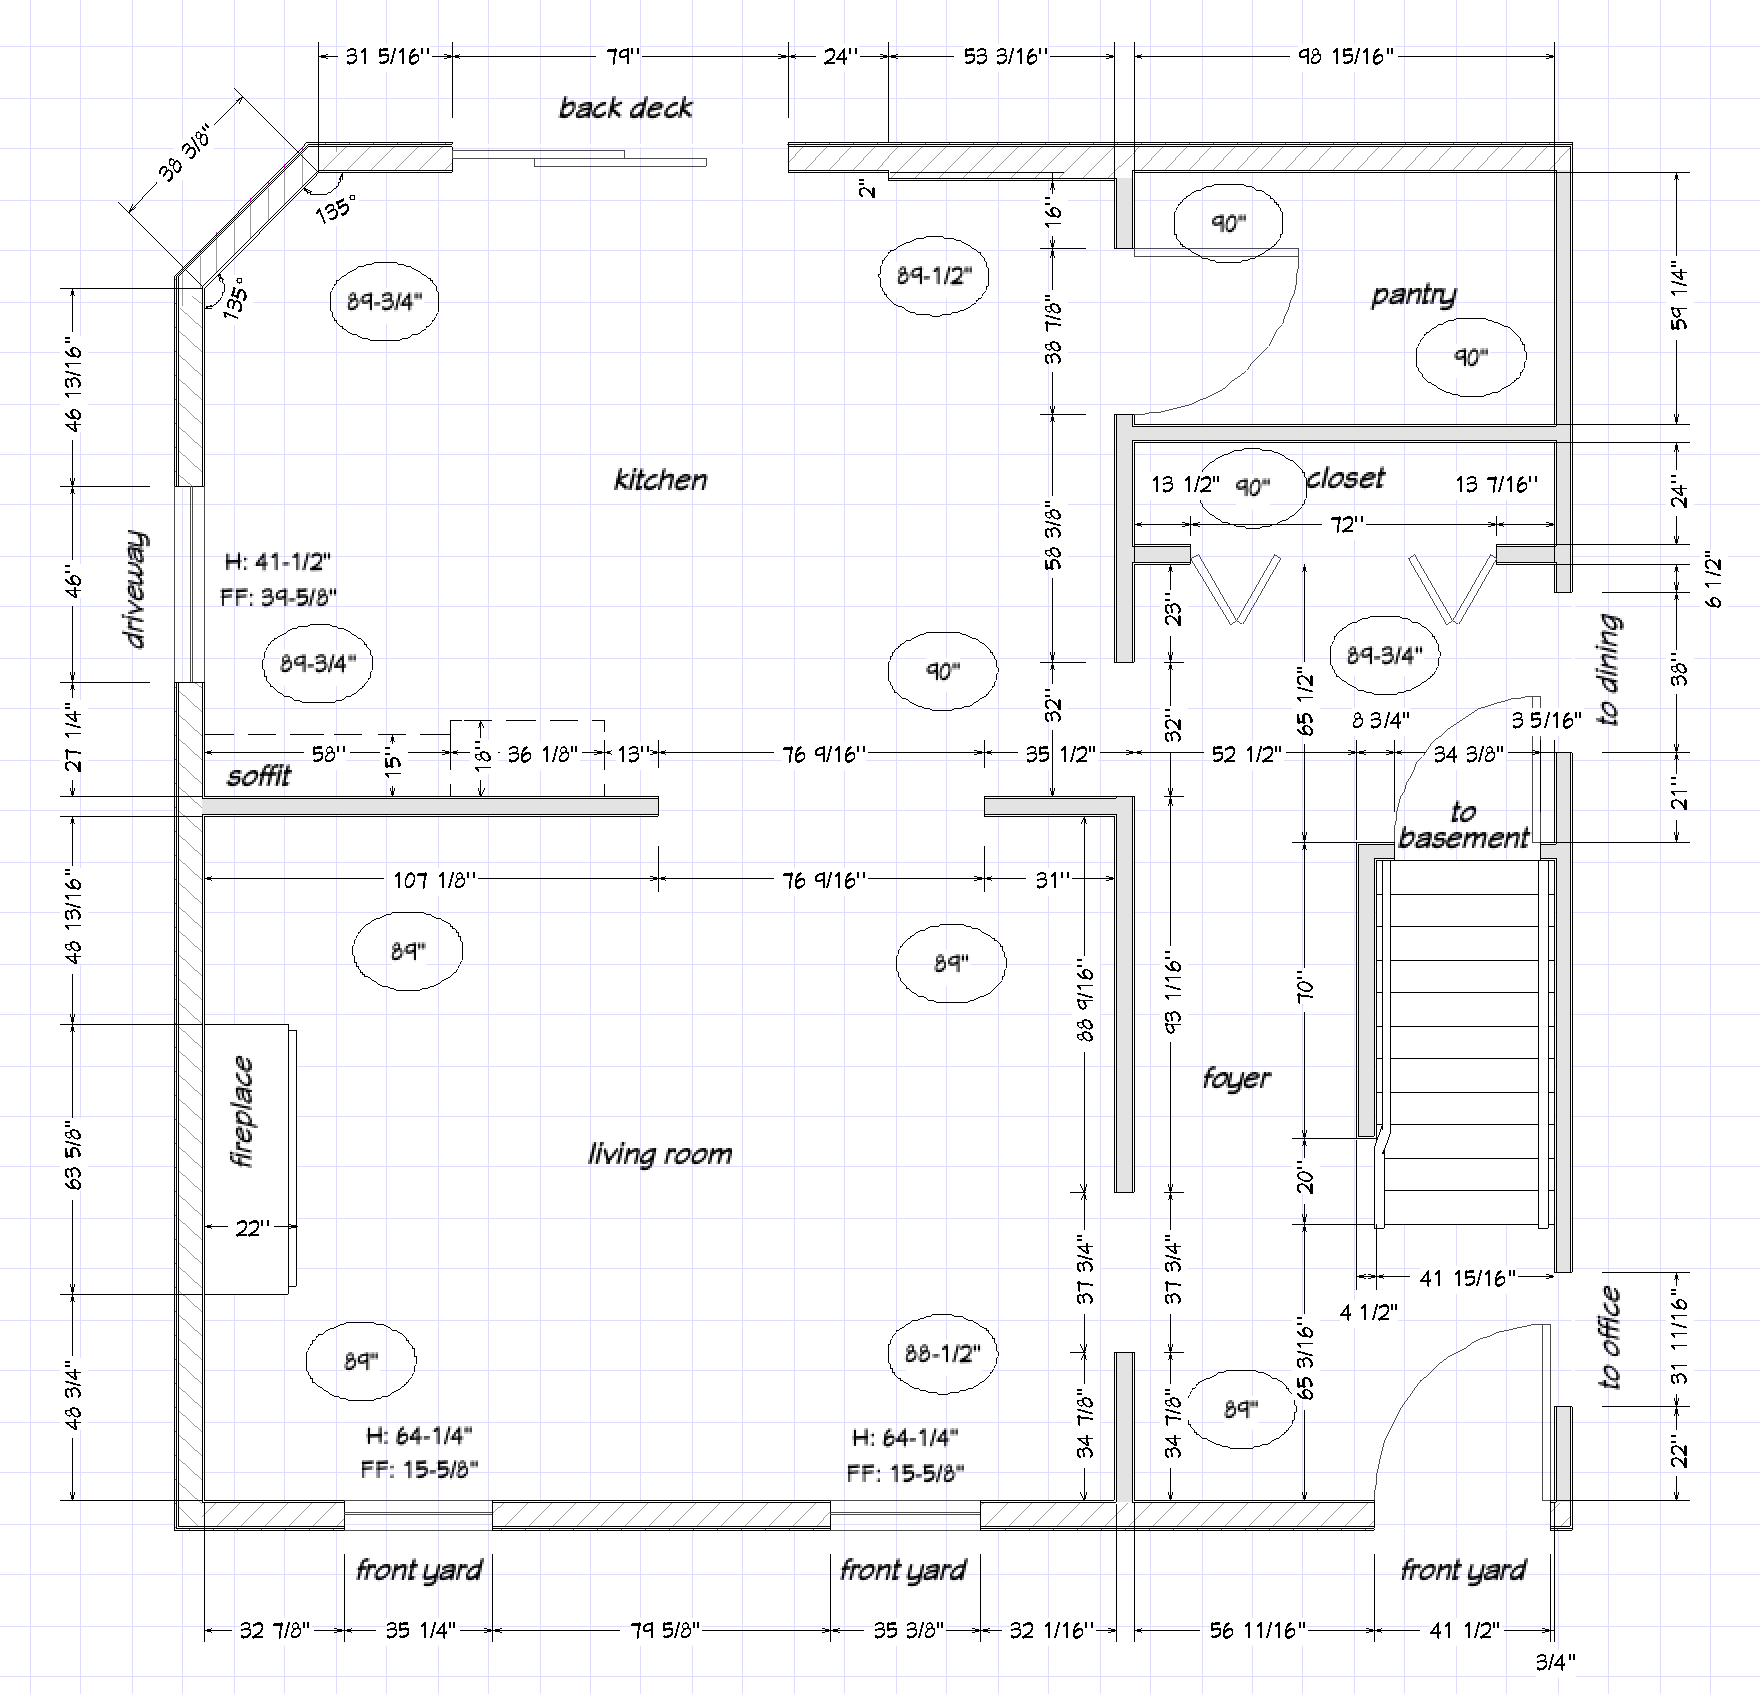
- Ceiling heights can vary from room to room + they very often do within a single room! Because of this, I require two separate ceiling measurements in smaller rooms, such as a pantry or powder room, + four separate ceiling height measurements in larger rooms, such as kitchens.
- Place the measuring tape hook on the floor + extend the tape up to the ceiling. Ensure the tape is as straight as possible. Reading this measurement is a bit tricky because the tape will be bent at the ceiling. Take your time studying the tape.
- Record this dimension on your sketch where you measured it in the room + circle it. As you can see, I typically measure ceiling heights nearer the corners of the room.

- Take a walk through your space, examining it floor to ceiling. Check that you’ve sketched + measured everything, including possible oddities. These often include subtle bump-ins or bump-outs in walls, a step up or down into adjacent rooms, a dropped ceiling, etc. Be extremely thorough. These small details are essential to the success of the design.
- Ensure wall treatments or moldings did not skew your dimensions. A frequent error I see is measuring to the backsplash surface, instead of to the wall. See below for how to correct this.

- It’s best to take photos during the day. Turn on every light in the main space + adjacent rooms.
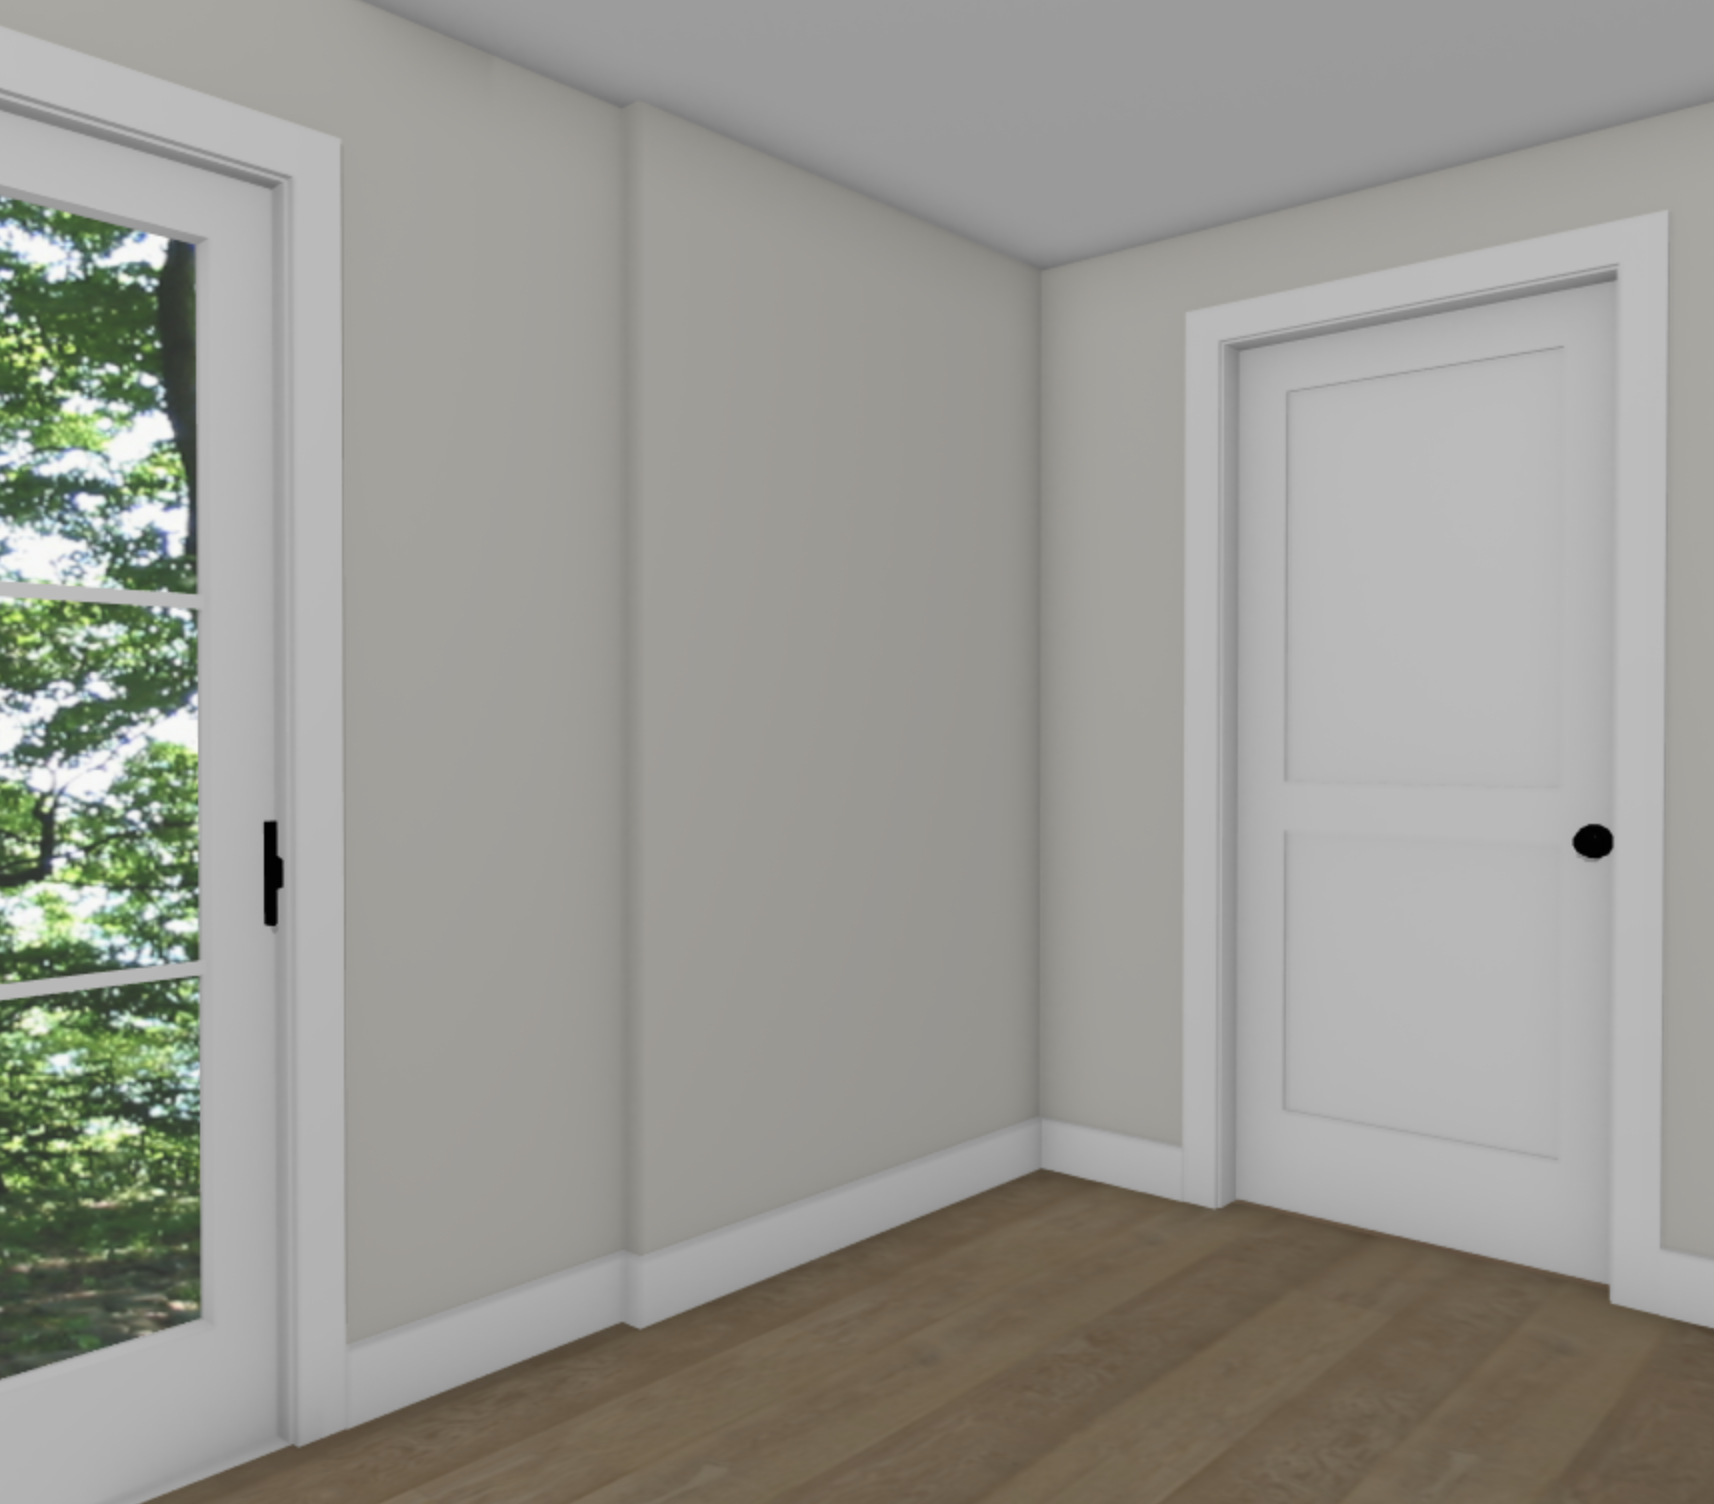
- Starting in one corner of the room, pivot + take three photos: one of each corner of the room. Move to the next corner + repeat. This should create a minimum of 12 photos per room. Include additional close-up photos of the permanent fixtures you included in your sketch. Include additional close-up photos of oddities, such as wall bumps or differing floor heights.

- Scan or take a well-lit photo of your sketch. Make sure all dimensions are clear.
- Review your photos. Make sure all parts of each room are captured. Confirm all photos are light + clear.
- Send me an email with your sketch + all photos attached. DON’T add your photos in the body of the email. They should be added as attachments, not as in-line photos.
- My most updated contact information can be found here.

- DO measure at eye-level as often as possible.
- DO pull the measuring tape tight. DON’T record a measurement if the tape is bending, twisting or sagging.
- DO ensure the measuring tape is straight + level. DON’T record a measurement if the tape is angled on the wall.
- DO have a second person help you hold the tape if you find it is bending, sagging, twisting or angled.
- DON’T ignore the depth of wall treatments [backsplash tile, baseboard molding, etc.] during measuring. See below for a visual example.
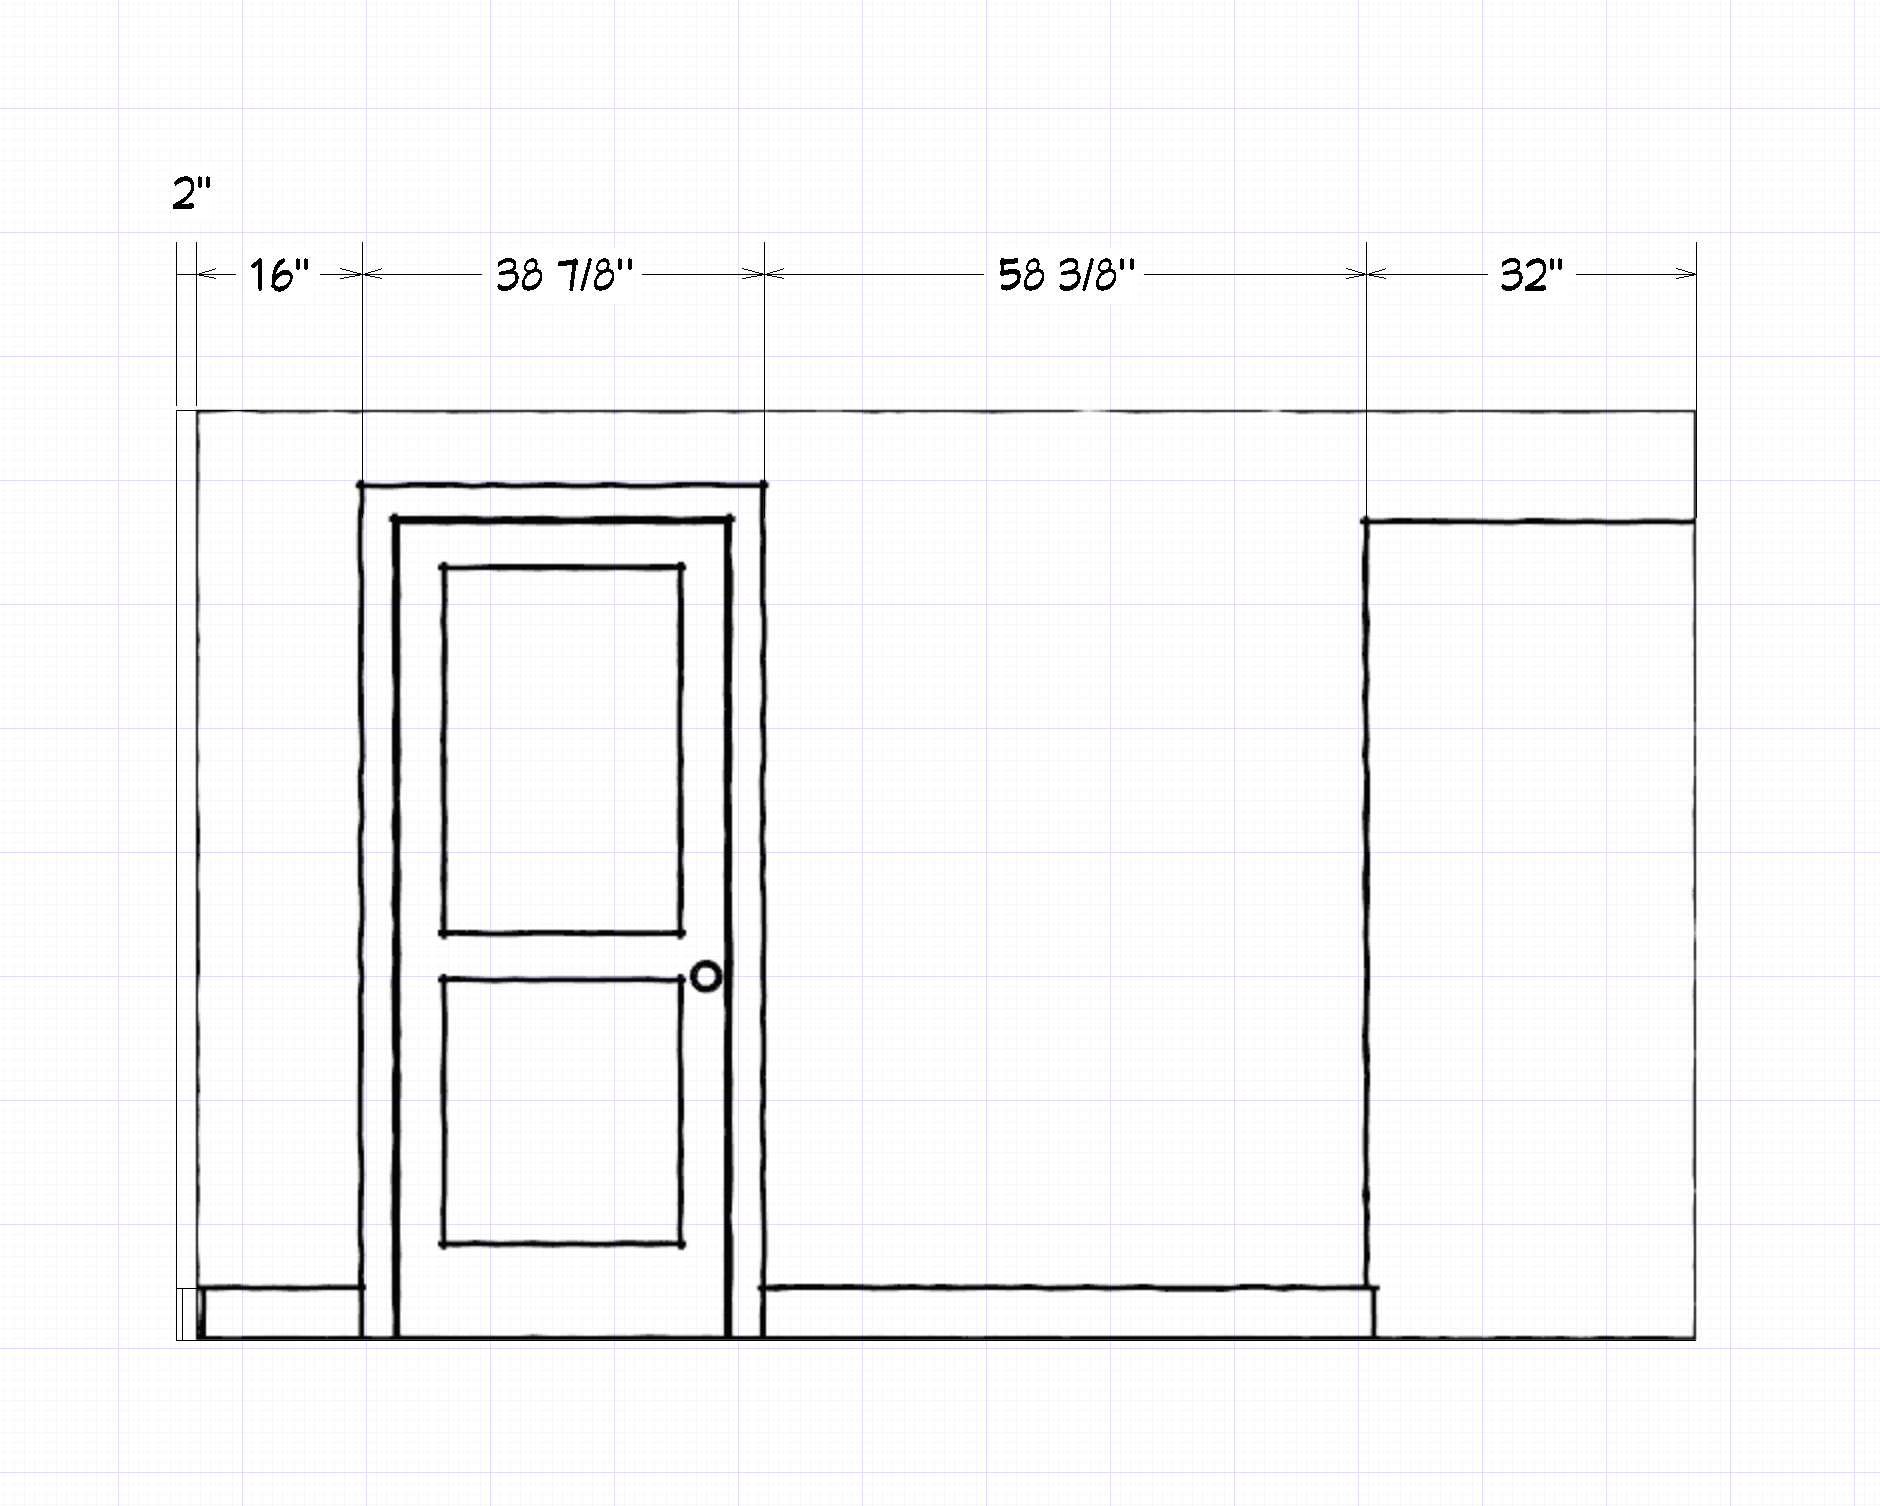
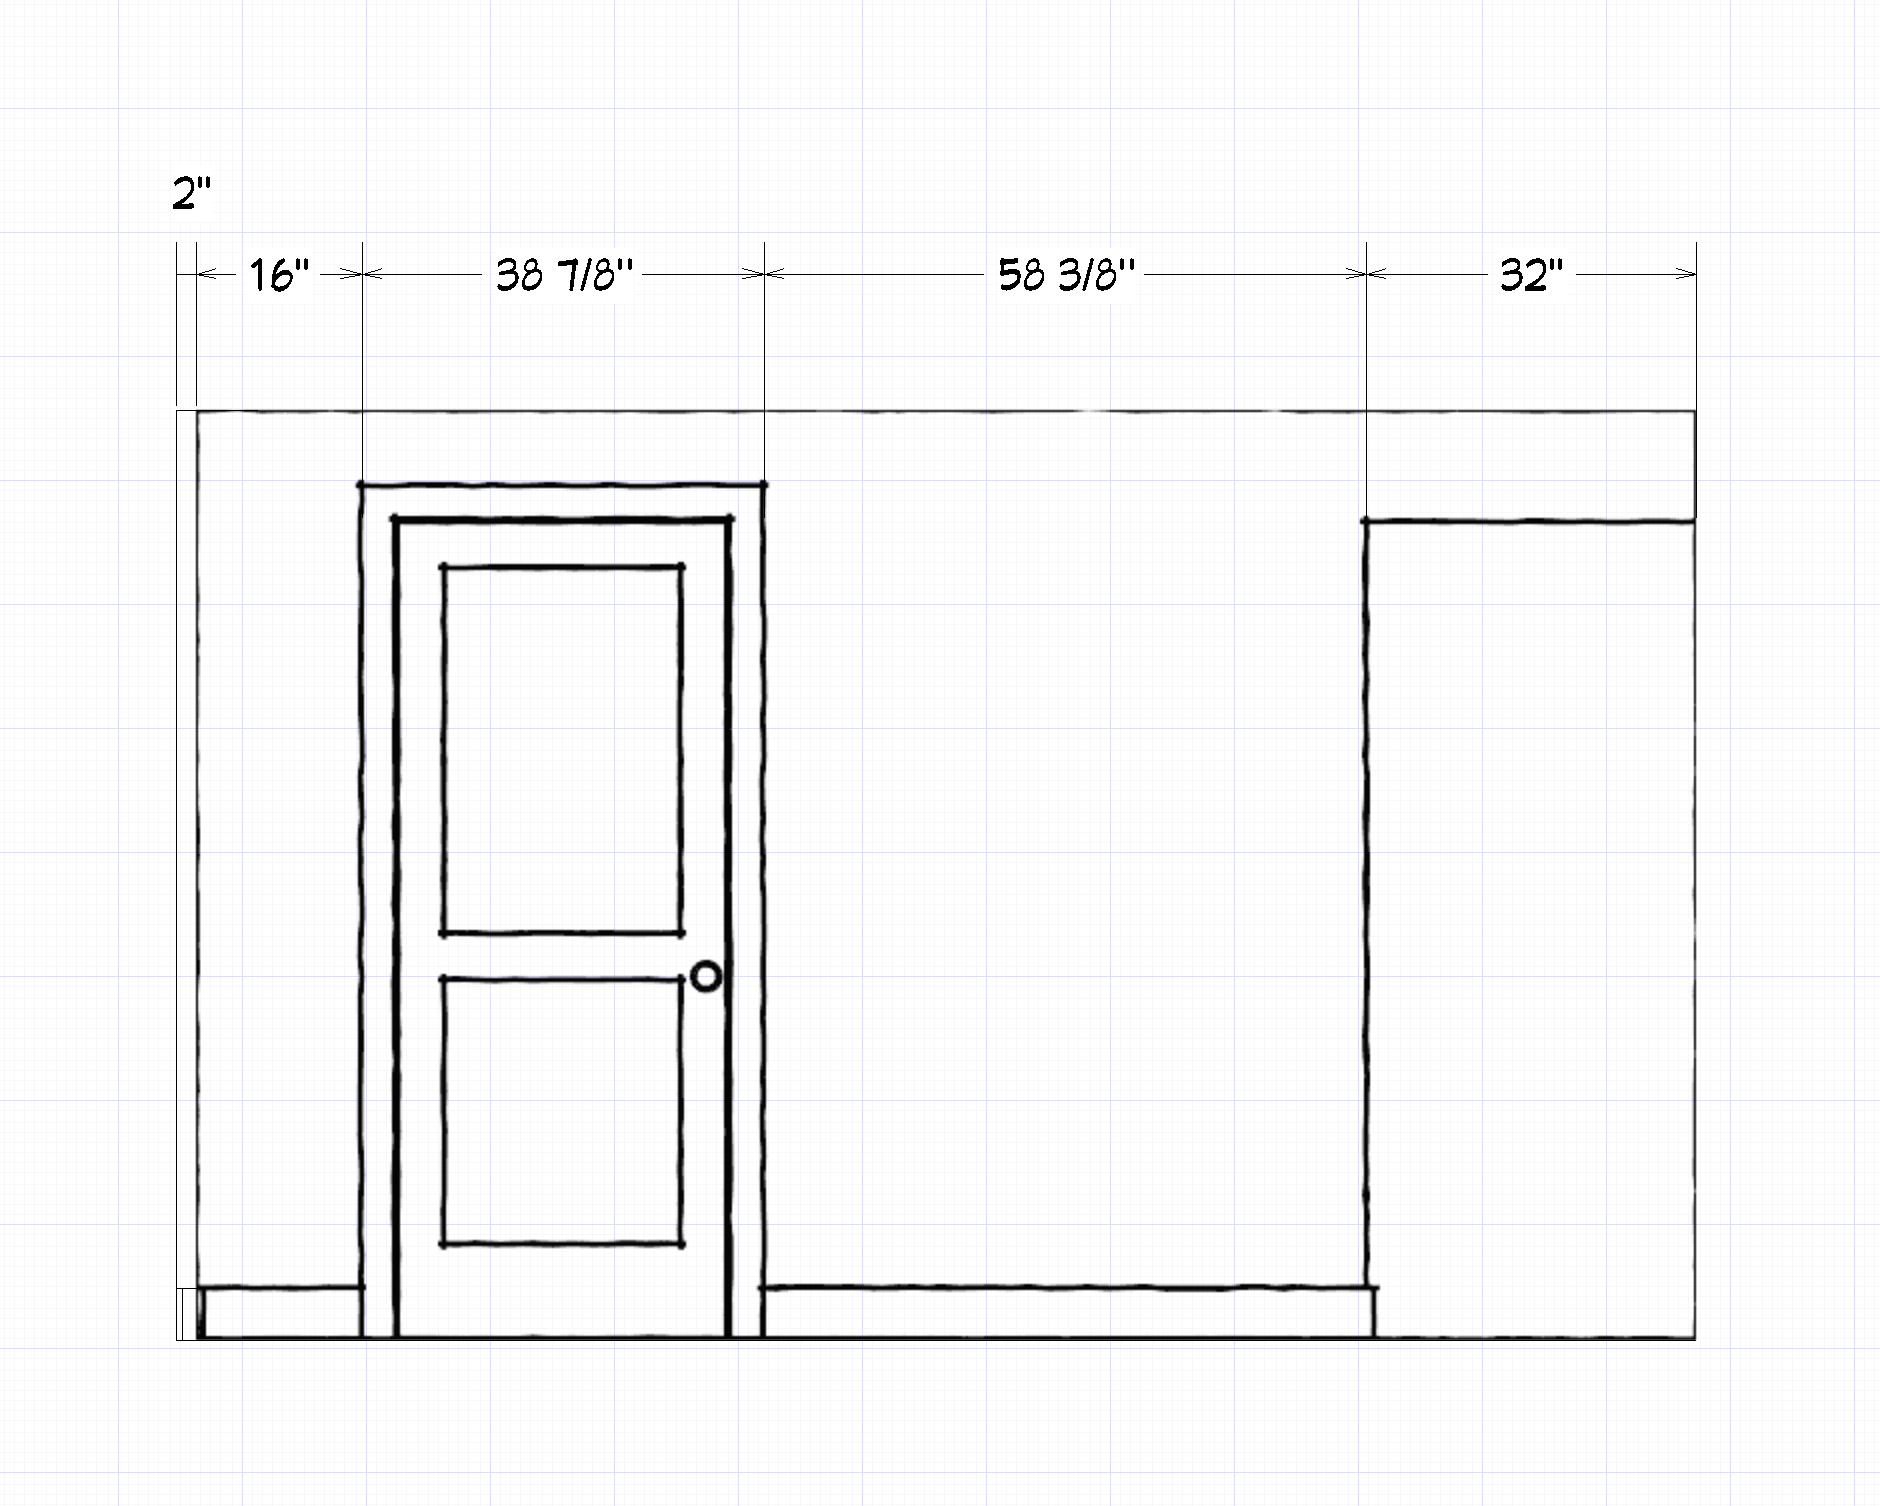
- DO include the trim in door, window + other opening measurements. See below for a visual example.
- DO include the height + the from-floor measurement for windows + window-like openings. See below for a visual example.
- DO record actual, accurate dimensions to the sixteenth of an inch. DON’T guess or round.
- DO use a stool, if needed, to measure over large appliances such as a refrigerator. DON’T use appliance or cabinet doors as a measuring point. The appliance or cabinet box itself is typically more square.
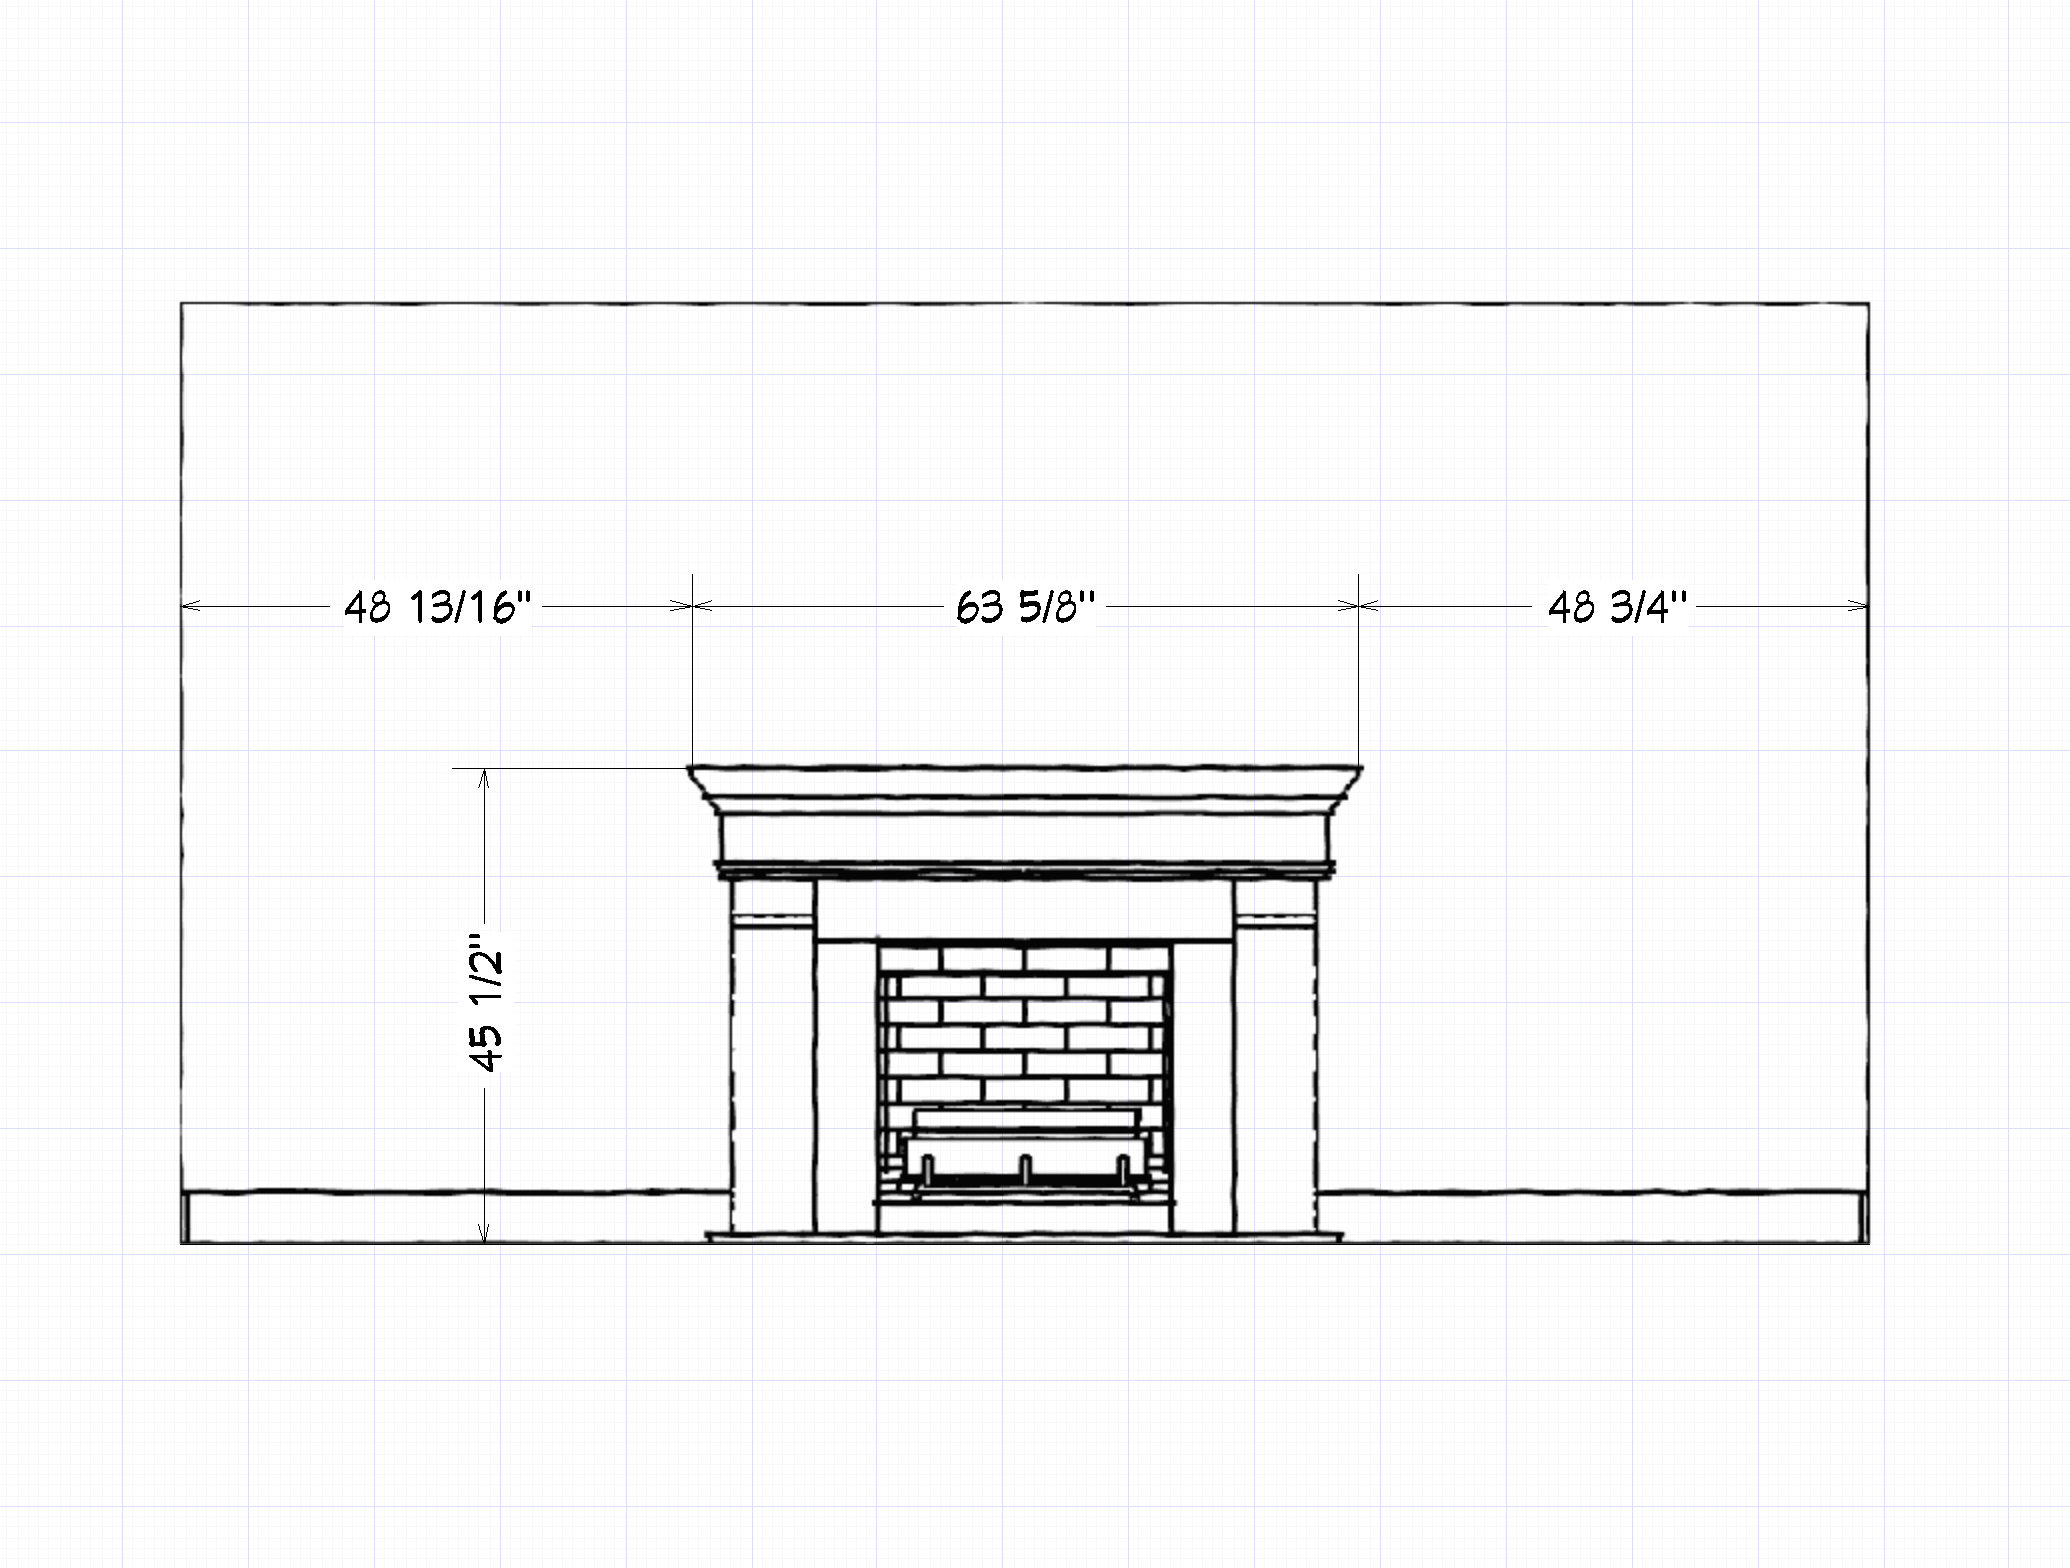
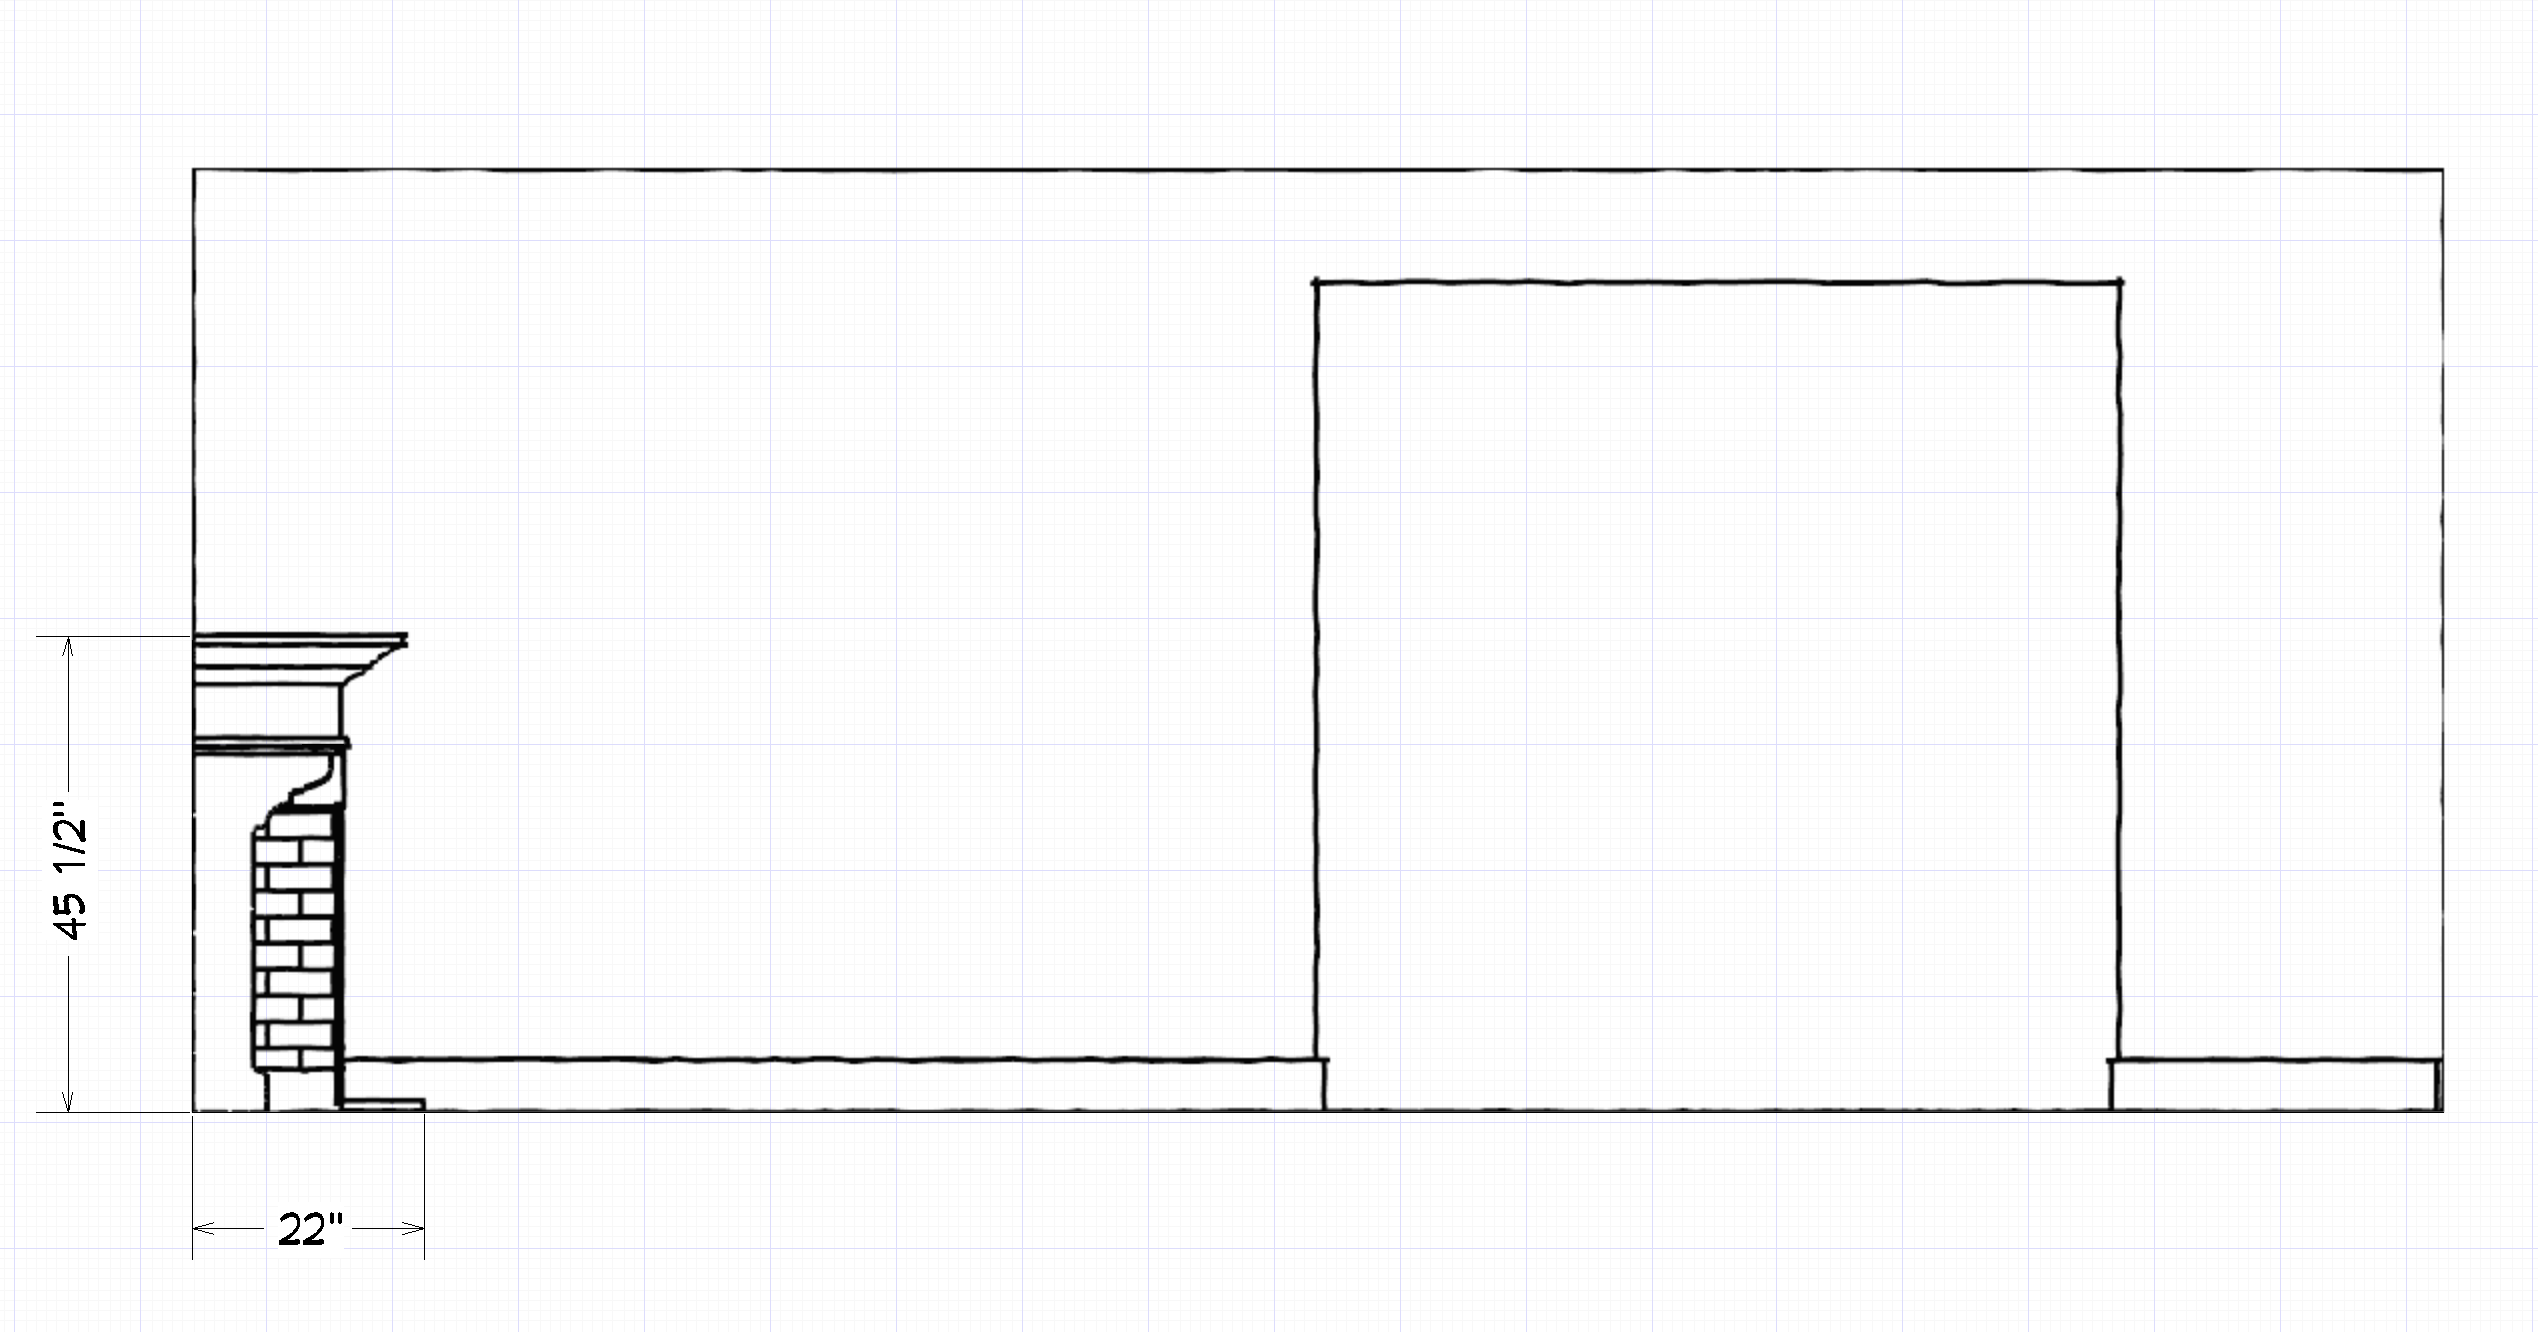
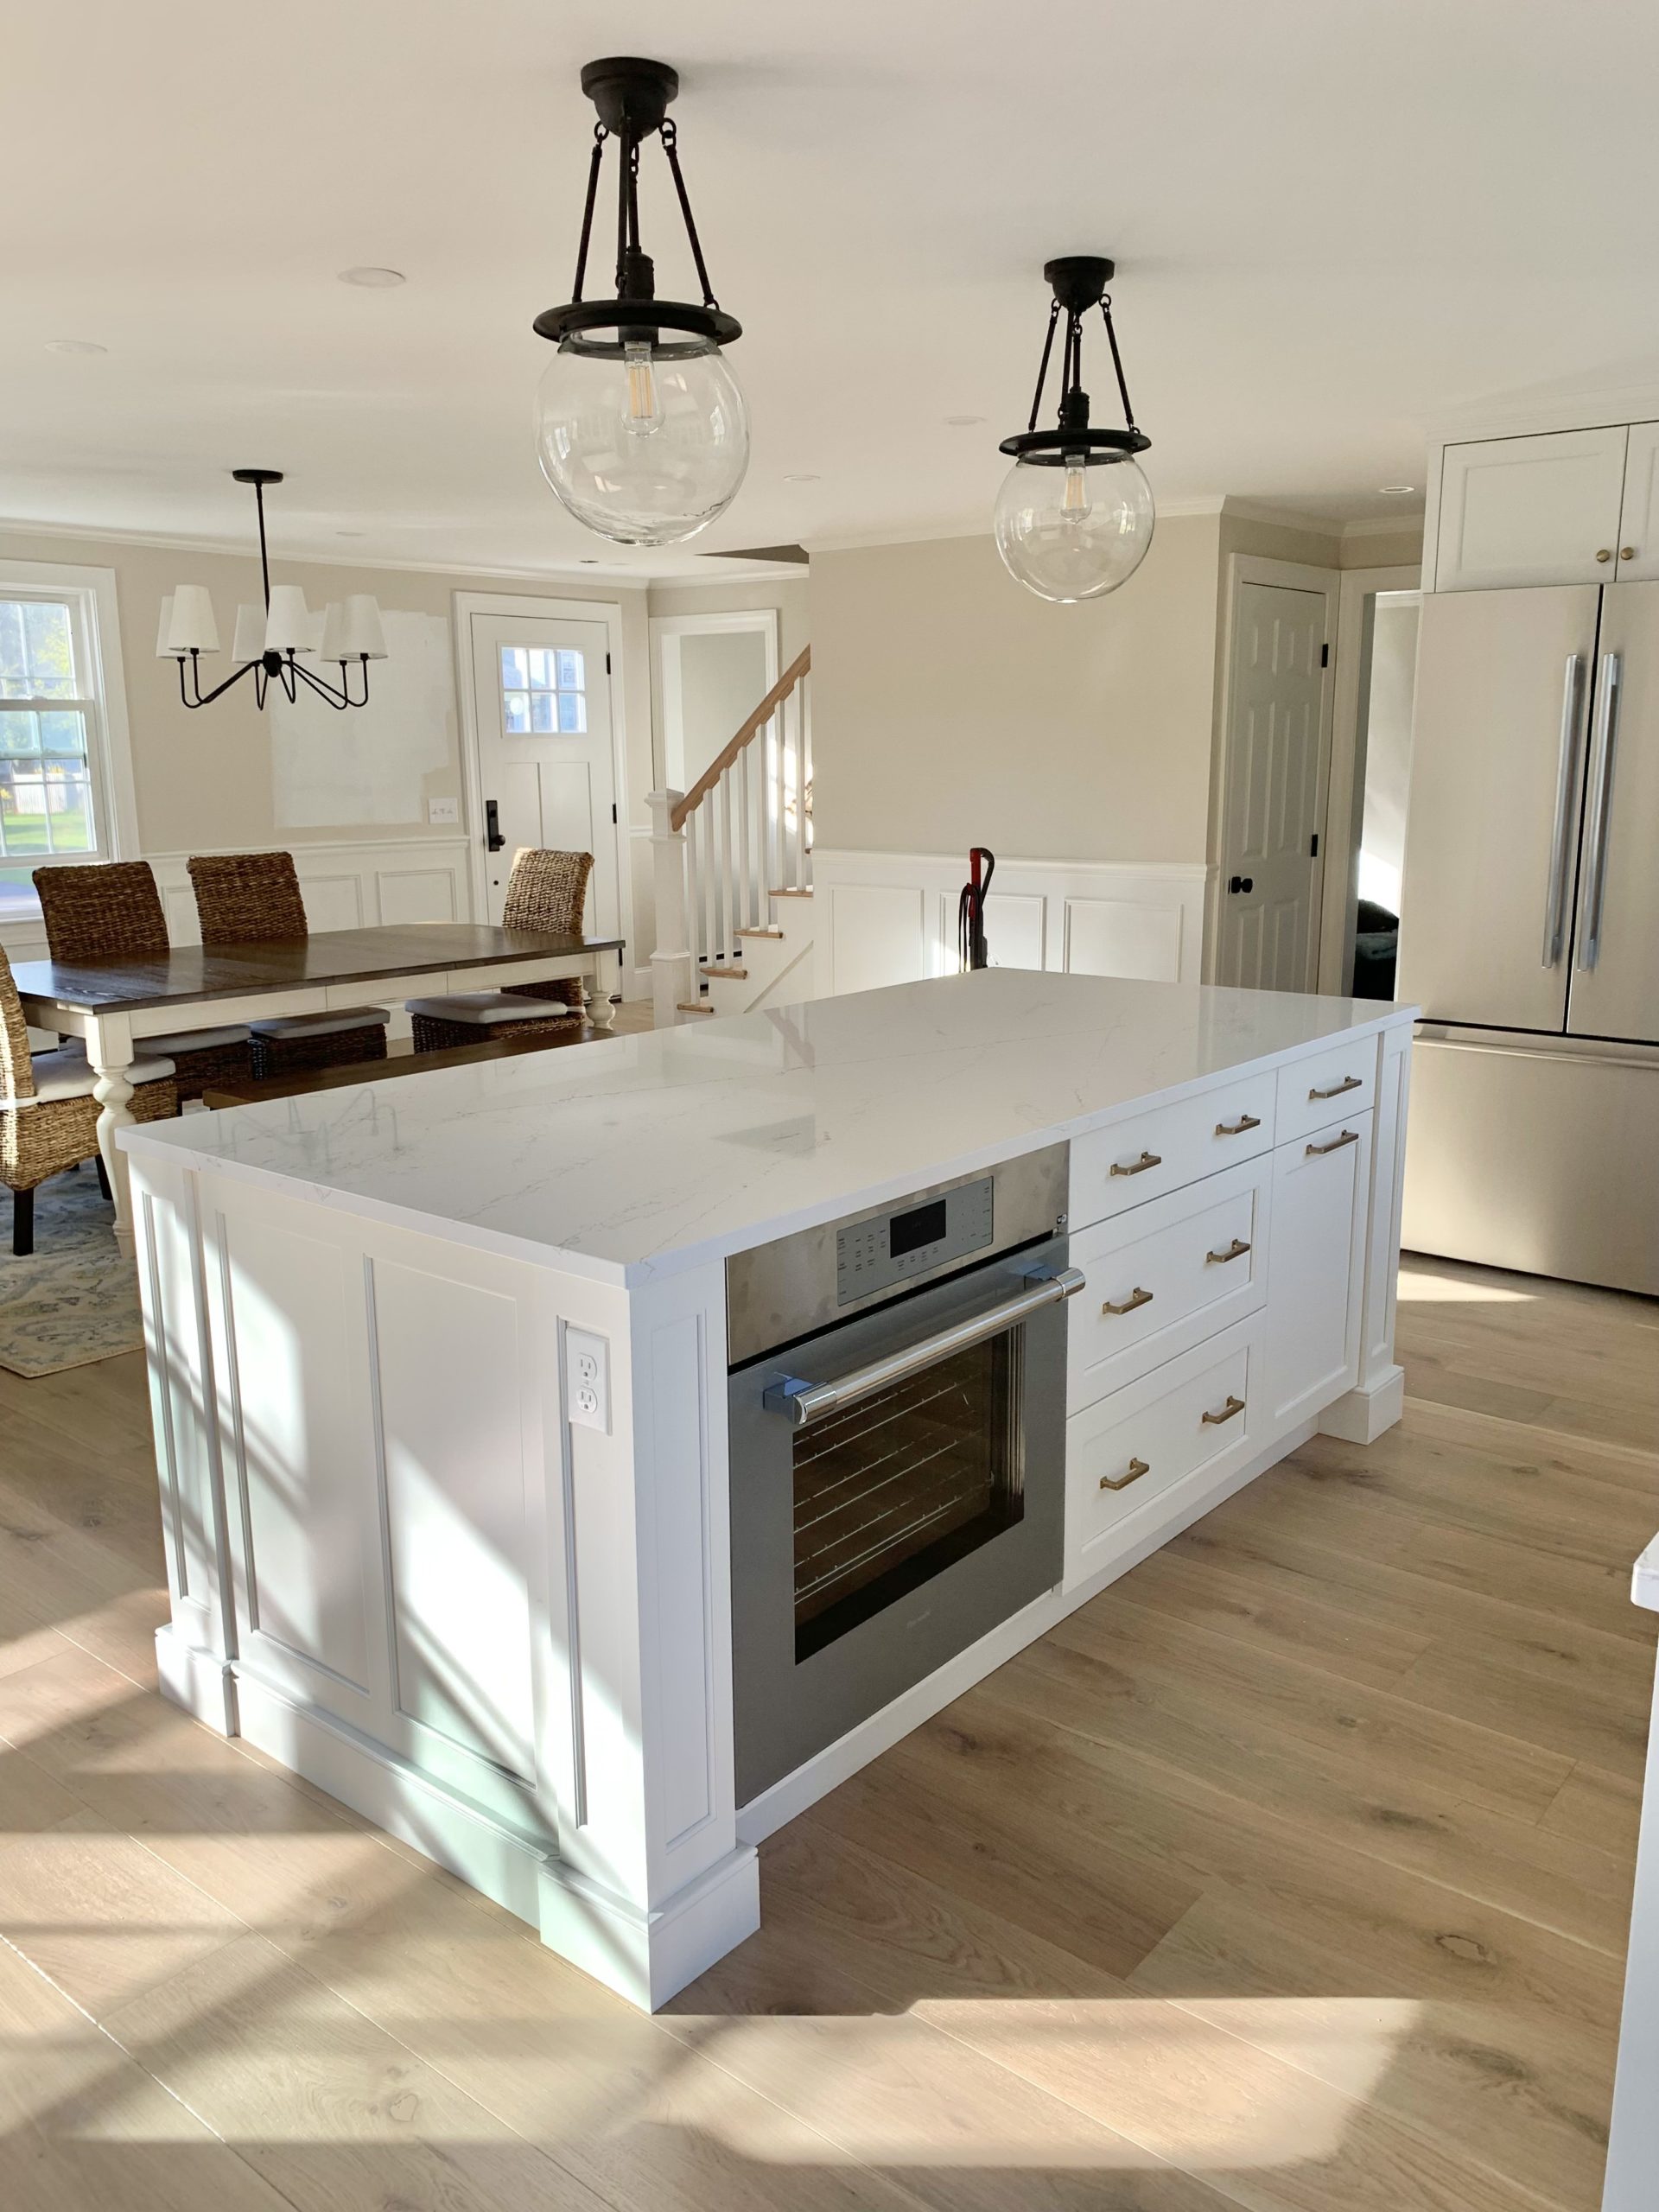
- DO record the width, depth + height of permanent fixtures. See below for a visual example.
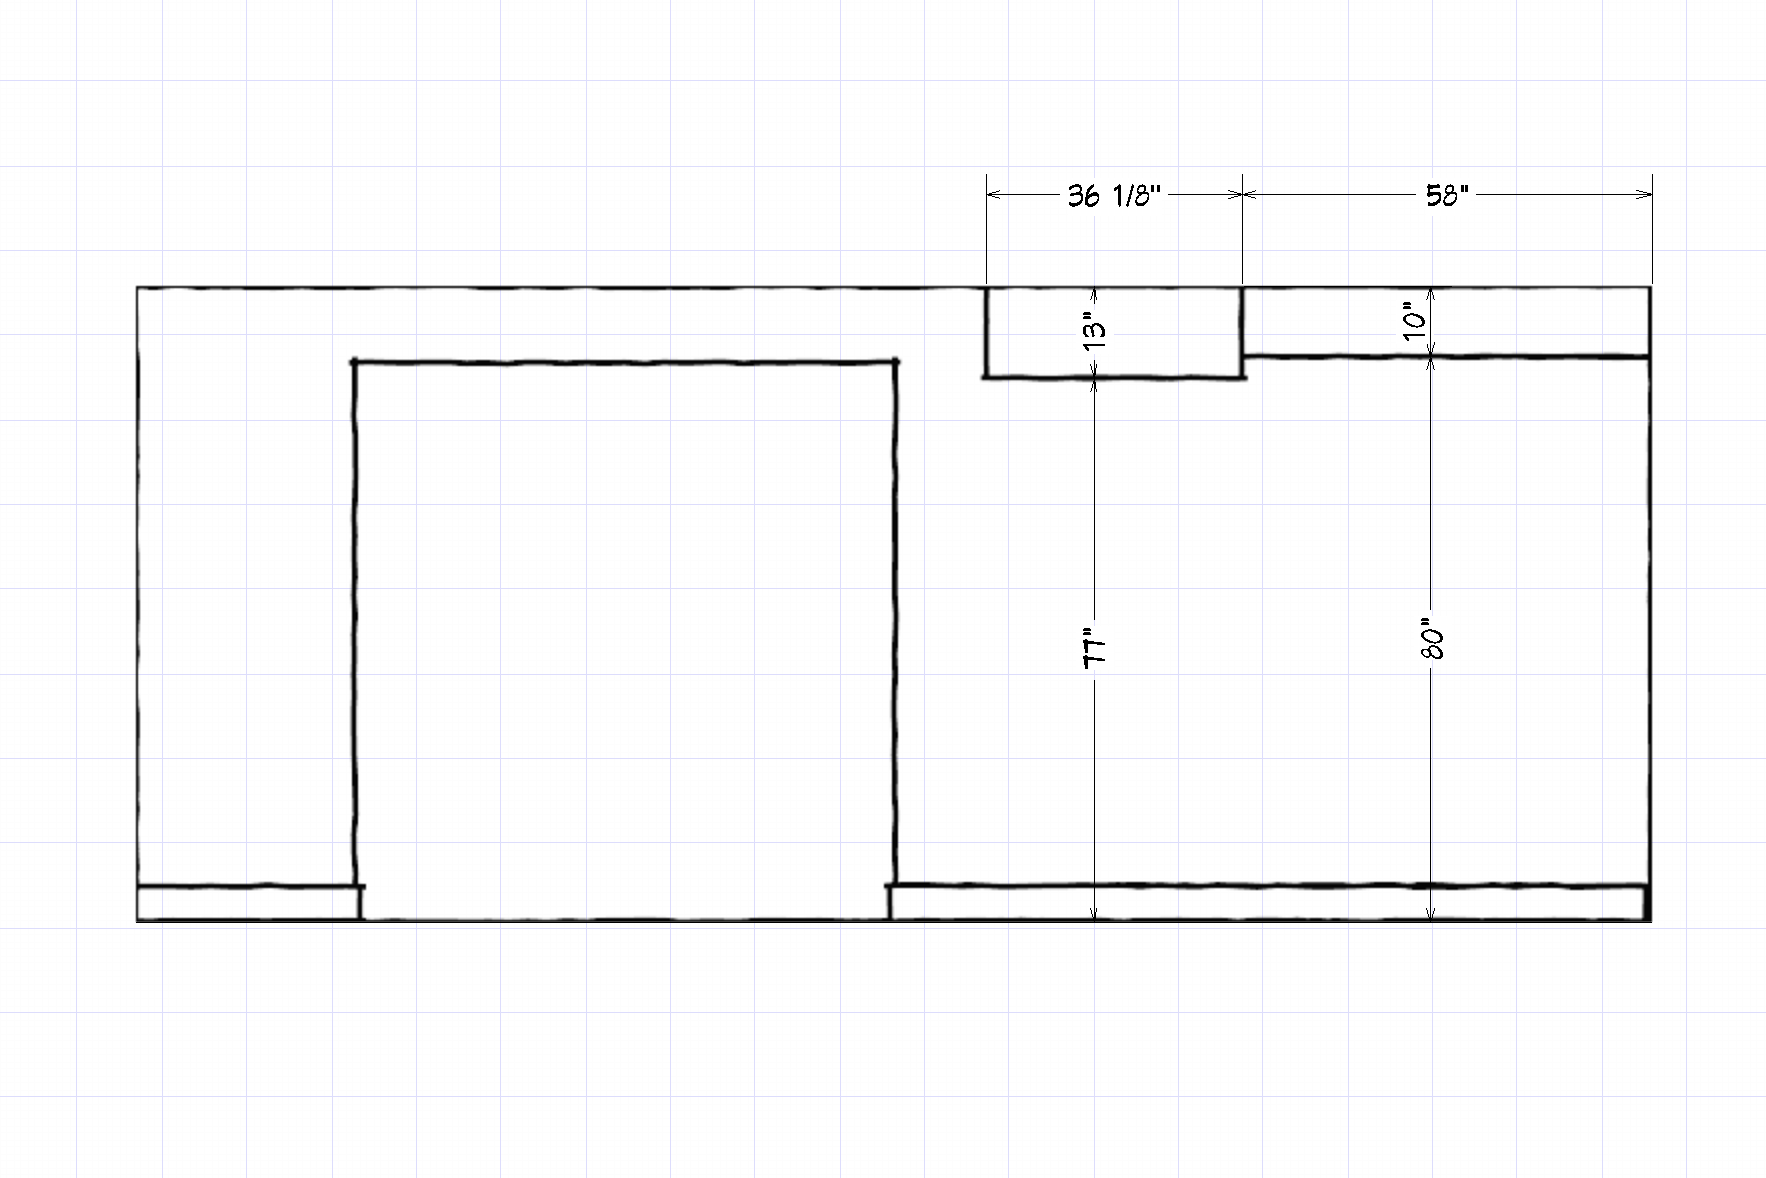
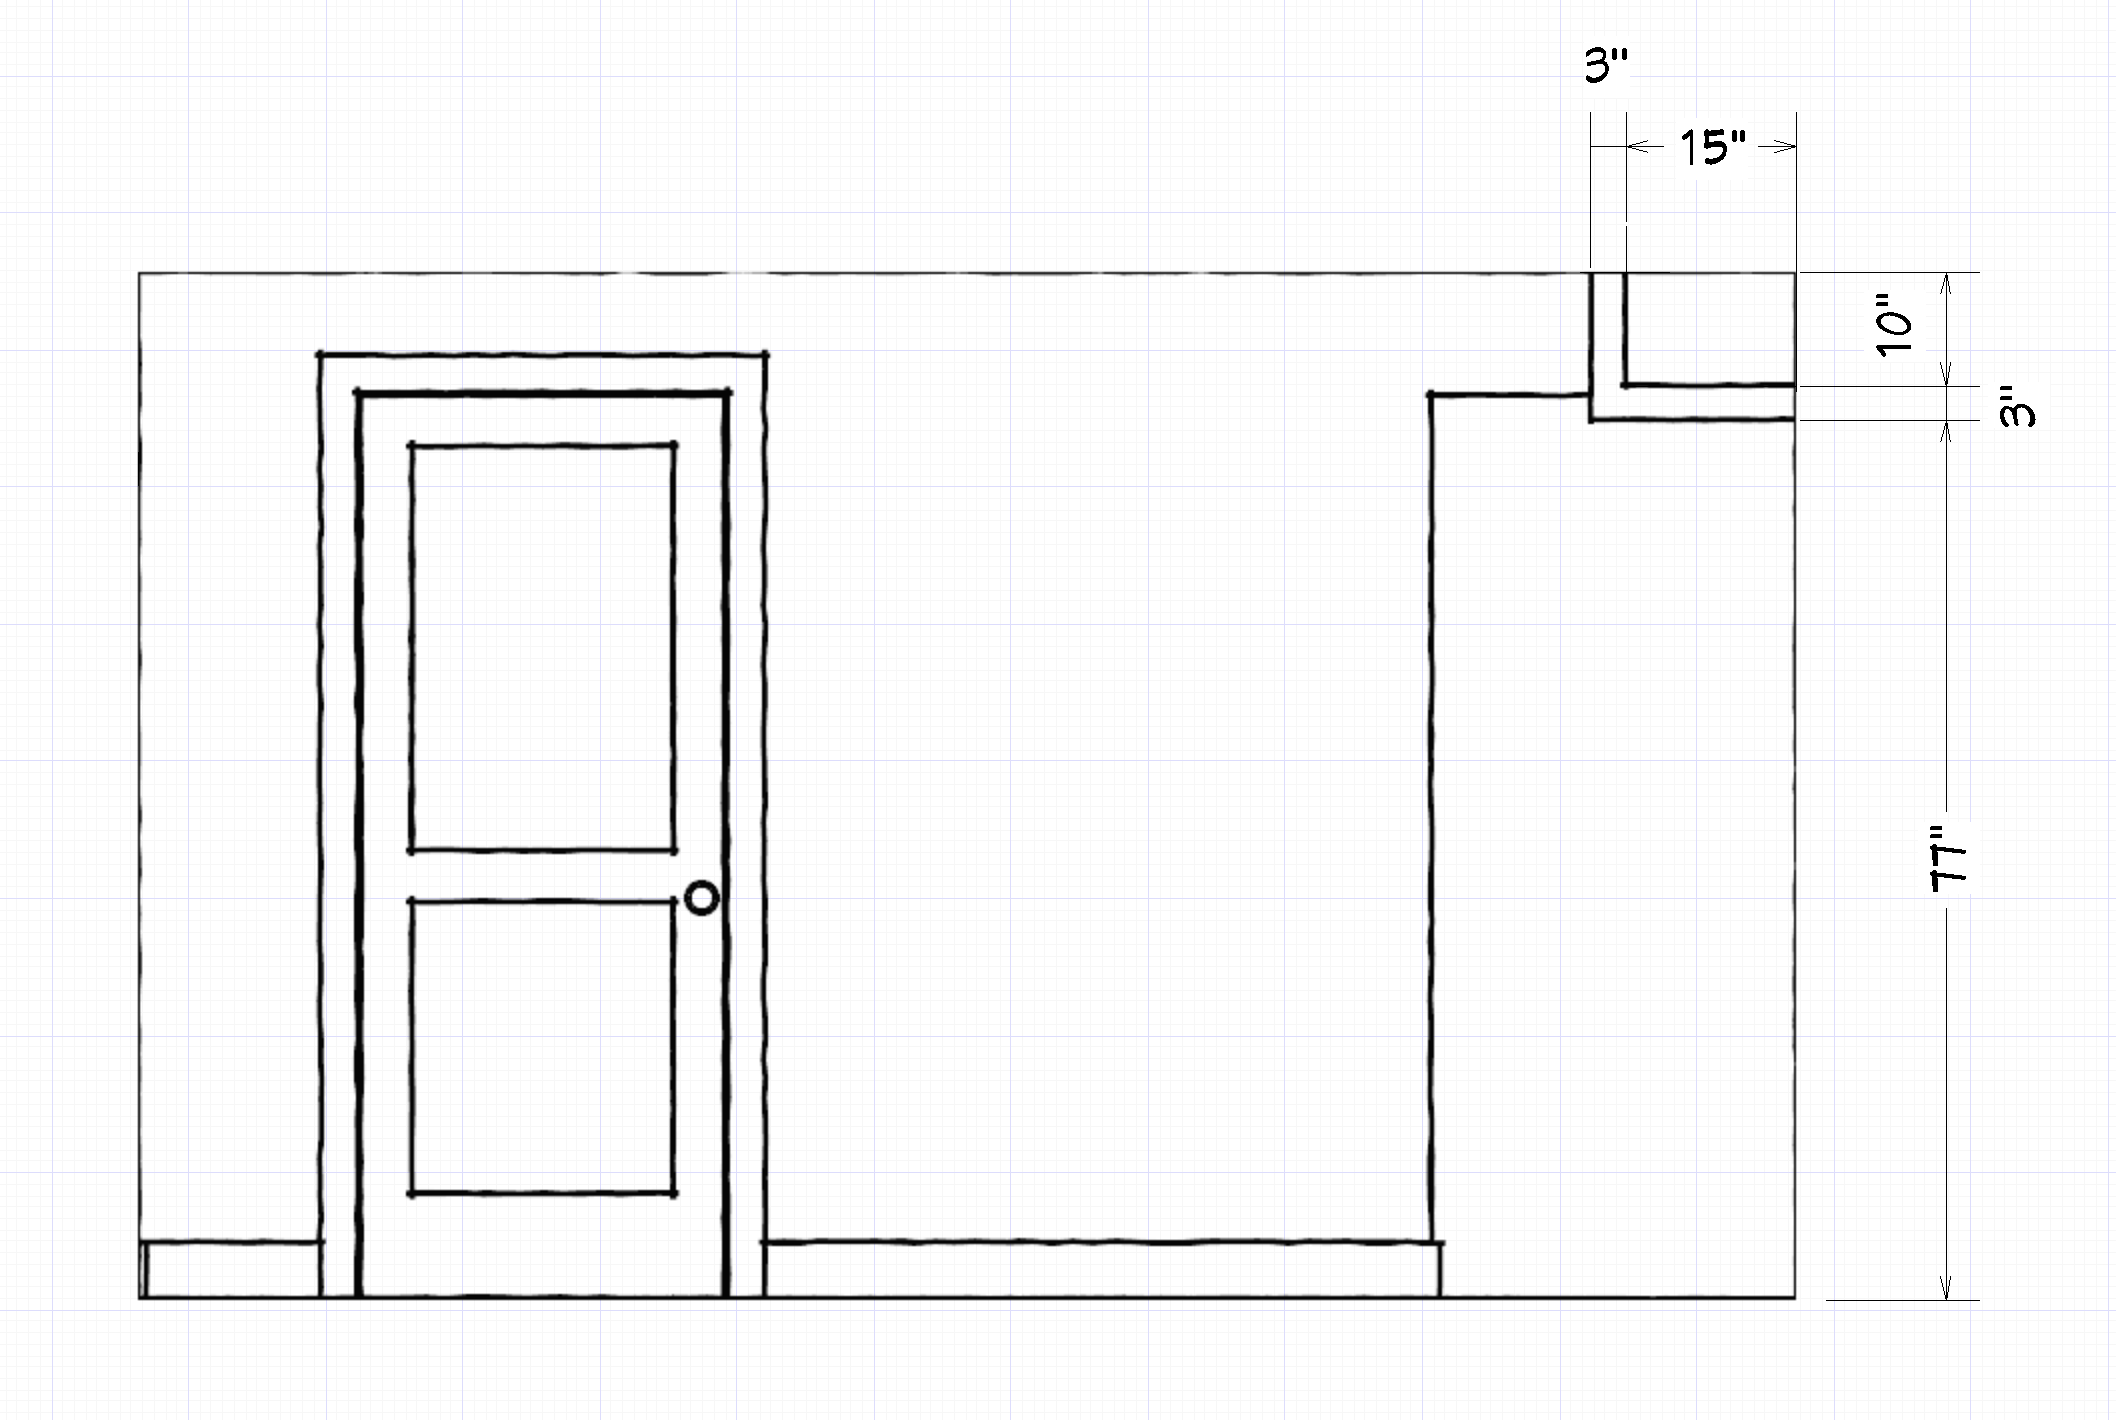
- DO sketch wall elevations if you feel it is necessary to show more complex details, such as a sloped ceiling. DON’T sketch wall elevations for standard doors + windows, as seen below. These drawings are for measurement aids only.

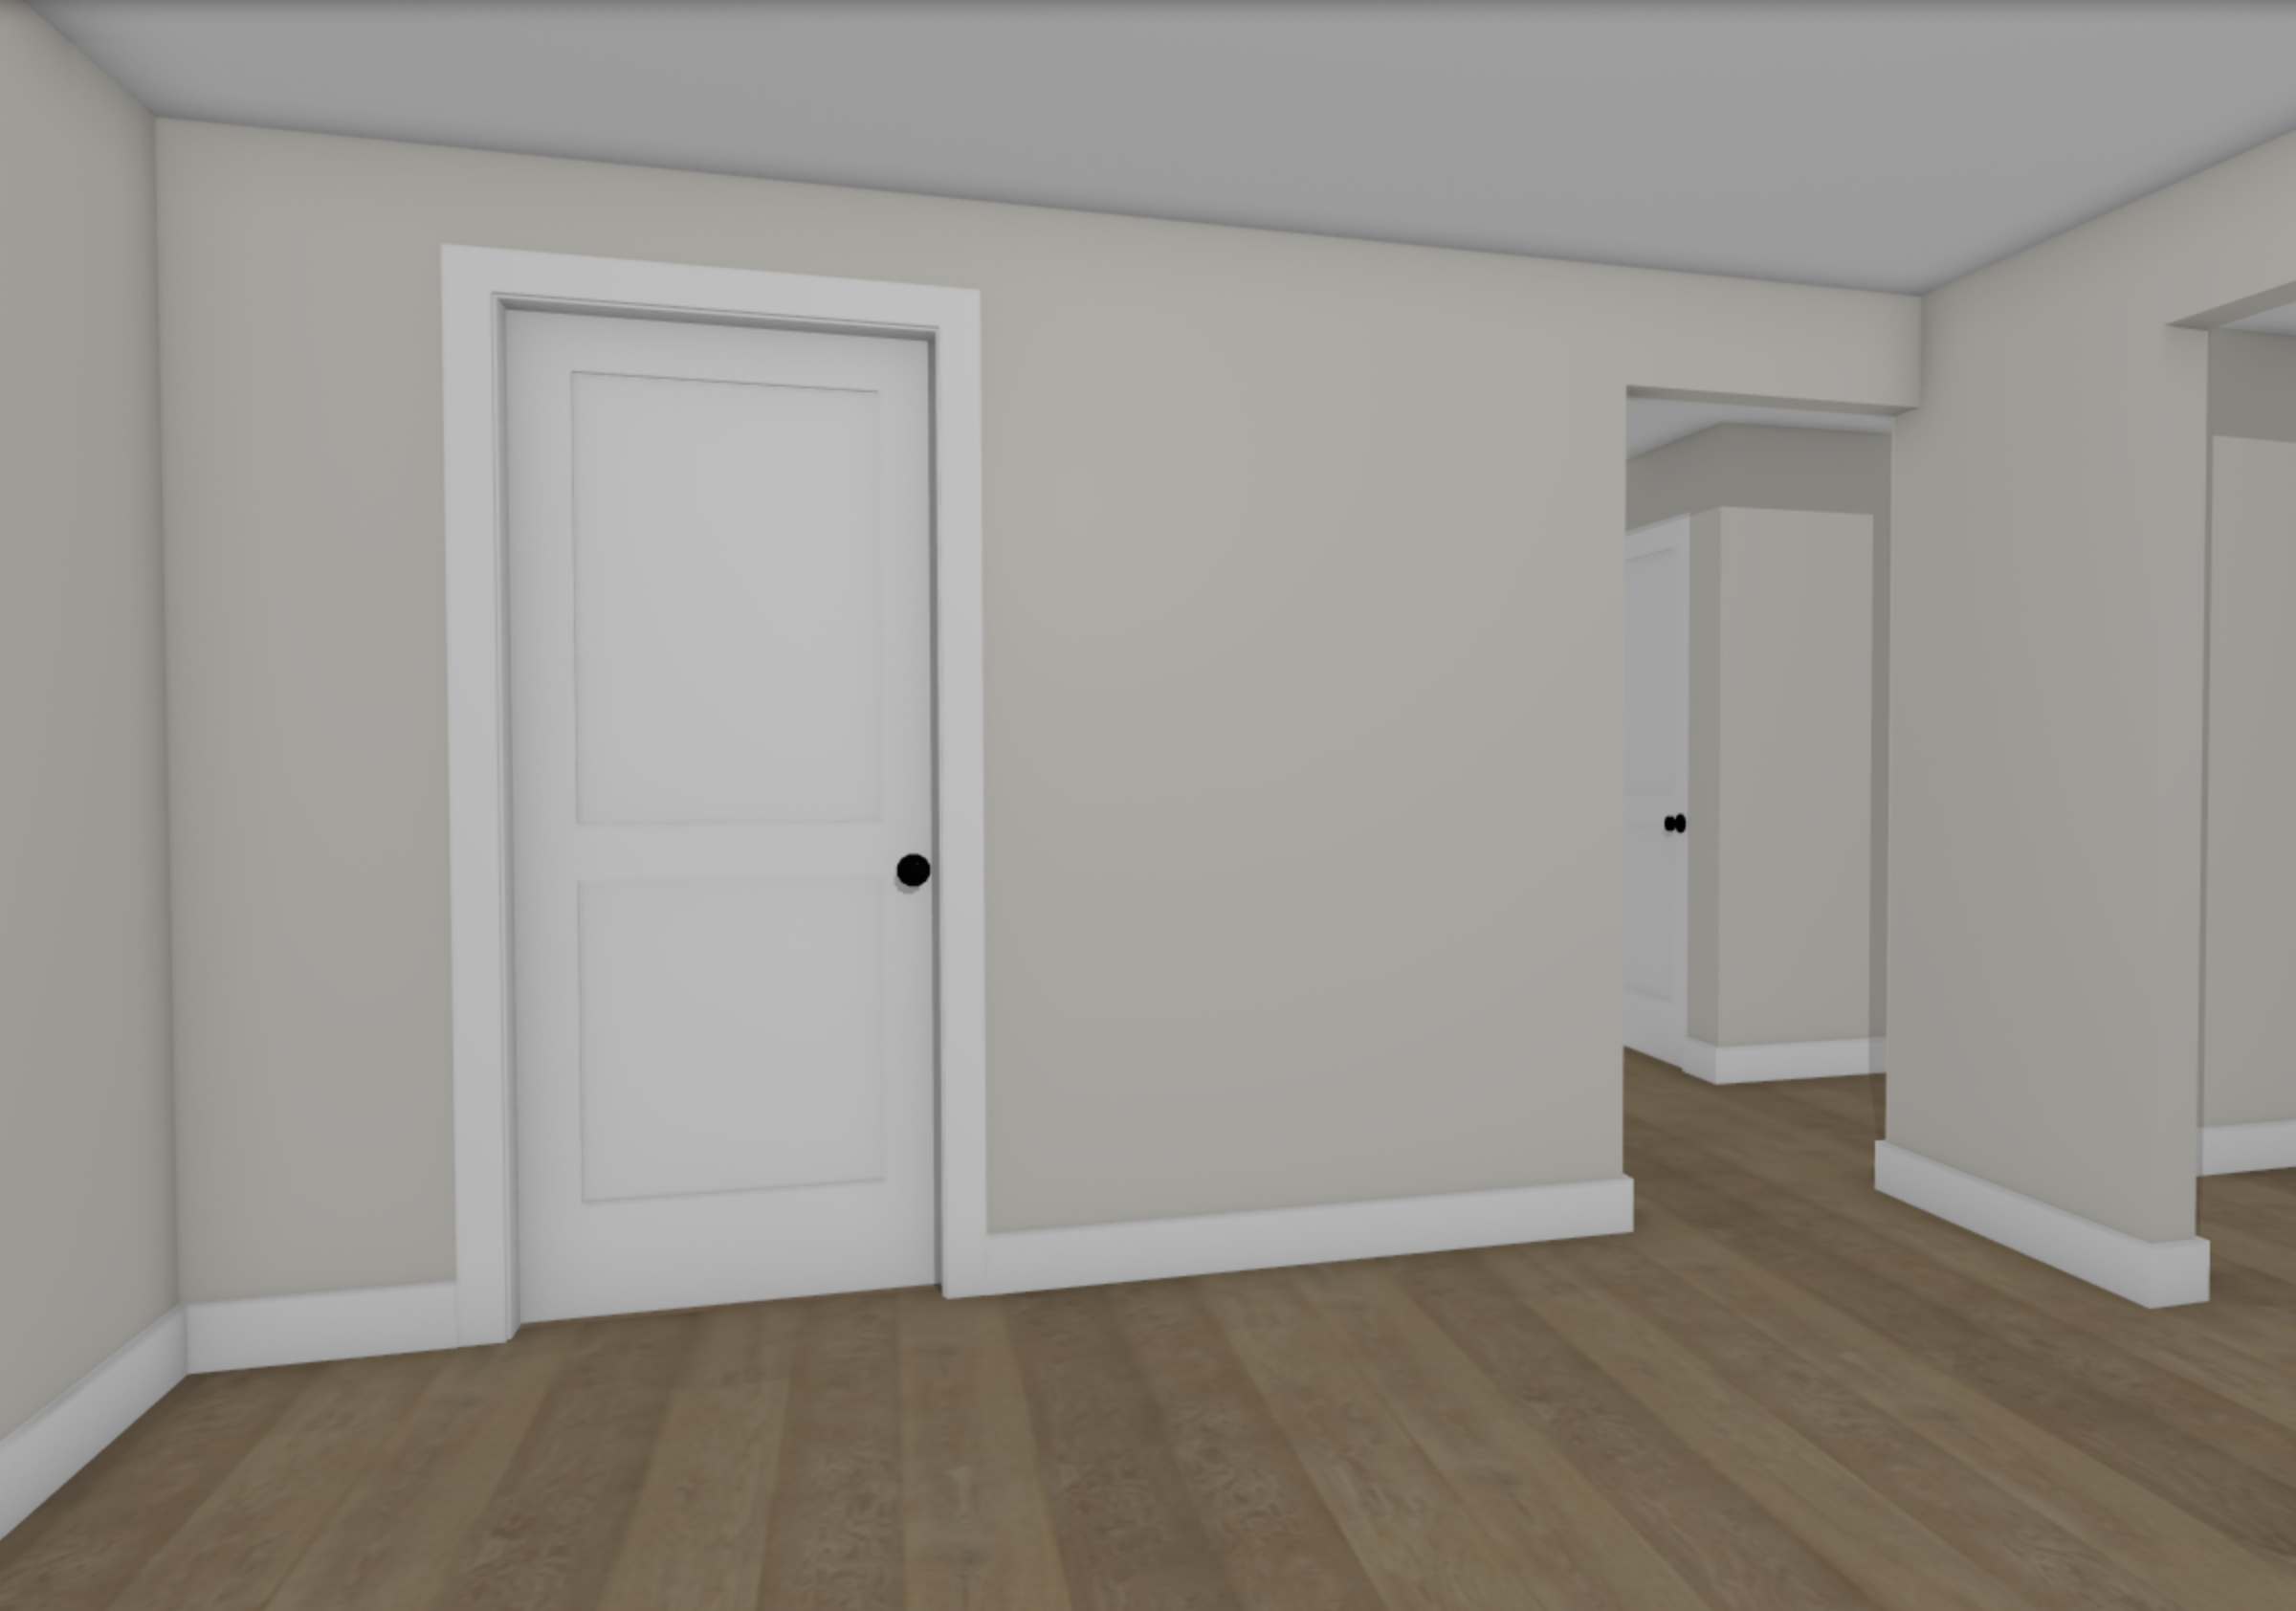
- It’s important that you include the existing trim in your door measurements.
- Hook the measuring tape on the outside of the trim. Extend the tape to the outside of the trim on the opposite end. Study the tape carefully + record the dimension clearly on the sketch.
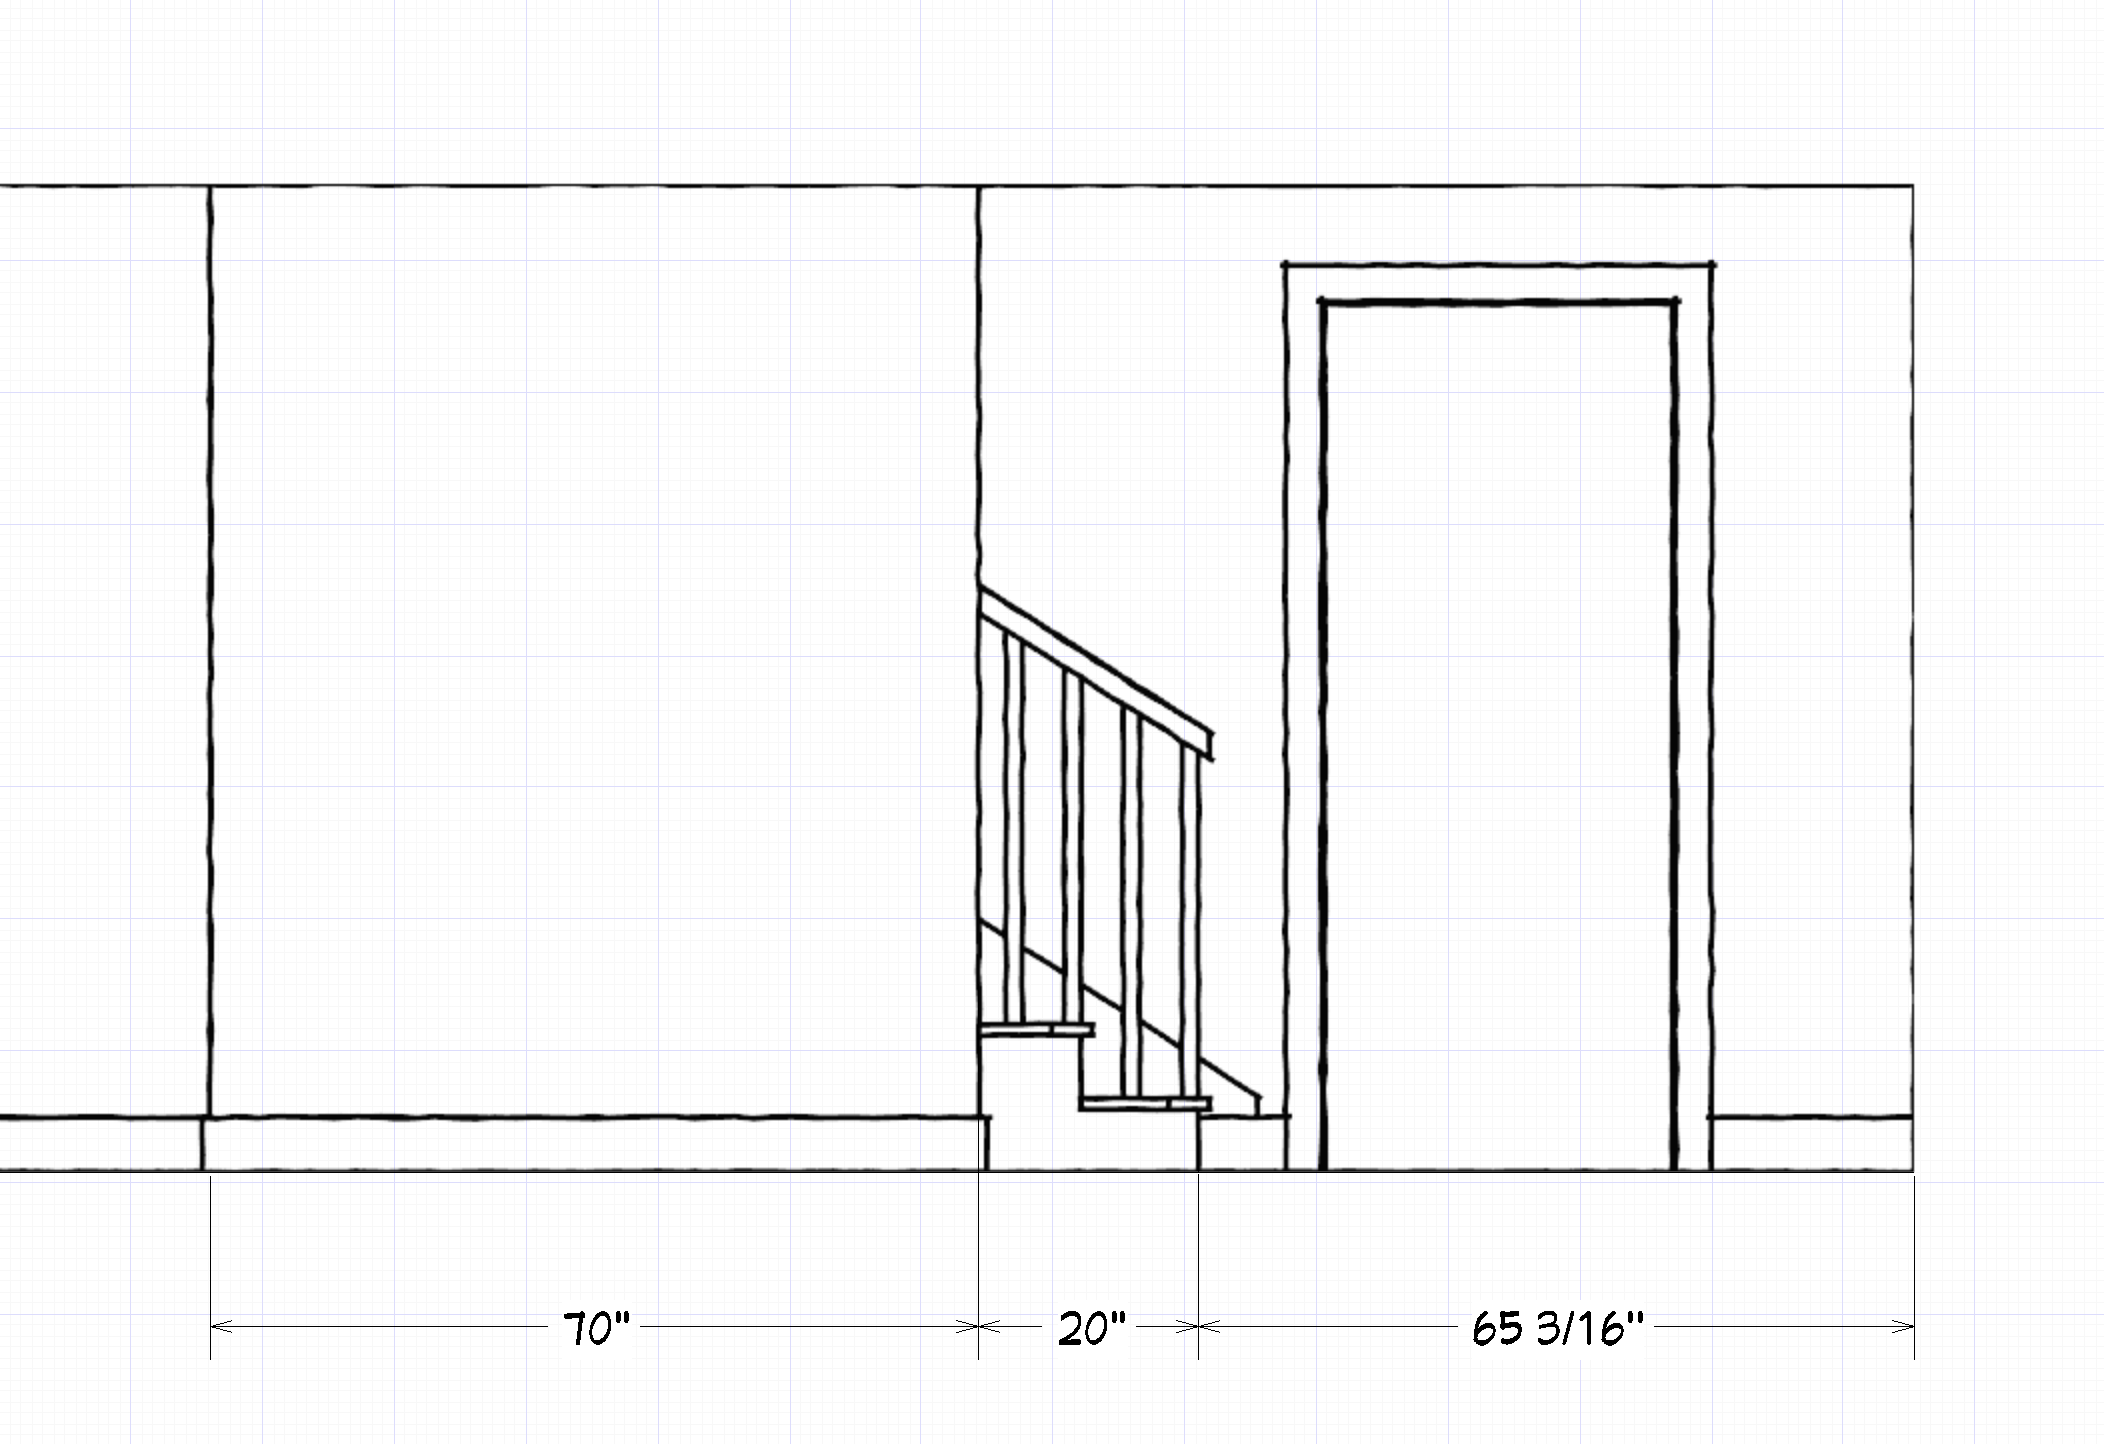
- This is how I’d measure the kitchen’s east wall:

- A finished opening is an opening wrapped in only drywall. There is no door or no window + no trim.
- As you can see above, I measured the innermost width of the finished opening, from drywall to drywall. The right side of the opening happened to be the end of that wall.

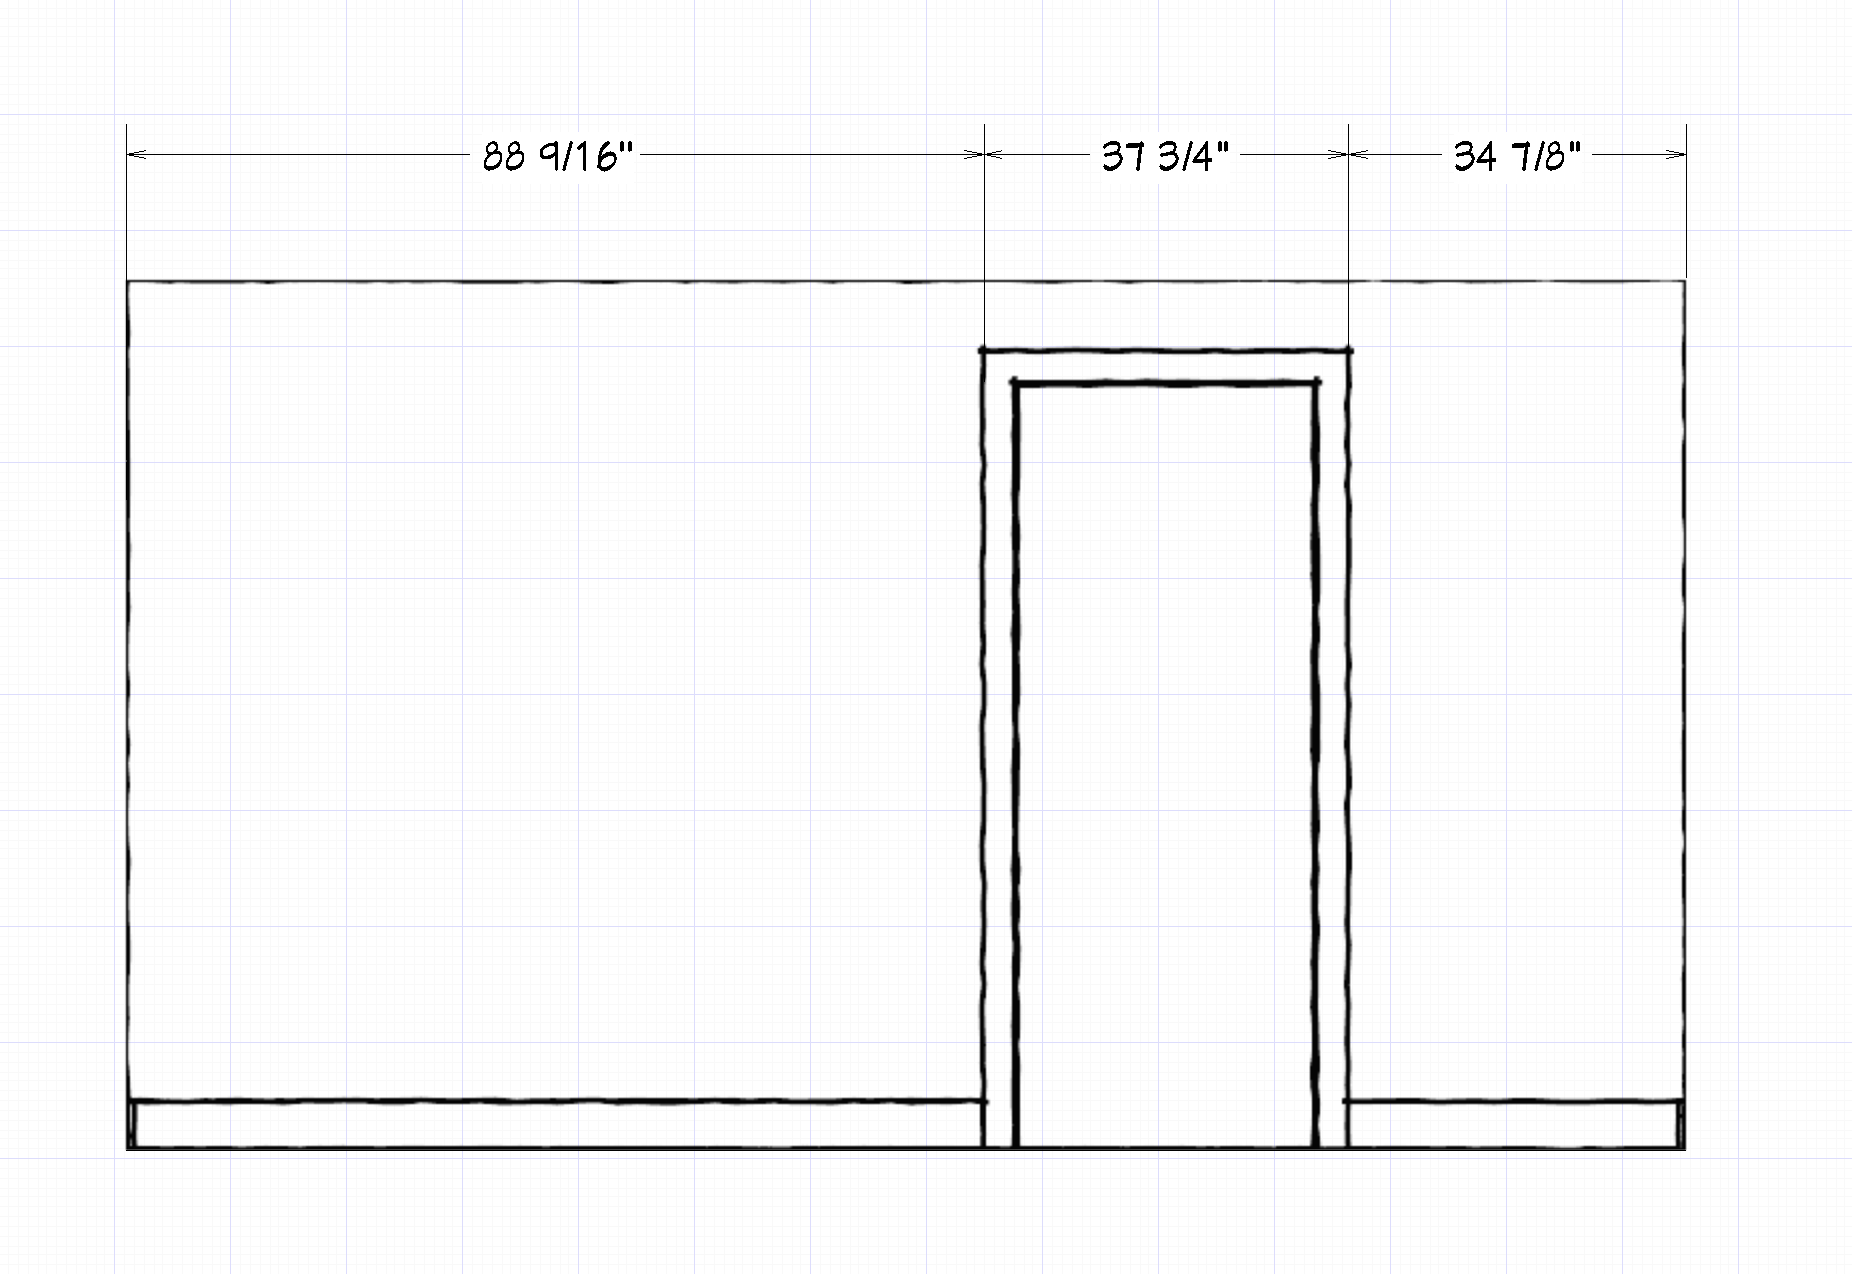
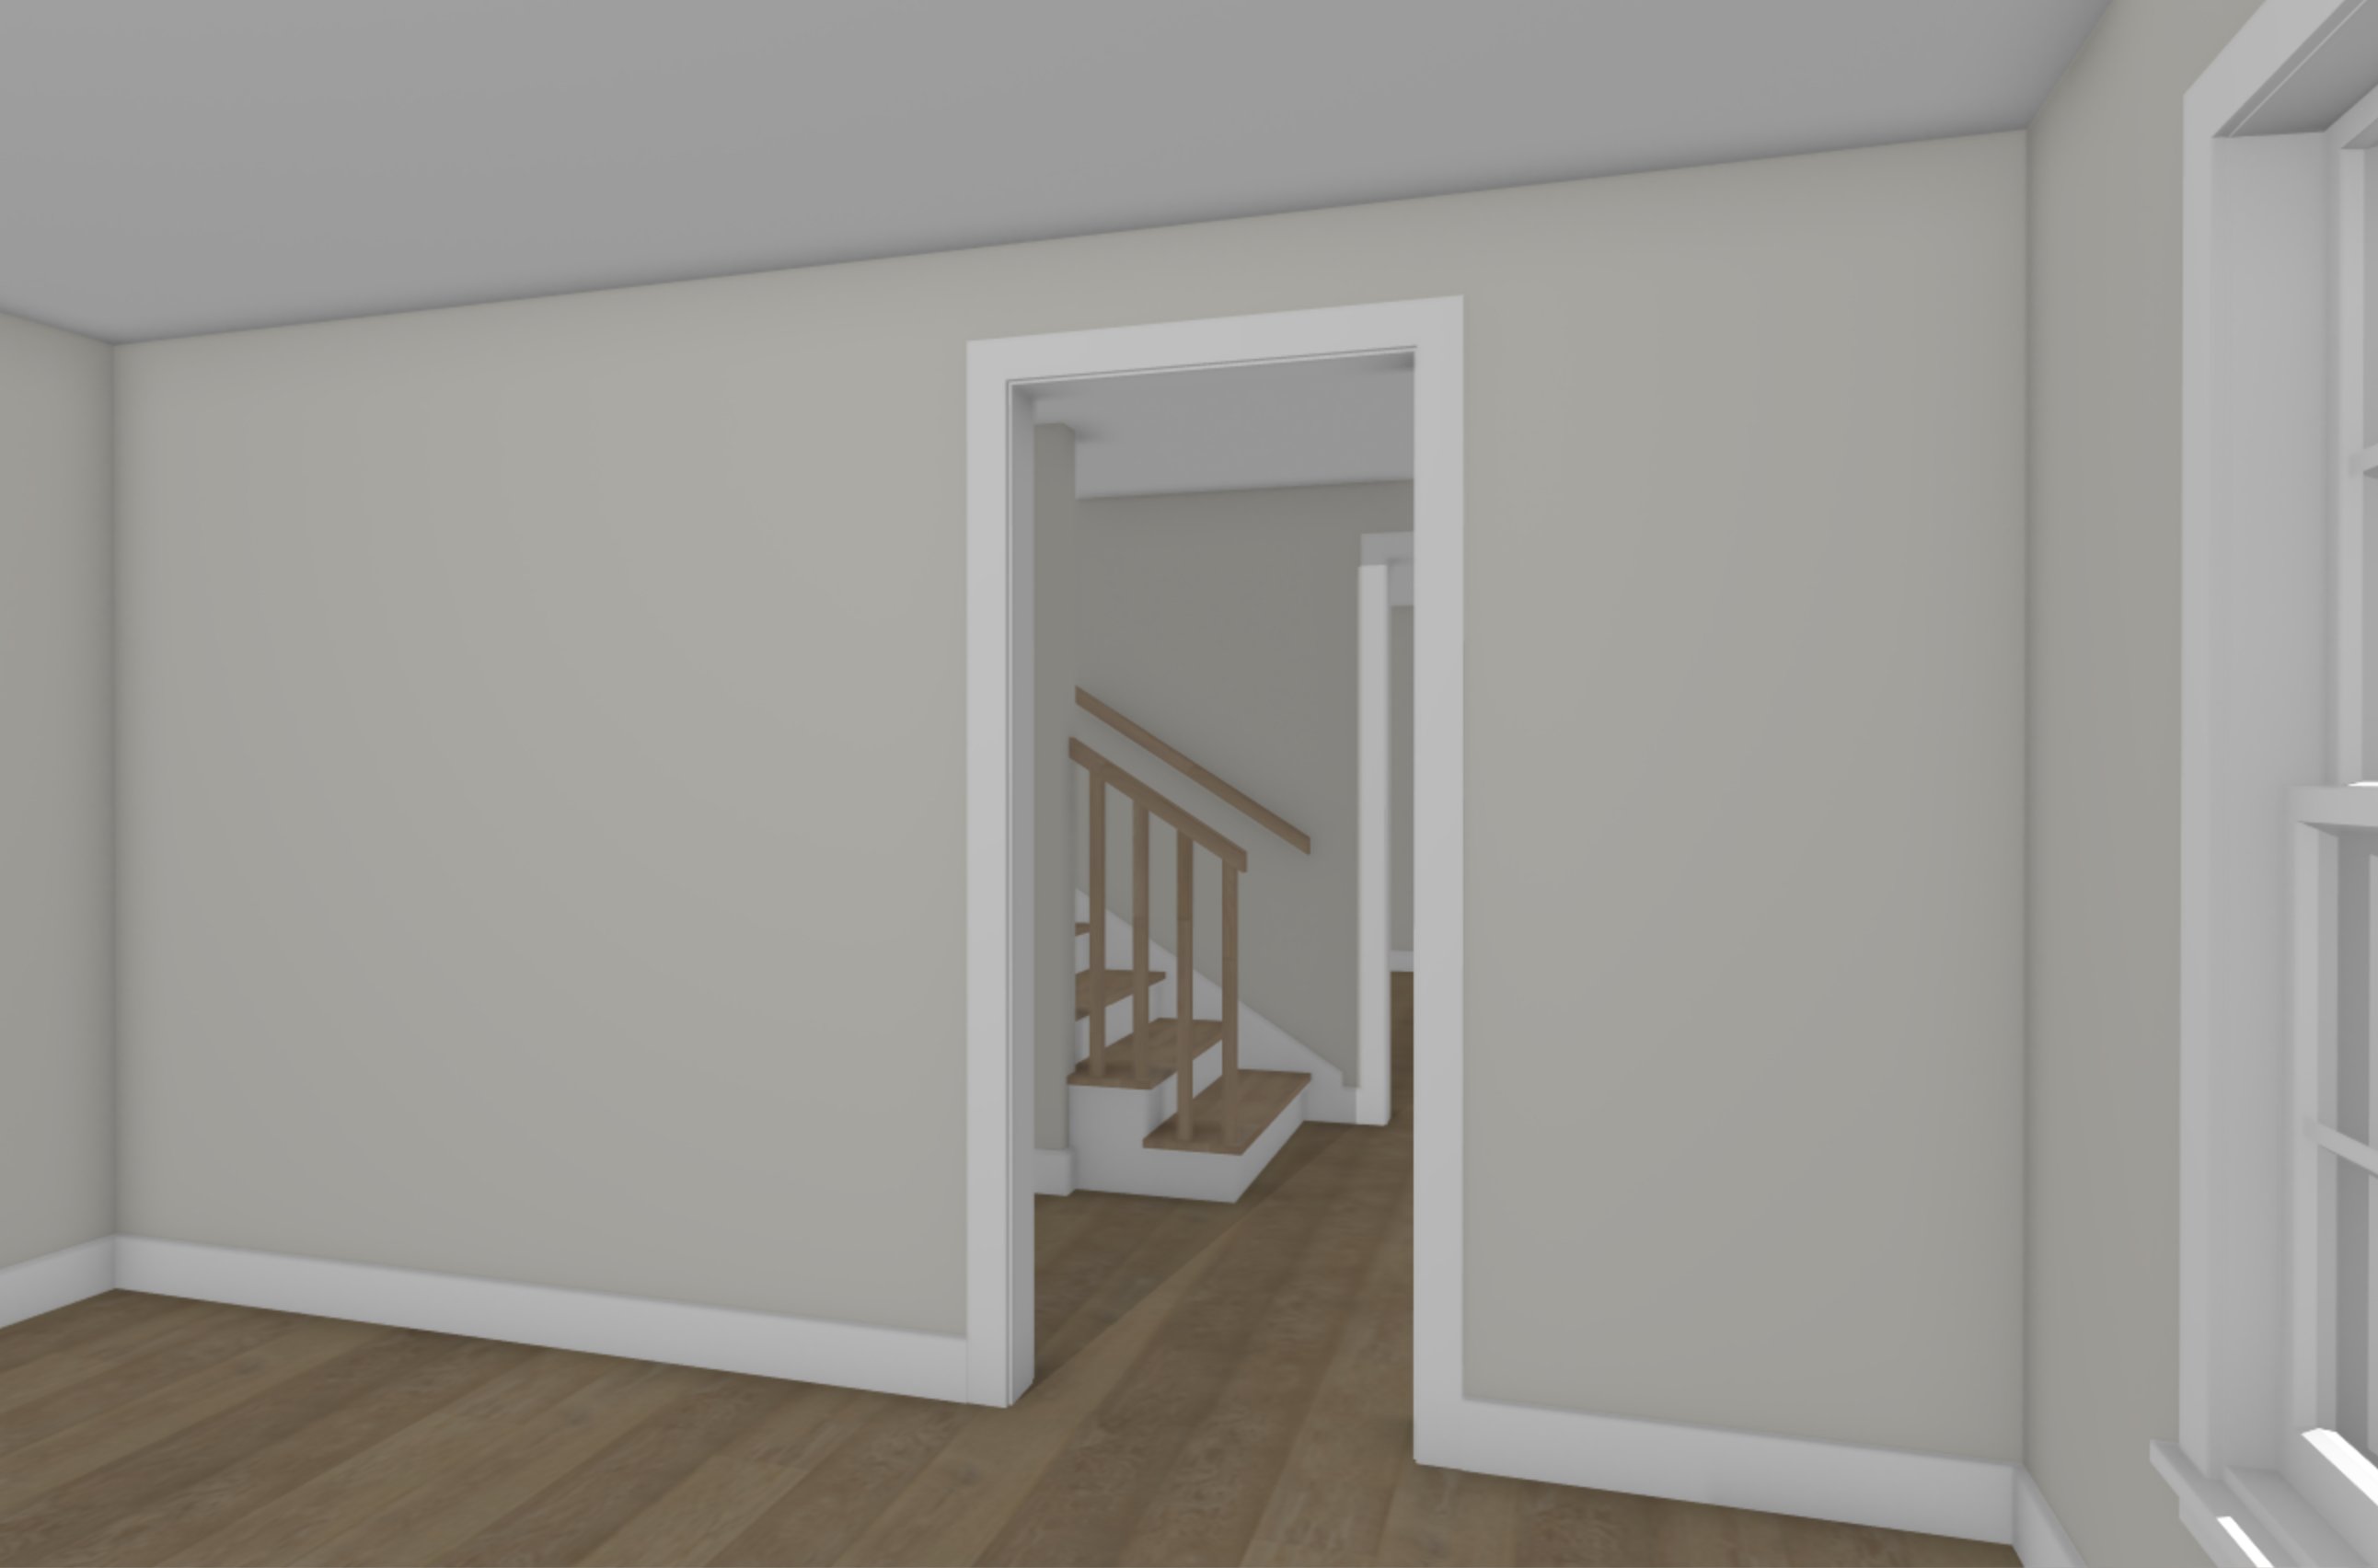
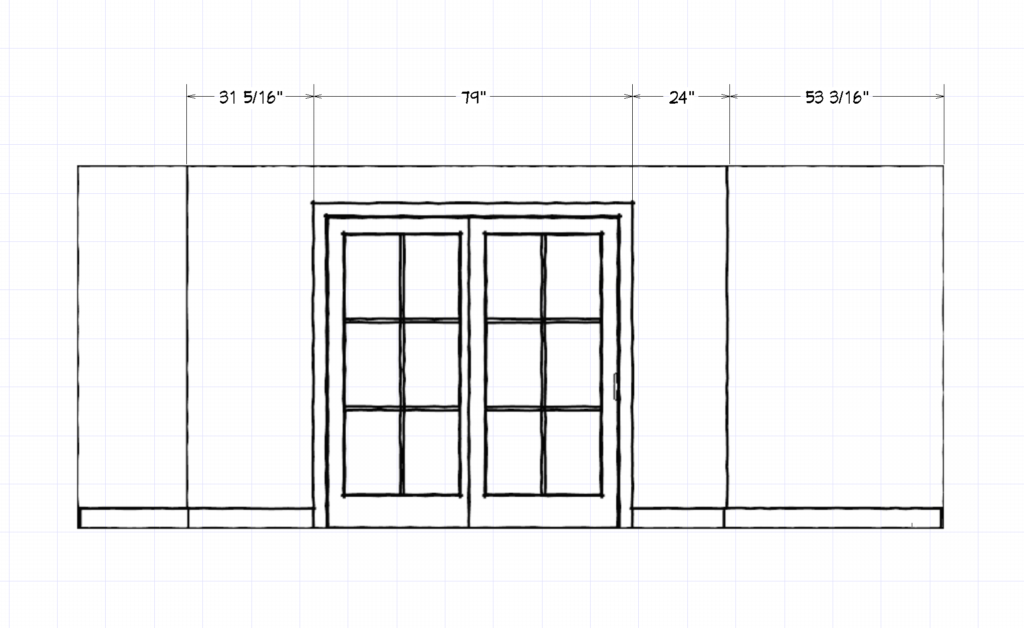
- A cased opening is an opening with trim, but no door or window.
- Hook the measuring tape on the outside of the trim. Extend the tape to the outside of the trim on the opposite end. Study the tape carefully + record the dimension clearly on the sketch.
- This is how I’d measure the living room’s east wall:

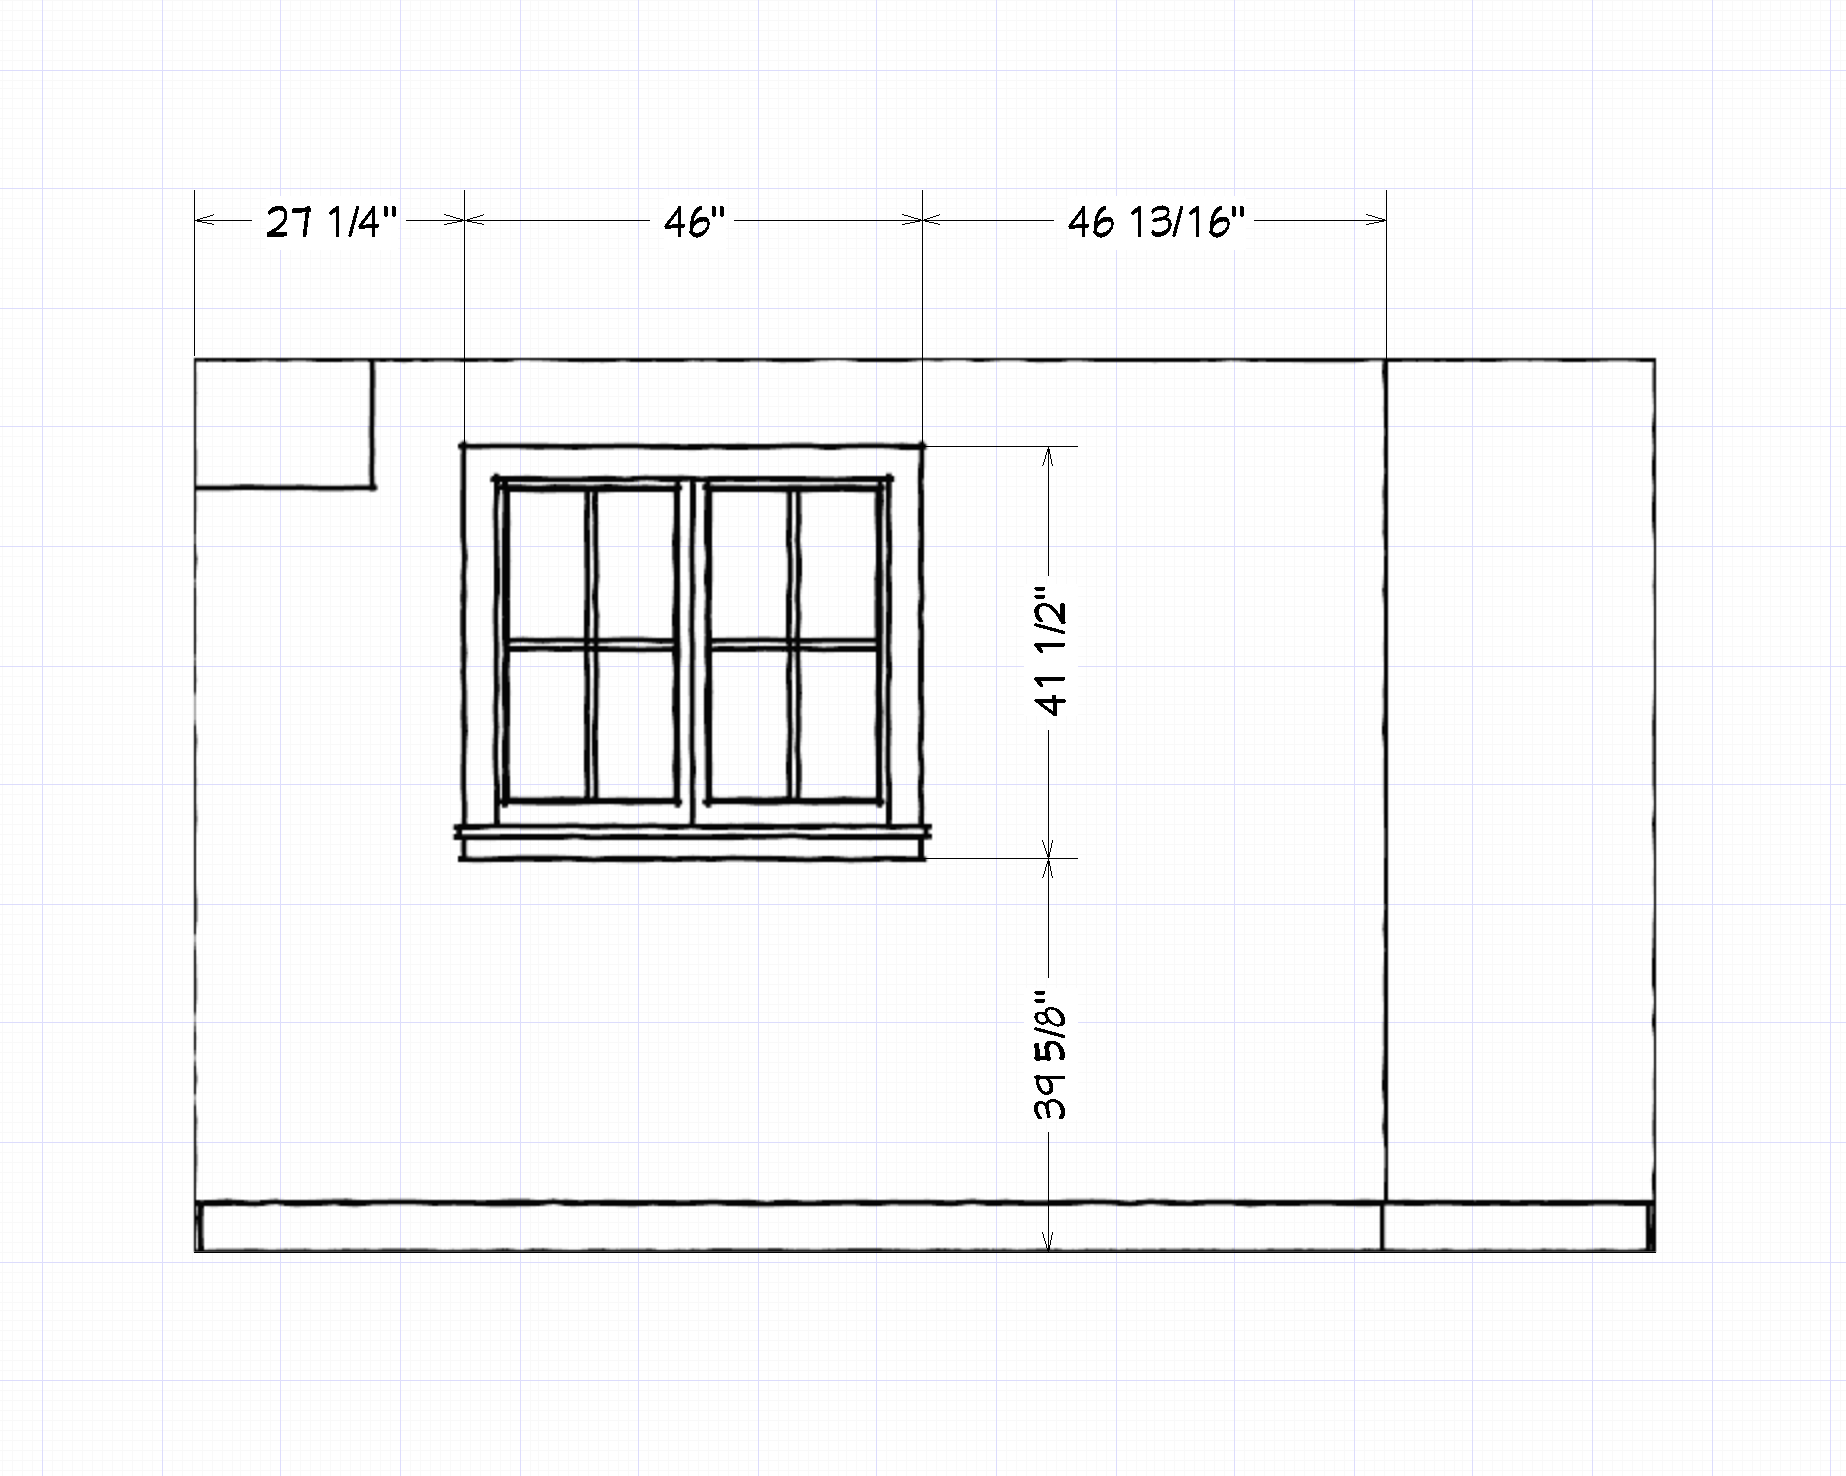
- Windows require three dimensions: width, height + from-floor. It’s important that you include the trim in all of these measurements.
- For the width + height measurements, hook the measuring tape on the outside of the trim. Extend the tape to the outside of the trim on the opposite end. Study the tape carefully + record the dimension clearly on the sketch. Do not include the windowsill overhang in your width measurement.
- For the from-floor measurement, put the hook on the floor + extend the tape to the bottom of the window trim. Study the tape carefully + record the dimension clearly on the sketch.
- If you have a pass-through, or other interior window-like opening, record the same three dimensions. If your window has no trim, treat the opening like a finished opening, but also include the height + from-floor measurement.
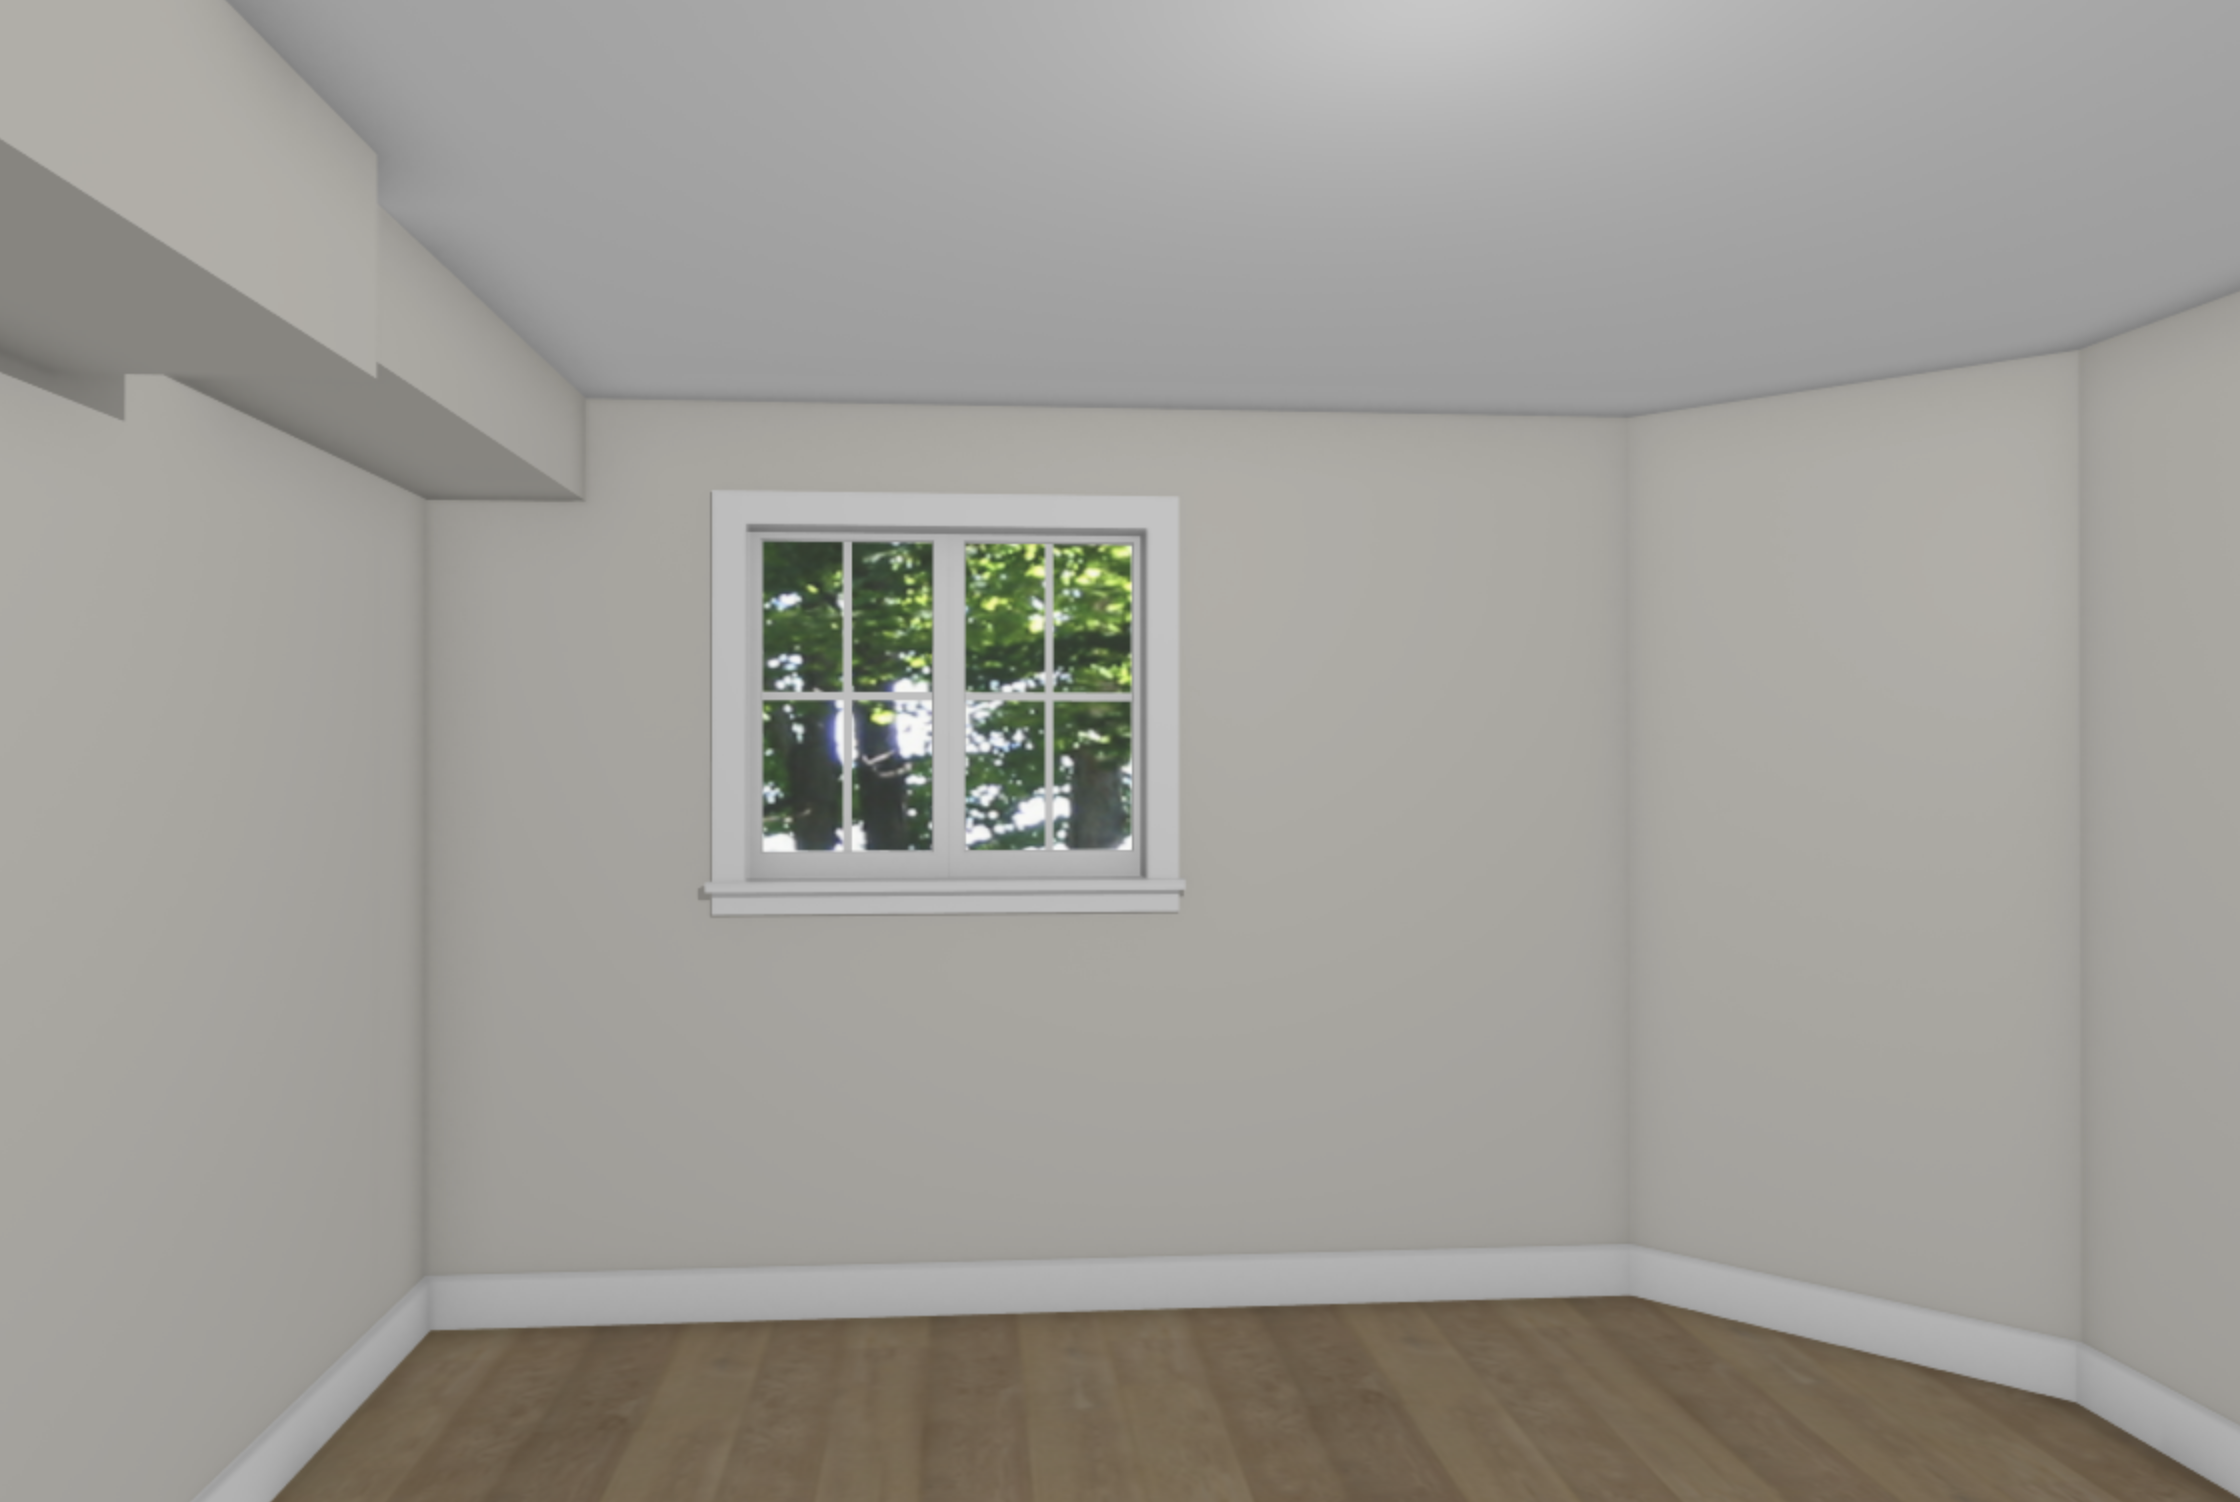
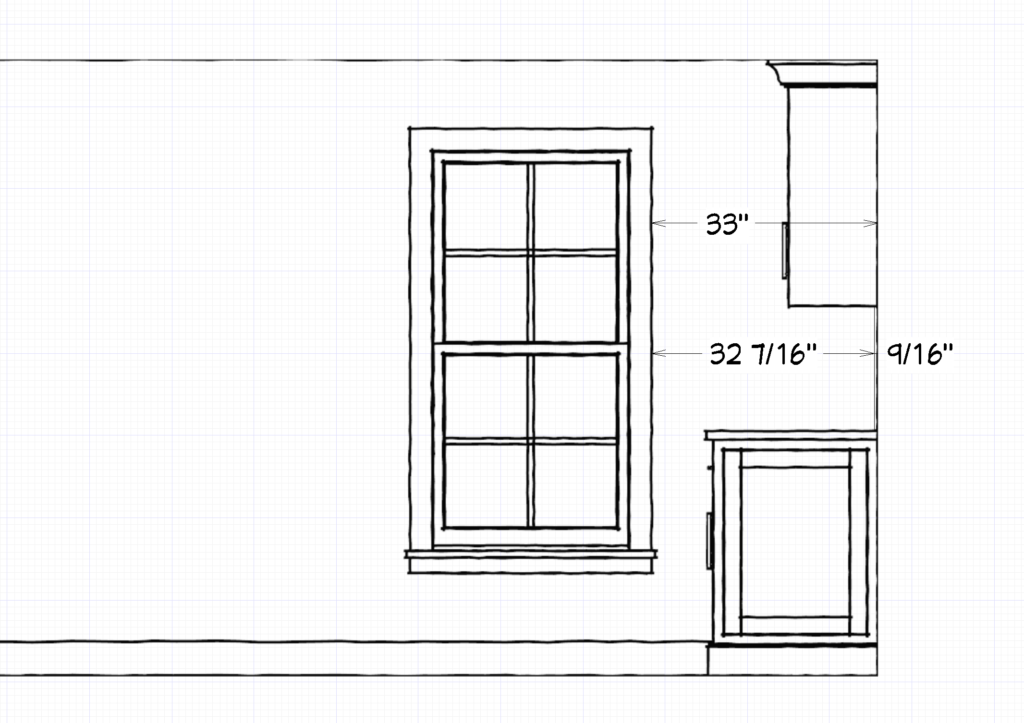
- This is how I would measure the kitchen’s west wall:

- Hold your angle finder in front of you so that the dimensions in the half moon shape are upright. Move the needle to 90 degrees. You’ll see that the hinge at the bottom left corner of your angle finder is now at a right angle.
- Place that hinge into the corner of the wall [where your angled wall meets an adjacent wall]. Keeping that hinge in the corner, move the left + right arms so that they are flush with both walls. The needle will move to show the angle. Record the angle on your sketch. Repeat with the second adjacent wall.
- Measure the surrounding walls as normal.
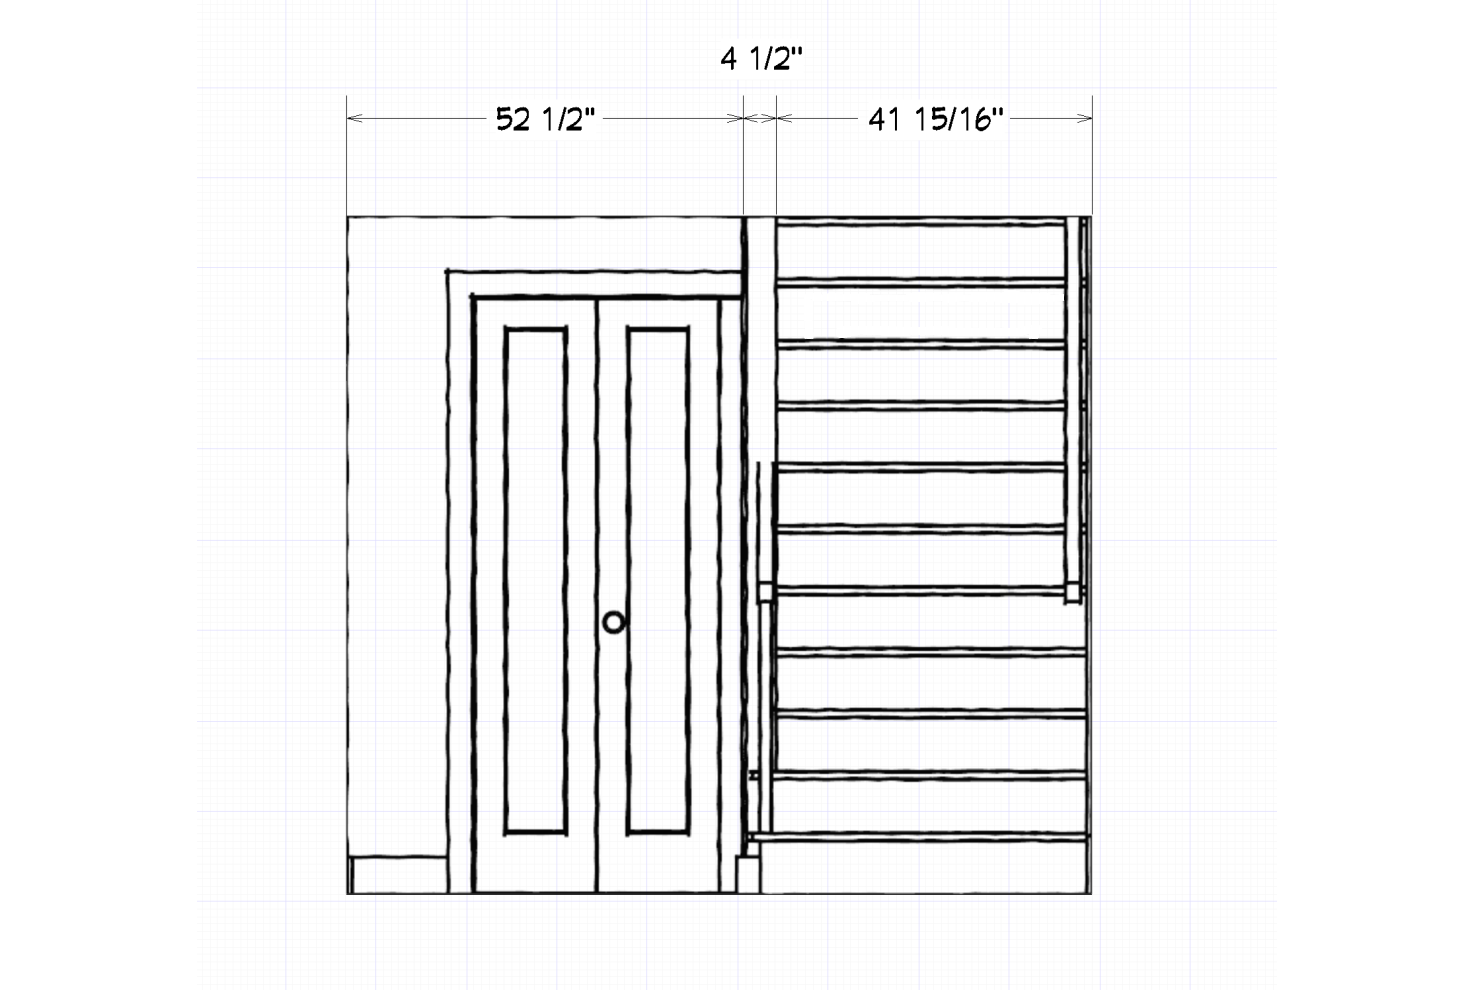
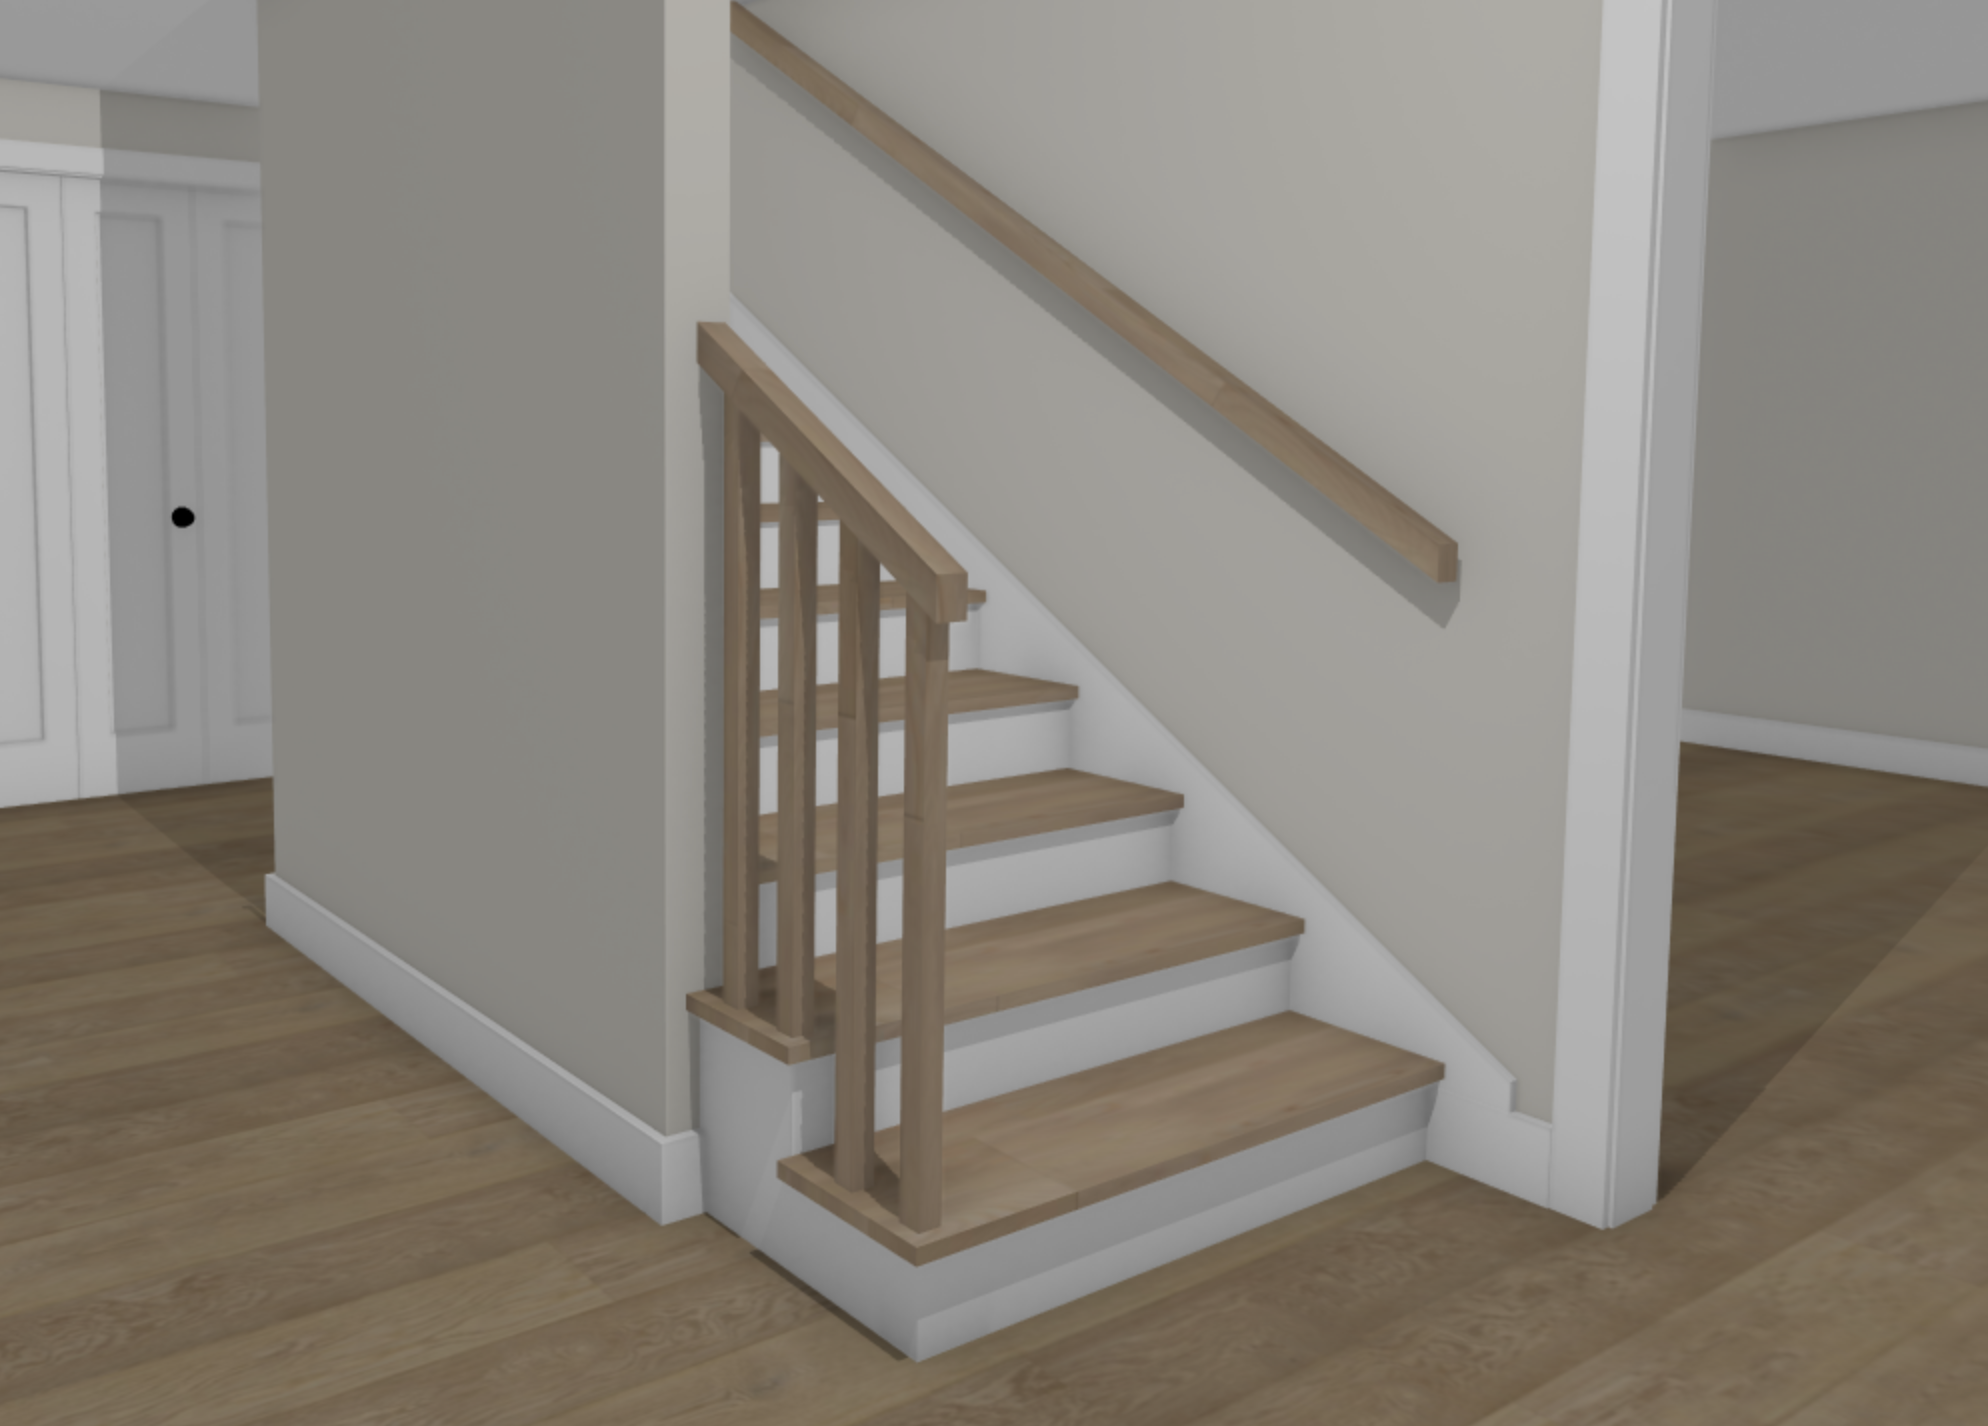
- If the stairs are contained or mostly contained between two walls, measure the width of the opening as you would a finished opening. Don’t forget to measure the thickness of the wall that the railing typically intersects!
- In this example, two stairs protrude past the left wall. Measure from the wall end to where the bottom stair riser meets the floor. Then, measure from this point to the nearest parallel wall [in this case, the foyer’s south wall].
- If the stairs have a wall on one side but no wall on the other, measure the width from the wall to the outermost point where the stairs meet the floor.
- If the stairs have no walls on either side, measure the width of the outermost points on both sides where the stairs meet the floor. Then, measure from this point to the nearest perpendicular wall for location reference.
- This is how I would measure the foyer stairs:

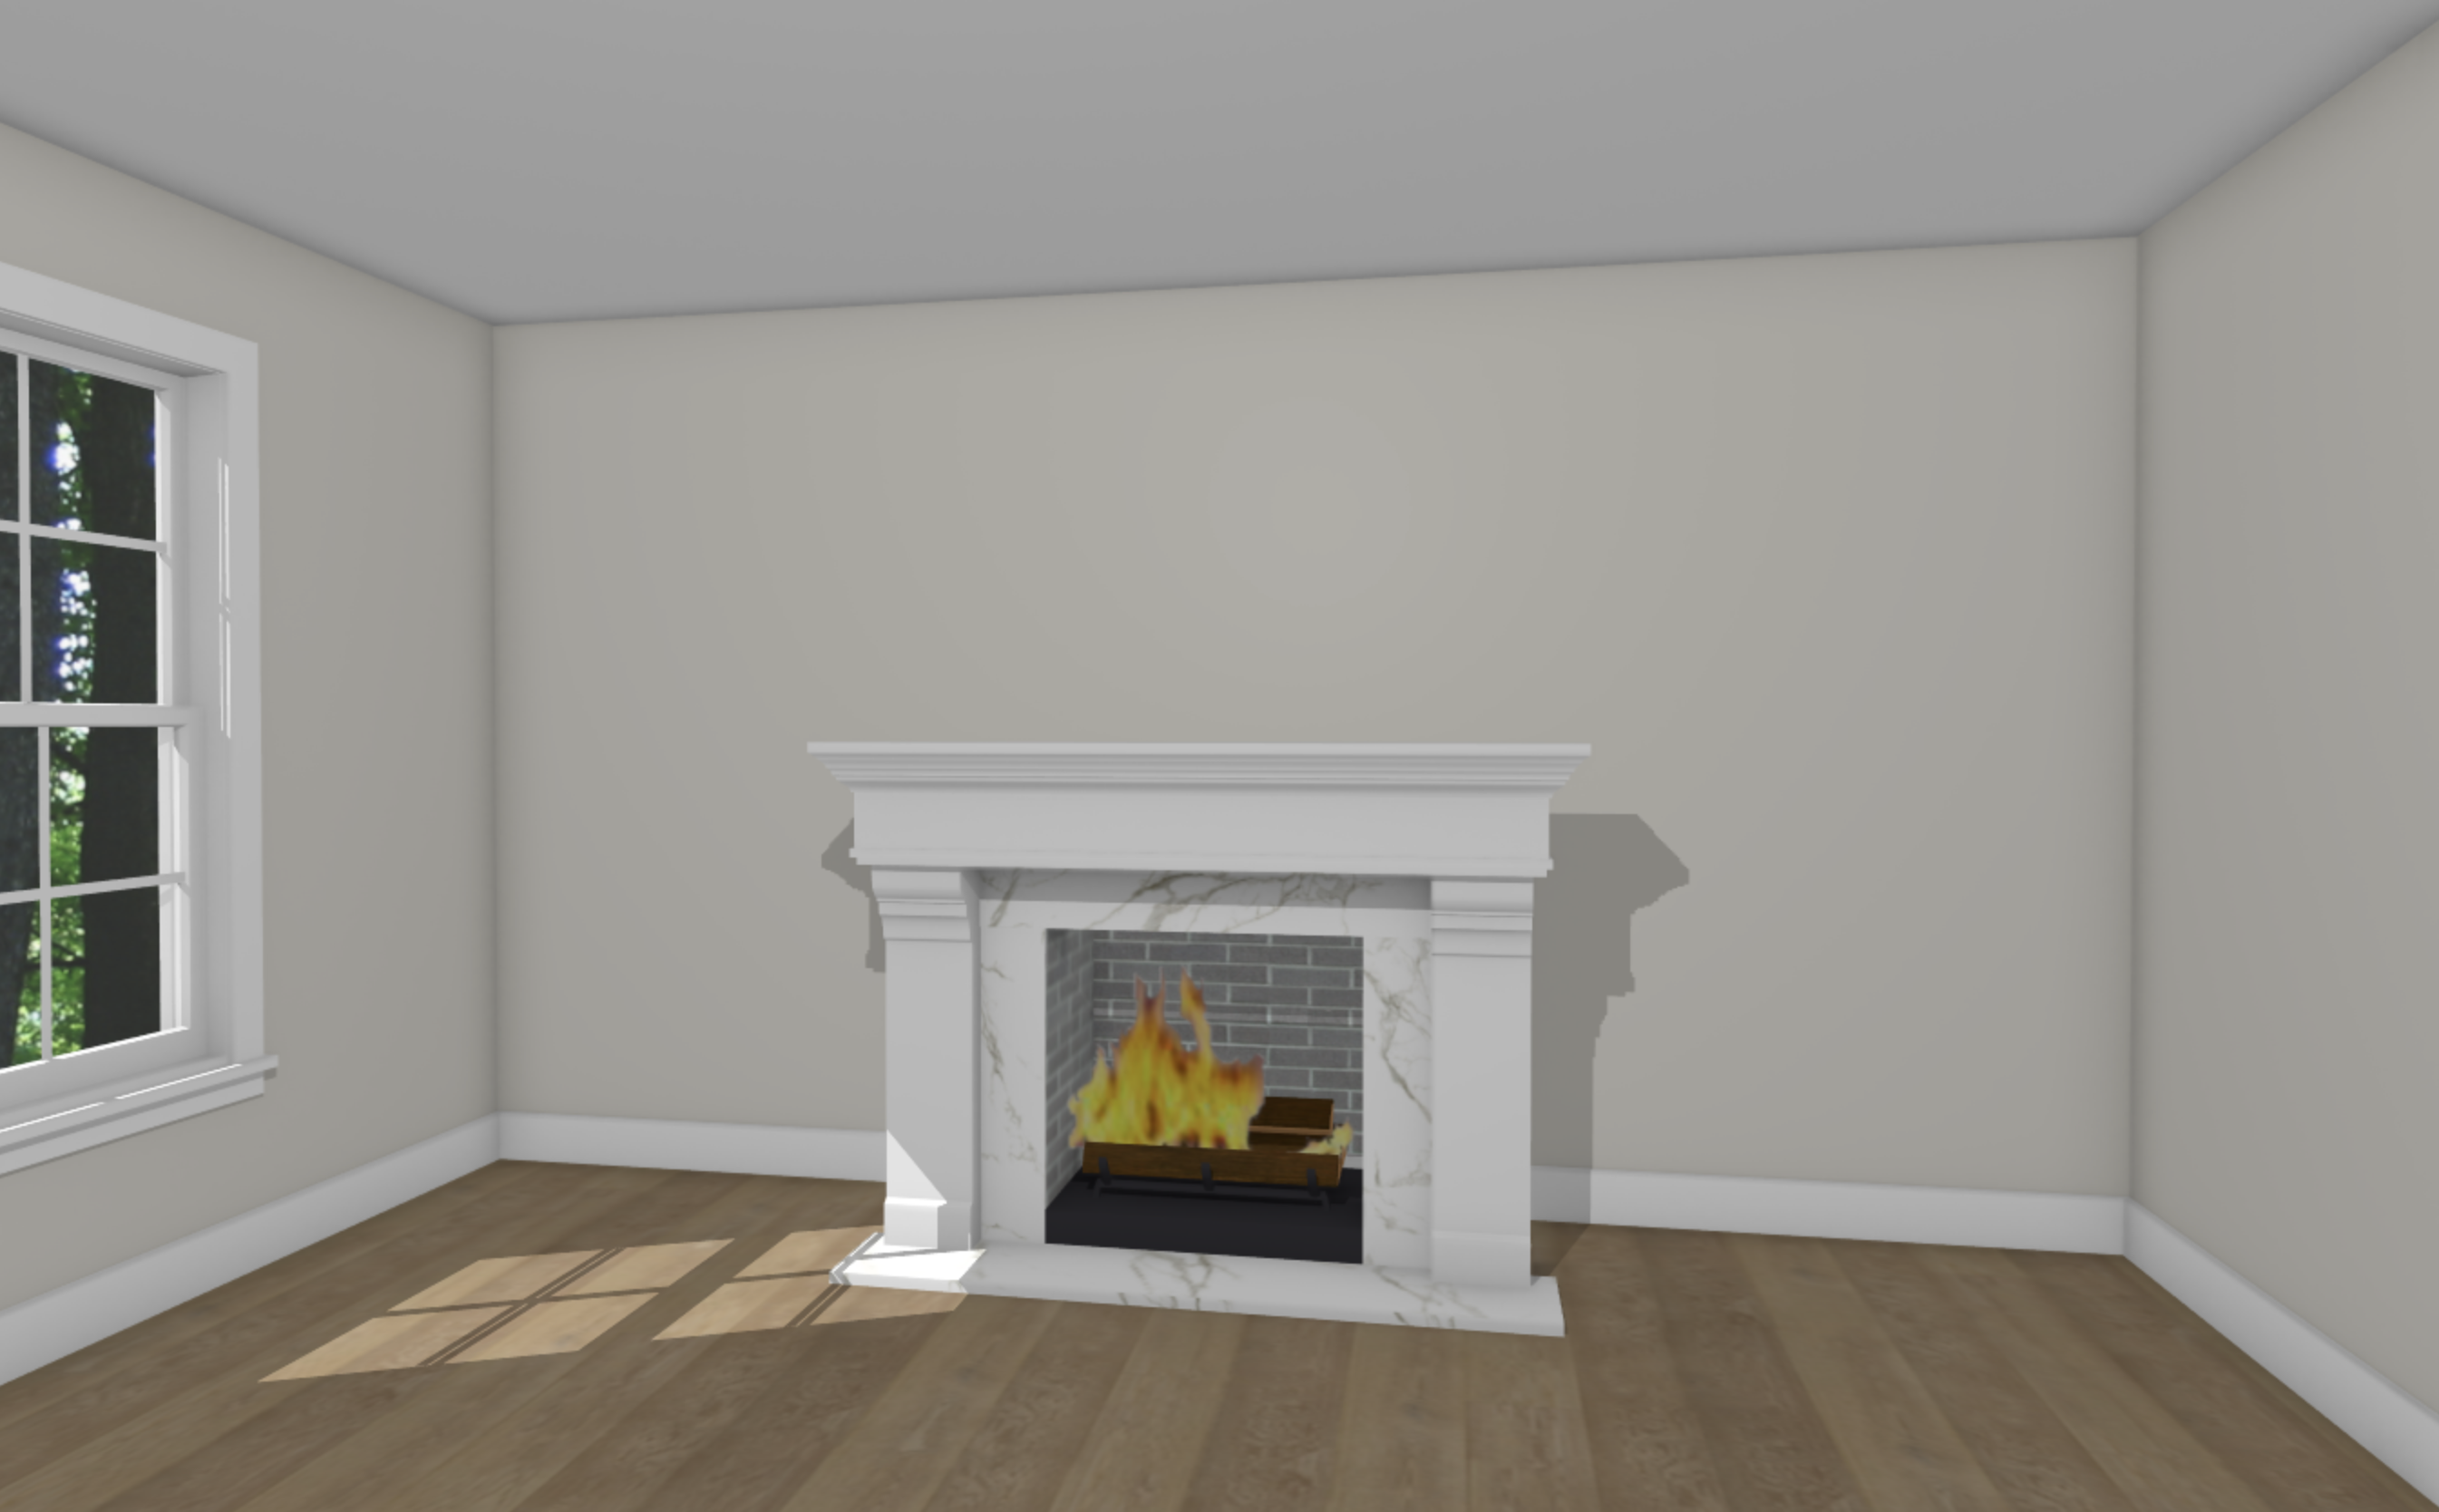
- Measure the fireplace width + height using the outermost points. Measure from the wall to the deepest point of the fireplace [this may be the hearth].

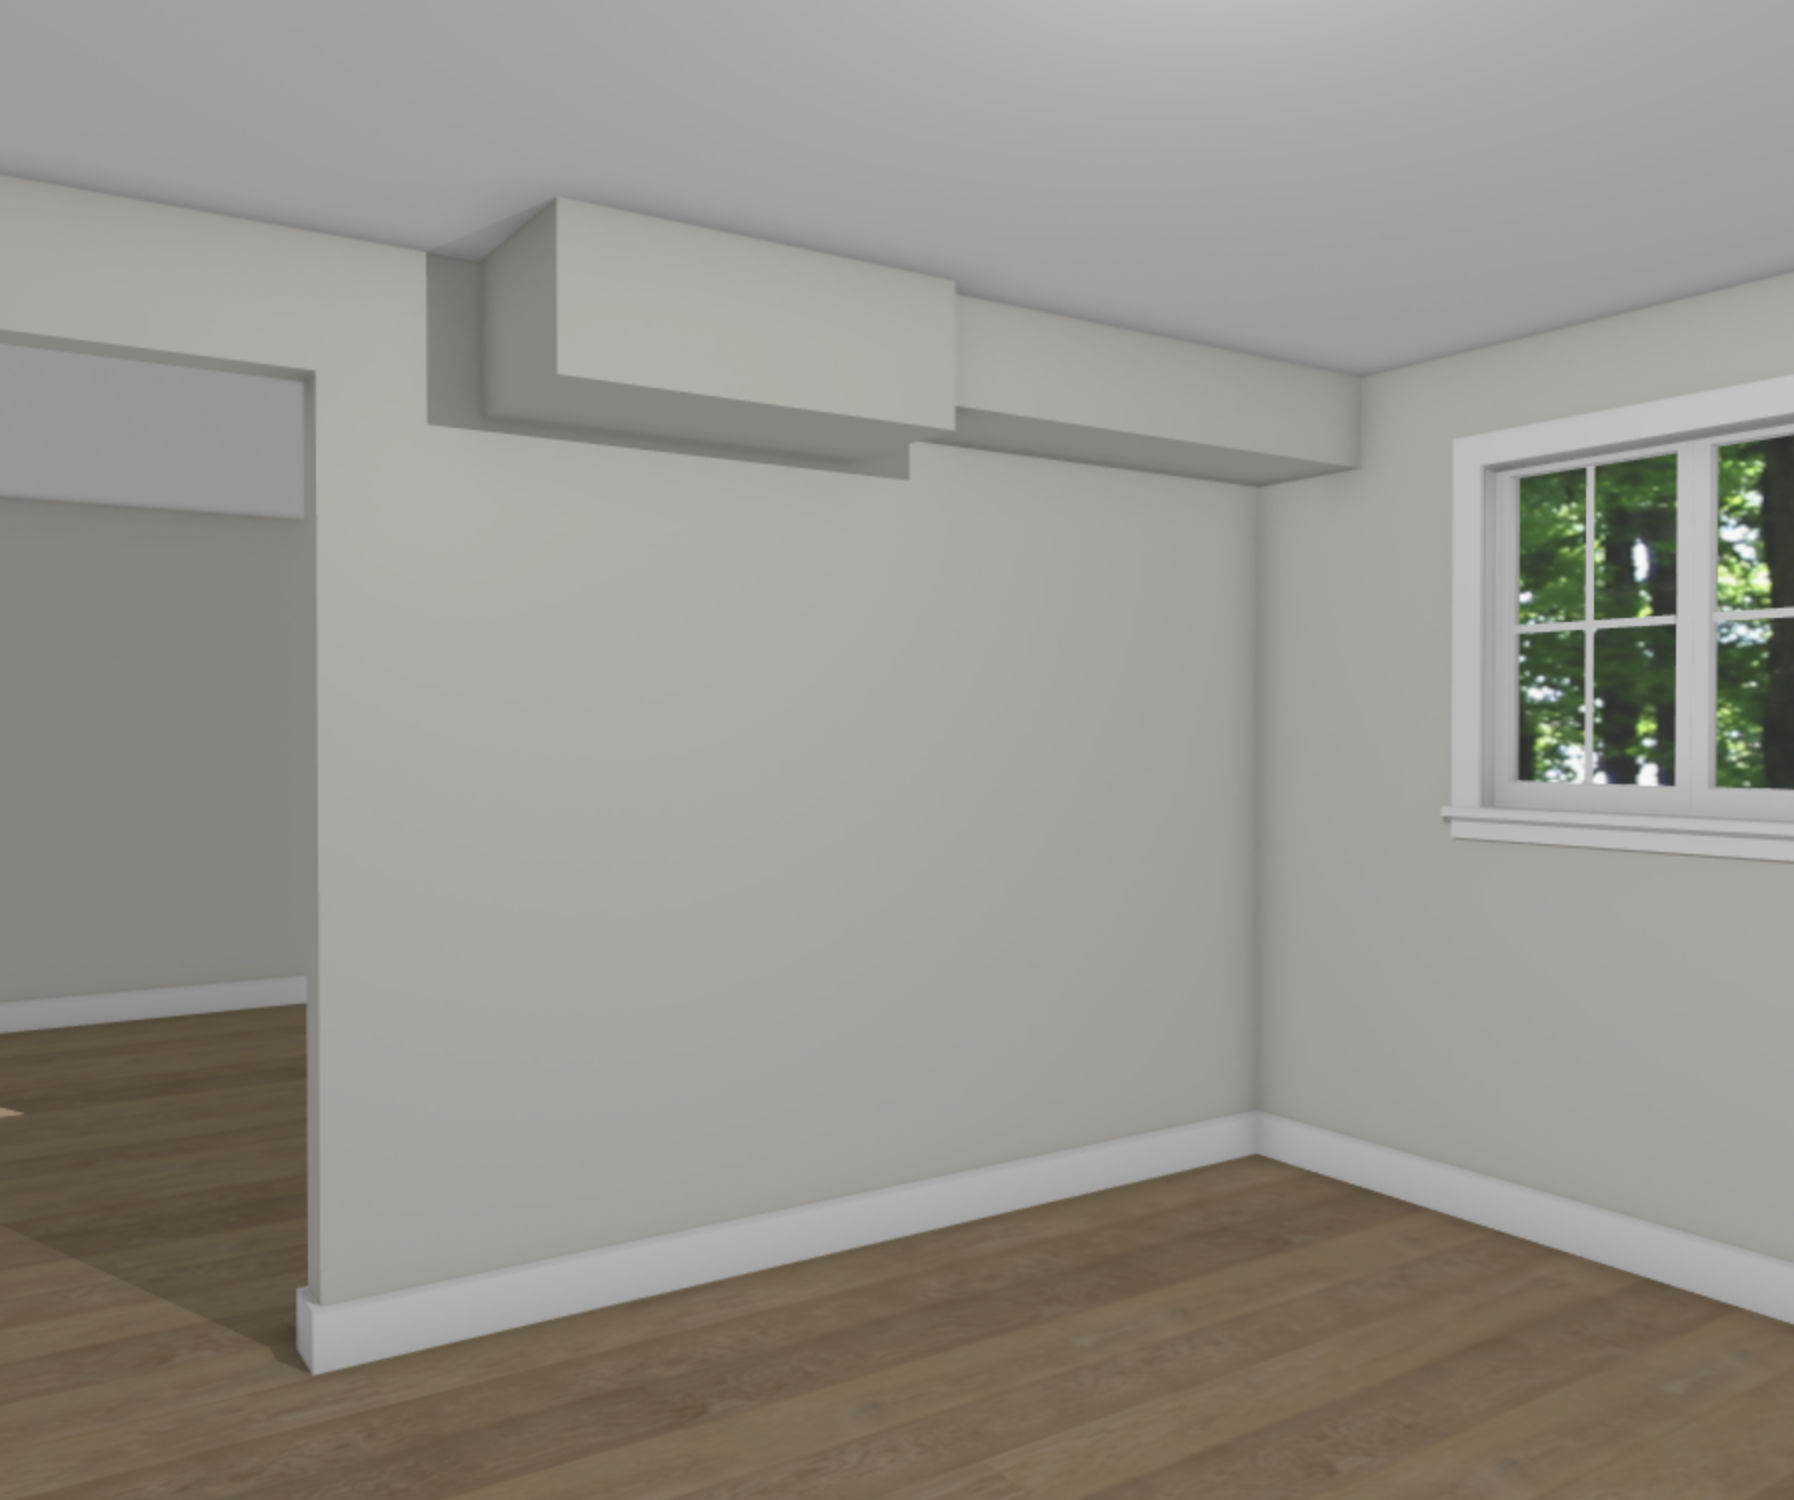
- Measure the soffit height, width + depth. Be sure to accurately record any varying heights + depths.

- Some “wall bumps” are large + obvious, like the backside of a fireplace. The wall bumps I’m talking about here are smaller [typically 1-3″ deep], less noticeable bump-ins or bump-outs on a wall. I’ve seen them hiding behind refrigerators, inside appliance garages + behind closet doors. I encounter these surprisingly often + they can be devastating to a design if not properly measured + planned for.
- If you encounter a wall bump, first determine if the bump is protruding into the room or recessed into the wall. Does the bump continue to the end of the wall or does it stop + the wall continues as normal? Sketch it properly.
- Measure the depth + width of the wall bump section. If the bump is not from floor to ceiling, measure the height + from-floor measurement, if necessary. Record these dimensions clearly on the sketch.

- Accounting for the thickness of wall treatments is very important when measuring. In many ideal cases, you’ll be able to get around or above a wall treatment to measure to the drywall.
- In certain cases, a wall treatment will completely conceal the entire wall that you need to measure to. The most common occurrence: a kitchen wall lined top to bottom with cabinetry + tile backsplash.
- First, measure what you can: to the face of the wall treatment.
- Second, find an exposed profile of the wall treatment elsewhere in the room. Measure the depth of the wall treatment + add it to the first measurement. This will get you the most accurate measurement to the drywall. Record the total on your sketch.
- If the top, side or bottom profile of the wall treatment is not visible in any part of the room, record the first measurement you took, then write a note next to it saying “plus [describe wall treatment] thickness”.
- Measure at eye-level as often as possible. If you measure along the floor, you’ll need to account for the thickness of baseboard molding.

- If you have a question that was not answered or a scenario that was not outlined in this guide, please email me! My most updated contact information can be found here.
